
I’m not going to rehash my constant struggle of healthy eating and weight loss with you. I’m certain we’ve discussed that topic before. But one thing I will mention, and surely I’m not the only one in a constant diet cycle who feels this way, is how much I loathe store bought protein bars. Somehow though, they’re always a staple on my grocery list and they can always be found in my desk drawer at work. But just as certain as this, is the fact that you will almost always find the opened wrapper still gripping to half of that partially eaten protein bar. In the trash bin. You see, I have a very hard time choking the whole dry and mealy thing down.

I know what you’re thinking, and yes, you’re right. There are several decent choices out there, but even so, I never look forward to eating one. And I won’t even dive into the topic of how grossly over priced these things are. Instead, I offer a solution: Homemade. Protein. Bars. Yes. They’re made from all natural ingredients, most of which can be scoured from your pantry, and they look and taste like granola bars. Oh, and again, the cost thing. Let’s just say that you can bake up a whole batch of these bad boys for a fraction of the price that it would cost you to buy a box of preservative filled, store-bought protein bars. Have I caught your attention yet?

I have been meaning to get around to making Homemade Protein Bars for quite some time now. But I am very good at procrastinating. However, the perfect opportunity finally presented itself and I was unable to resist. Last month, a group of 12 of us hiked Havasupai, a weekend trip that involved a 10-mile trek down a canyon where each of us had to carry (on our backs) what we needed for the upcoming days. This included clothing, shelter, water and of course food. With a weekend full of grueling activity, delicious, satisfying and protein packed snacks seemed like an answer to our prayers.

Havasupai, for those of you not in the know (most likely meaning not native to Arizona), is an enchanting part of the Grand Canyon where the Supai tribe still dwells and it is actually the only place in the US where mail is still delivered on horseback! It’s in the middle of the desert, yet it is full of lush greenery and greenish blue waters that flow through the canyon and pour over cliffs into truly majestic waterfalls. Mooney Falls, one of the many there, is actually 200 feet tall!

With so much beauty to see, jam packed into one short weekend with well over 20 miles of rocky terrain covered in heavy hiking boots, our tiresome bodies were in desperate need of energy sources. Like I mentioned before, we were each responsible for packing in our own supplies. When you’re hiking down a 10 mile canyon, the lighter the weight the better- a concept that I didn’t fully understand until I “turtled” only a mere mile into our journey. What’s turtling, you say? Well, my pack was close to 40 pounds, that weighed heavy on my shockingly weak shoulders, and with one swift trip of the foot, I was flung onto my back, unable to pull myself upright. It was embarrassing, yes, but it also made for a hilarious moment.

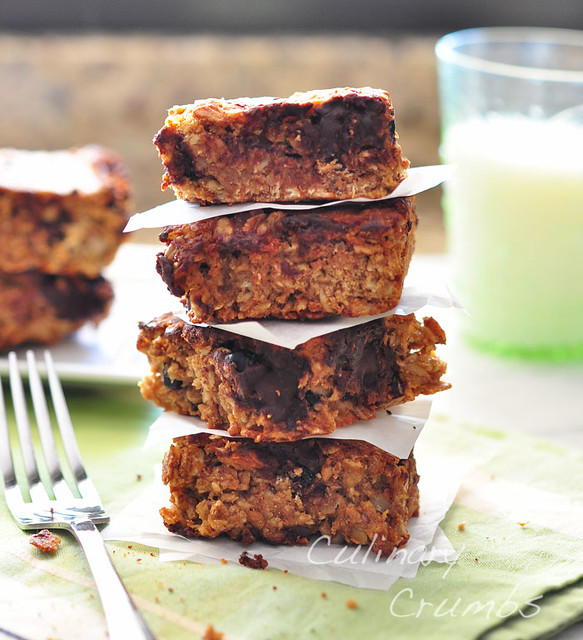
As you can see, eliminating as much weight as possible is necessary to retain a small sense of comfort on the hike down. This is where dehydrated foods come in handy. While many of them don’t taste half as bad as we expected them to, it was nice to have a home baked snack at arm’s reach. They were wholesome and sweet and provided much needed replenishment. I became increasingly thankful for the Homemade Protein Bars, and I’m sure my fellow hikers did too. Well, maybe… I didn’t share too many of them. They're that good.
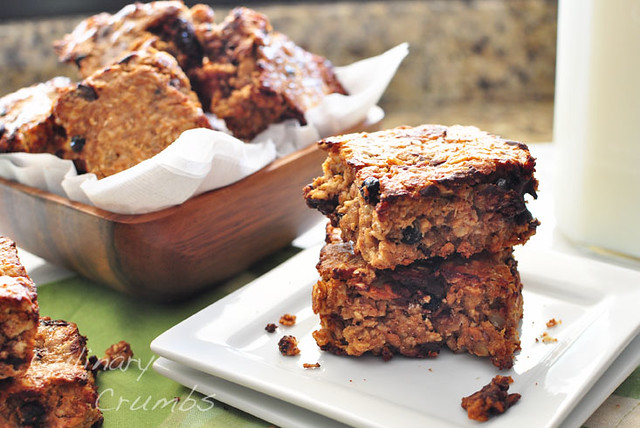
Homemade Protein Bars
Recipe Adapted From Healthy Green Kitchen
Ingredients:
3 cups regular old fashioned oats (no need to get fancy, Quaker works just fine, just don't use instant)
1/2 cup seeds (I used a mixture of sesame, flax and sunflower)
1/2 cup unsweetened shredded coconut (I buy this from Wholefoods)
1 1/2 tsp cinnamon
1 tsp sea salt
1/4 cup light brown sugar
1 cup vanilla protein powder
1 cup plain non-fat Greek yogurt
1/4 cup + 2 tbsp honey
1 cup nut butter (I used a mixture of almond and crunchy peanut butter)
1 tsp vanilla extract
1/4 cup coconut oil, liquified if solid (not an issue here in AZ)
2/3 cup dark chocolate chips (Ghirardelli, please)
3/4 cup chopped nuts (I used 1/4 cup each of pecans, walnuts and almonds)
1/2 cup dried fruit (I used a mixture of raisins, dried cherries and dried blueberries)
Directions:
1. Heat the oven to 350º F and grease a 9x13 inch baking dish with some coconut oil (or just spray with Pam- let's be honest, this is just way easier).
2. In a large bowl, combine the dry ingredients (oats through protein powder) and mix until combined.
3. In a separate smaller bowl, combine the wet ingredients (Greek yogurt through coconut oil) and mix until completely combined.
4. Pour the wet ingredient mixture into the dry ingredients. Using a large spatula or wooden spoon, mix the two together until thoroughly combined. Add the chocolate chips, chopped nuts and dried fruit and continue to mix together. Use your hands if you need to. Don't be shy.
5. Transfer the mixture to the baking dish and use the back of the spatula or spoon to spread evenly and smooth the top. Bake for 25 minutes and then let cool on a wire baking rack for about 15 minutes or until cool enough to handle.
6. Cut into squares. You can choose how big or how small you want these to be. Place the squares on a foil covered baking sheet and bake for 10-15 minutes longer. Remove and let cool completely. Eat and enjoy!
* These should be kept in the fridge in an air tight container, but they keep really well in the freezer too!
Makes 12-18 protein bars
These pictures are amazing! So beautiful. You got some great shots!
ReplyDeleteAnd the protein bars look great. You are right, the typical protein bar tastes like cardboard. I am definitely going to make some of these!
Glad you enjoyed the pictures! Hope you get a chance to try the protein bars. They're worth it!
DeleteWhat could you use instead of yogurt for those who can't eat dairy?
ReplyDeleteI think you could eliminate the yogurt without effecting the taste or texture too much, but perhaps try substituting silken tofu for the Greek yogurt. You would get the same boost in protein and it wouldn't change the overall taste. Let me know if you give this a try and how they turn out! Thanks for stopping by!
Delete