December 24, 2010

Pumpkin Whoopie Pies


i wanna lick that frosting

I realize that pumpkin is technically more suited for the likes of November's seasonal eating.  You're probably thinking that perhaps I should have made an egg nog inspired whoopie pie or even basic chocolate ones flecked with peppermint candy canes. But ya know what?  I had already made these. Over a month ago. And I had already photographed these.  So I thought, the hell with it.  I'm posting them anyway.

Come to think of it, why do we, on average, only eat pumpkin one month out of the year?  It's sold year round in supermarkets, the canned version anyway.  It's delicious. It's healthy.  So why not?  Maybe I'll just have to make it my mission to change this.

three little whoopies all in a row...

Pumpkin or no pumpkin, however, whoopie pies are becoming increasingly popular.  Some even claim it's on its way to replacing the cupcake as the next "It" dessert.  There are others out there, however, who believe it's the French macaroon that is on its way to the top.  I prefer macaroons to whoopie pies, but macaroons take a skilled hand. (You might recall this from last December- a humiliating display of macaroon technique. I plan to give this another go within the upcoming weeks). The beauty of the whoopie pie although, is that there is basically an endless array of flavor combinations.  If it can work as a cupcake (or cake), it can work as a whoopie pie.  After all, whoopie pies began their existence as a way to use up leftover cake batter, which is merely plopped by the spoonful onto a baking sheet, the same way cookie dough is.

Now, the whoopie pie purist might be some what put off by my use of a cream cheese frosting in this recipe. Original whoopie pies were made with a marshmallow fluff filling, but that's not very fun.  Or creative.  Or very forgiving to flavor additions. So I'll make my whoopie pies any way I see fit.  And you can too.

Whoopie! I love pies!


Pumpkin Whoopie Pies with Maple Cream Cheese Frosting

Pumpkin Spice Cake
recipe heavily adapted from Bon Appètit 

Ingredients:
3 cups all purpose flour
2 teaspoons baking soda
2 teaspoons baking powder
1 teaspoon cinnamon
1/2 teaspoon ground ginger
1/4 teaspoon ground cloves
1/4 teaspoon freshly grated nutmeg
1/4 teaspoon ground allspice
1 15-ounce can pure pumpkin
1 1/2 cups sugar
1 1/4 cups vegetable oil
4 large eggs
1 teaspoons finely grated orange peel

Directions:
1. Preheat oven to 350°F. Lightly spray a whoopie pie pan with nonstick cooking spray. (If not using a whoopie pie pan, use a large baking sheet lined with parchment paper). Whisk first 8 ingredients in large bowl. Using electric mixer, beat pumpkin, sugar, and oil in another large bowl. Add eggs 1 at a time, beating to incorporate between additions. Mix in orange peel. Add flour mixture; beat on low speed until just combined. Spoon 2 tablespoons of batter into each cavity of pan; spread batter to the edges. Cavity should be about 2/3 full. (If not using pan, drop 2 tablespoons of batter on to prepared baking sheet and flatten slightly with the back of a spoon).

2. Bake for 8-10 minutes or until the top of the cake springs back when touched. Cool in pan 8 minutes. Remove cakes from pan and allow to cool completely on a wire rack before filling. Repeat process with remaining batter. 

3. To assemble pies, spread frosting (or pipe with a piping bag filled with frosting) on the flat side of half the cakes.  Top each frosted cake with another cake.  Voila! 

*I poured sprinkles around the edges of the frosting for added decoration.  Chopped pecans would be yummy too!
makes 20-24 whoopie pies

Maple Cream Cheese Frosting

Ingredients:
16 oz cream cheese, softened
1 cup butter softened
6 cups confectioner's sugar
6 tablespoons pure maple syrup
1/2 tsp maple extract (optional)

Directions:
1. Beat the cream cheese and butter together in a large bowl until blended and creamy.  Gradually add the confectioners sugar and beat until combined.  Add the maple syrup and extract if using and beat until smooth.  Store in refrigerator for up to one week. 

makes 3 cups

November 24, 2010

Hawaiian Adventures Part 1: Maui


Ho'okipa Beach... surfers' hang out

I had previously promised to share my stories and experiences from Hawaii, and now that I've been back at home in Texas for nearly 6 weeks, I think I'm ready to do just that. Any sooner would have been too painful for me. You see, my brief time (just under three weeks) spent in Hawaii opened up a new realm of self to me. I got to ooh and ahh over breathtaking scenery and experience deep gratitude and appreciation for this earth and everything God has put in it unlike I ever have before. I got to revel in my surroundings and listen to my inner thoughts. All the while sipping a mai tai of course. It was exactly the vacation that I needed- plenty of solitude and relaxation mixed with gluttony and adventure.

Kaanapali Beach- great place for people watching

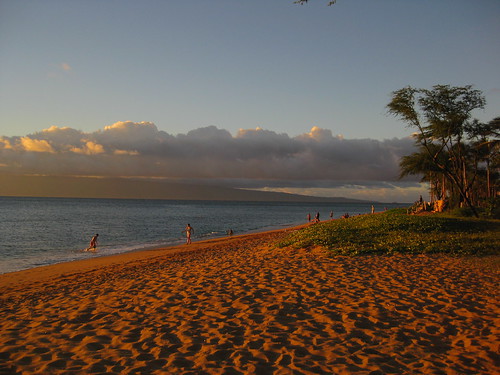
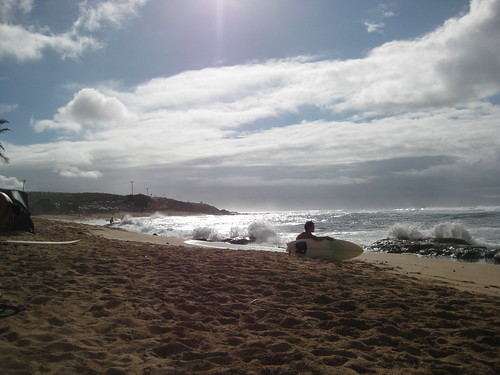
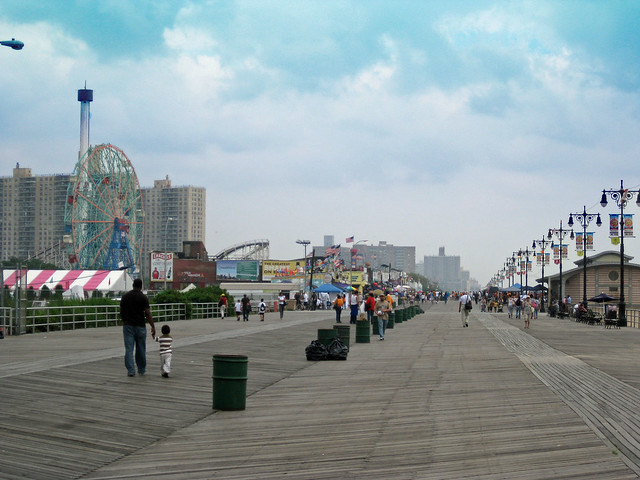
My Hawaiian vacation consisted of two legs: a week spent in Maui and a week (which "accidentally" turned into 11 days- we'll get to that later) on the Big Island. I'm lucky enough to have a grandmother who lives in Wailuku, Maui, but unlucky enough to have only been to visit her once when I was 16. I decided that I was indeed due for a visit. She graciously showed me around her beautiful island and introduced me to my favorite town in Maui- Paia, which is a charming surfer's village with this hippie-esque vibe that I found completely groovy. I spent a few days wandering around Kihei, Lahaina and Kaanapali Beach lounging, sunbathing, reading, eating, people watching. I like the down time every now and then where I can just sit and absorb what's going on around me. However, I like the thrill of adventure just as much. And I feel like my time is better spent sharing the details of that part of my trip as compared to talking about how many times I flipped from my stomach to my back trying to maintain an even tan.

the beginning of the Haleakala sunrise

With so many mountains, beaches and exotic terrain to cover, I decided to book two day tours to help me efficiently navigate my way around the island. First up, and perhaps the more exhilarating, was the sunrise tour to the top of Haleakala.

so many glorious colors!

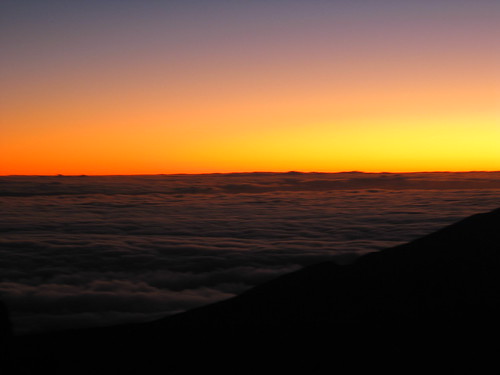
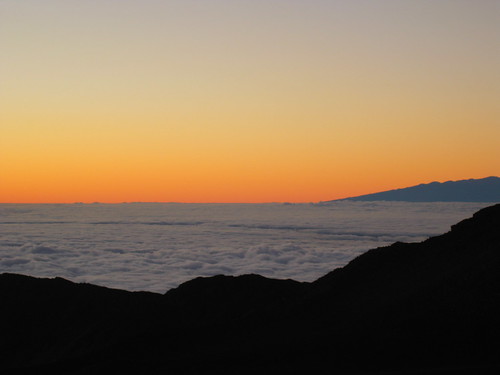
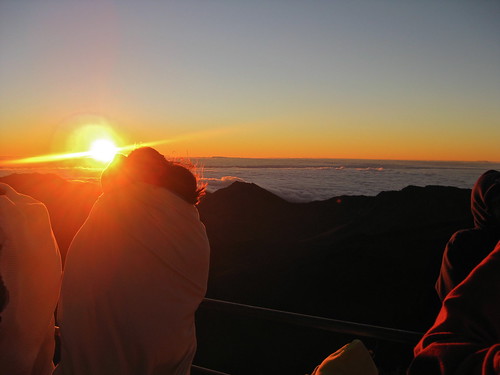
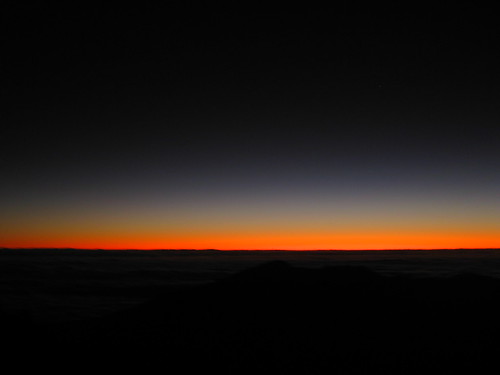
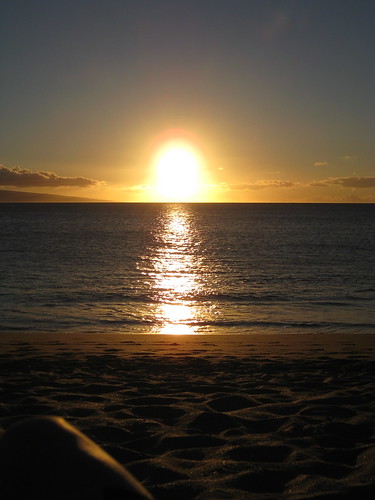
The tour began at 3 am so as to give us ample time to ascend the dormant volcano in time to make it for the 5:45 am sunrise. I was warned that the temperatures would be fairly chilly while atop the summit at roughly 10,000 feet, but that was certainly a gross understatement. It was simply freezing.

the sun is about to peak...

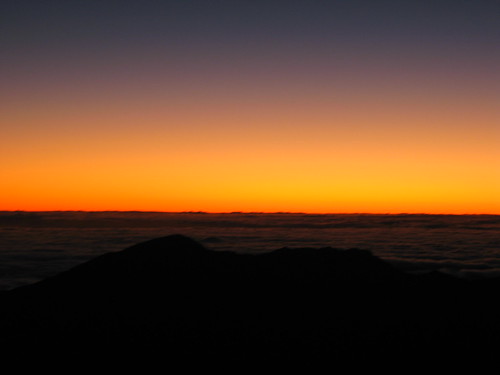
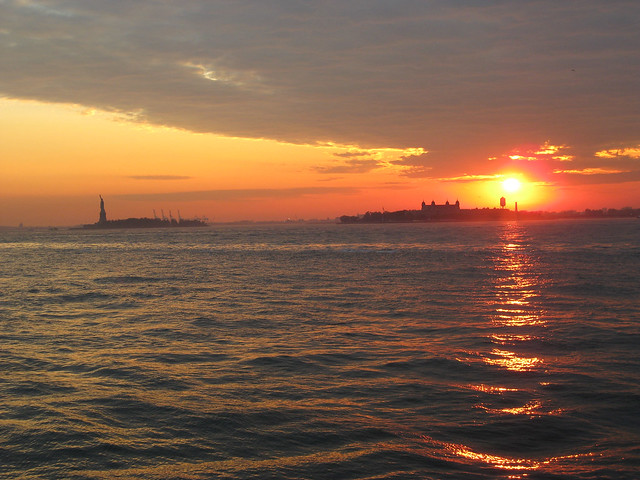
As I stood on Maui's highest point, shaking, shivering and turning blue, I witnessed a glorious sunrise consisting of spectacular colors- red, yellow, pink, blue- each color more vivid than the last.

a couple warming up to each other in the light of the new day

After taking it all in, I set off on a mountain bike to descend the roughly 10,000 feet. I stopped frequently to take pictures or marvel at the view and then took a long break for a leisurely breakfast half way down the volcano at Kula Lodge.

getting ready to bike down Haleakala... I know I look good!

I dined on eggs benedict made completely from locally sourced ingredients while sipping Hawaiian coffee and gazing down at the ocean.

the coast line on the way to Hana

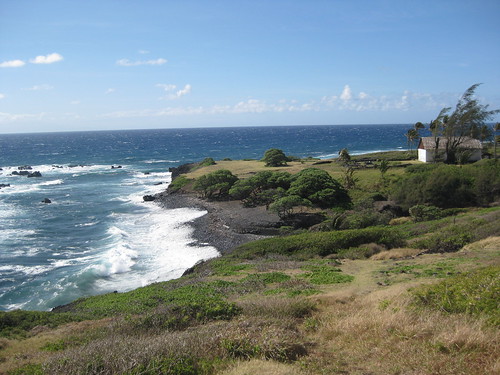
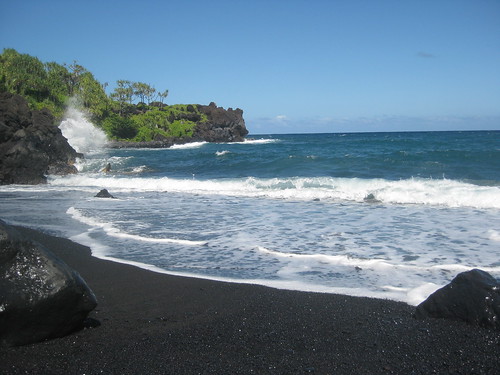
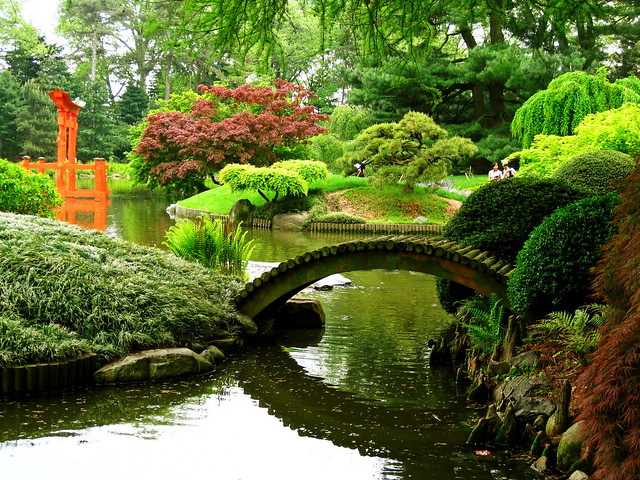
After having been inundated with such an enormous array of breathtaking views, I didn't think my next tour along the road to Hana, a scenic drive toward the underdeveloped and less populated side of Maui, would possibly be able to live up to the experiences I had already participated in. However, I suddenly found myself astounded by the ever changing terrain and scenery. One moment open fields, the next sweeping mountains with plunging valleys followed by black sand beaches and tropical rain forests.

a beautiful black sand beach

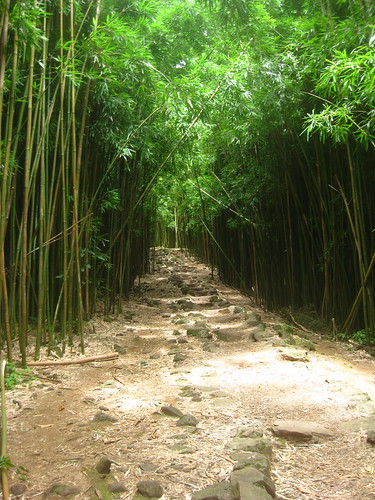
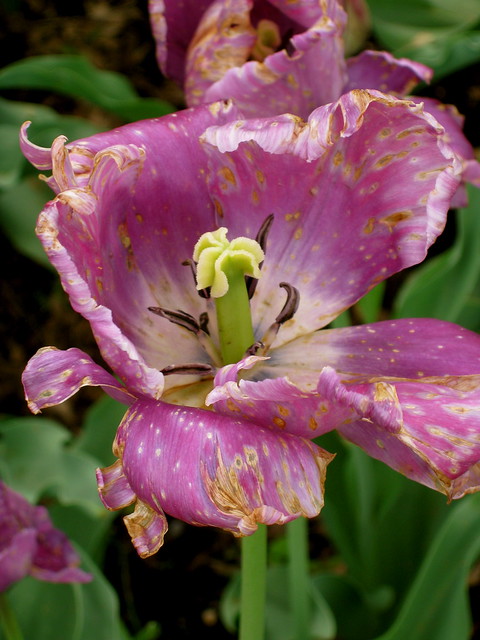
After driving for 2 hours or so along the narrow, winding road- the only way to Hana- we reached our destination. A part of the sprawling Haleakala National Park where the tour guide was going to lead us deep into this tropical paradise. The next several hours provided me with a visual feast. Gigantic banyan trees, 400 ft waterfalls, bamboo forests, natural fresh water pools, hibiscus in every color of the rainbow.

bamboo forest

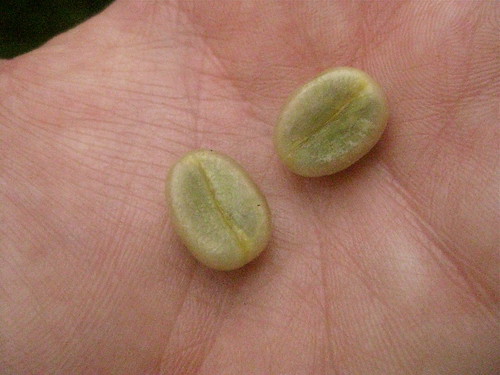
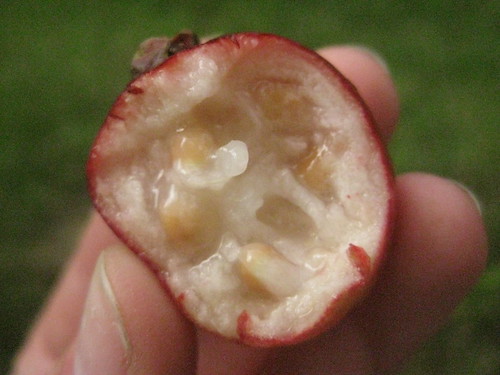
But what I found to be the most interesting was the sheer amount of edible vegetation that naturally grows EVERYWHERE. Besides the pineapples, papayas, mangoes and bananas I had seen along the drive, the rain forest alone offered coffee beans, guavas, and strawberry guavas (so delicious and tart!) hanging from every tree top just begging to be plucked.

raw coffee beans!

The guavas filled the jungle with such a sweet and tantalizing fragrance that you almost wished one would drop from its perch among the trees' canopy, plop upon your head and release it's sweet, pink nectar, allowing it to slide down your nose and on to the tip of your tongue. Now you might wonder how I can find guavas more intriguing than, say, a 400 ft waterfall, but in this day and age with all the processed and manufactured food, there is something rather remarkably comforting in seeing Mother Earth provide so naturally for her children.

strawberry guava- a delicious little snack!

Although I partook in plenty of outdoor exploration, I allowed myself ample time to indulge in some of Maui's finest dining. While I try to steer clear of tourist traps when traveling, I do like to do some research and take the suggestions of reputable travel guides. After eating at a few "Hawaiian" restaurants (as a side note- pineapple and macadamia nuts do not a traditional Hawaiian menu make), I decided to seek out someplace that would serve me real Hawaiian cuisine. Enter Aloha Mixed Plate, a seemingly popular lunch spot that served, well, mixed plates. Despite being somewhat less than hungry, I ordered their largest plate, the Alii, which offered all the Hawaiian basics: lau lau, kalua pig, lomi lomi salmon, and poi. Well, let's just say it might have been a good thing that my appetite was not at its peak.

Aloha Mixed Plate... the best part? The mai tai!

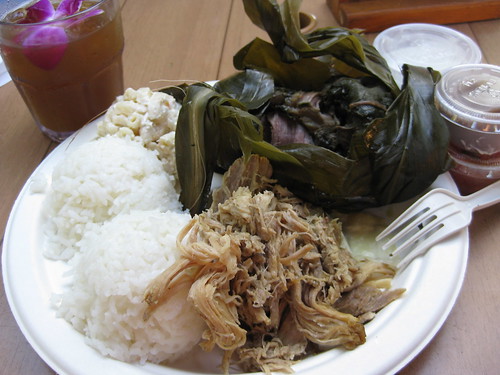
The lau lau pork, though tender from being cooked in laua leaves, had a strange seaweed like flavor and unappealing texture. The kalua pig had a nice smoky essence, but I found the rice and cabbage served along side it completely unnecessary. I understand they are both traditional sides, but must they be so impossibly bland? The macaroni salad... all I can say is, would you like some noodles with your mayonnaise? The lomi lomi salmon wasn't the worst thing on the plate, but definitely not anything I would miss. The worst thing was, by far, the poi. This grayish goo managed to be cold, bland, sour and salty simultaneously. The only possible solution to rid my tongue of this offensive flavor was to order another mai tai. (OK, OK, two). What was happening to me? When did I become so discriminating of food? At this point, I had frequently been finding myself critiquing and criticizing food and thinking of ways I would personally alter the dish to enhance it, assuming of course that I was fully capable of doing so. Maybe my increased cooking abilities I had gained over the last year were turning me into a food cynic...? Or perhaps I had developed a more sophisticated and fine tuned palate...?

the delectable sashimi pizza from HGS

Luckily, as it turns out, I'm only cynical of food when said food deserves to be critiqued and criticized. The 
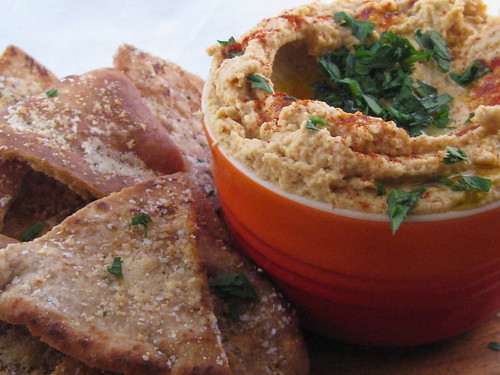
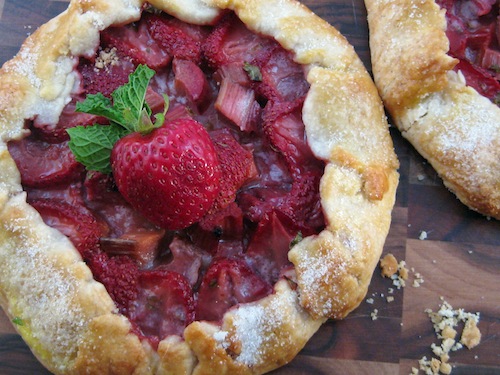
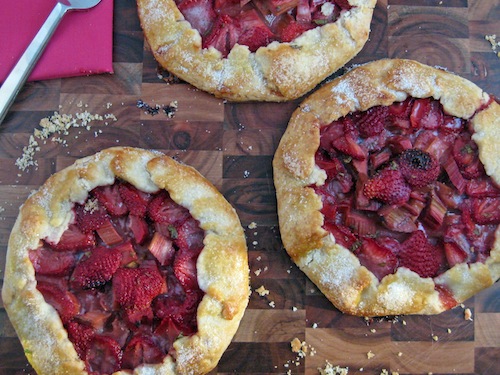
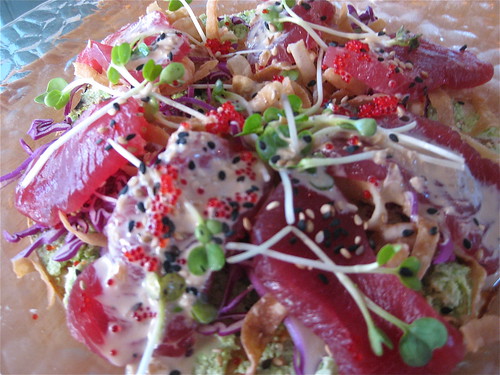
Haliimaile General Store- a charming, no-fuss restaurant with spectacular food- helped me figure this out. I began my meal with the sashimi pizza: a crispy thin crust topped with edamame hummus, ahi tuna, shaved purple cabbage, crispy wonton strips, bean sprouts and a soy-sesame aioli. (Please pause to wipe that drool hanging from your bottom lip). For my second course, a beet carpaccio salad with Marcona almonds, golden raisins, caramelized onions, arugula and panko crusted goat cheese fried to perfection all topped off with a honey bacon truffle vinaigrette. Finally, I ordered the meyer lemon rosemary chicken as my entrée. A boneless half chicken, roasted, and served with wine poached pear, prosciutto wrapped asparagus and a caramelized onion blue cheese tart. That tart was easily my favorite item of the night. In fact, from now on I want a blue cheese tart served with every one of my meals. I savored every last crumb of that tart, and every last crumb of that plate to be more accurate and honest. I was so full and satisfied that I even decided to pass on dessert! That is until I looked over their dessert menu. One item caught my eye instantly: the rustic cherry tart with sour cream gelato. (I have mentioned my unhealthy obsession with sour cream to you before haven't I?) I almost gave in, threw caution to the wind, but I closed the menu and pushed it aside. There was simply no room left in my stomach. The button along my waistband begging to be freed from its button hole served as a much needed reminder that I still had well over a week left of wearing my bathing suit. In public. Just as I was patting myself on the back and signing the check, the manager approached and placed in front of me a small plate with an even smaller cookie seated next to a perfect little lump of sour cream gelato. It was as if he had read my mind.

a Maui sunset, does it get any better?

My intentions with this blog are to include as many travel related posts as I possibly can (or can afford), accompanied by a travel inspired recipe. While most of my inspirations seem to come in the form of solid edibles, I felt drawn toward a cocktail this time. Perhaps those dozens of mai tais had more influence on me than I previously had thought...

inspiration for the Haleakatini

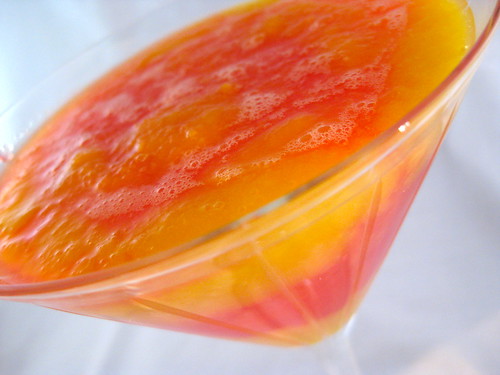
However this drink was inspired by the brilliant colors of the Haleakala sunrise. I wanted the colors to be layered so I used a heavier substance for the bottom layer of this martini: puréed mango. So it might be best to think of this drink as a smoothie like cocktail. If you're one of those people who like to drink before noon (but may not like to admit it) this just might be the drink for you!

Haleakatini... my Maui inspired creation

Haleakatini

Ingredients:
1 oz coconut rum
2 oz passion fruit vodka
1-2oz grenadine
2 dashes angostura bitters
1 large mango, peeled and cubed
1/2 cup pineapple juice

Directions:
1. Purée mango and pineapple juice in a blender until smooth. Divide mixture among 2 martini glasses.

2. Place X-Rated liqueur, coconut rum, vodka, grenadine and bitters in a martini shaker filled with ice. Shake vigorously and strain into prepared martini glasses. Enjoy!

Serves 2-3

November 2, 2010

Buy the Book November 3rd!!


I just wanted to remind my loyal and fervent readers about the cookbook I am so proud to be a part of. The Foodista Best of Food Blogs Cookbook, which was released on October 19 as the first grassroots cookbook to emerge from social media, features 100 "best of the best" mouthwatering recipes from food bloggers in over 20 countries.

In an effort to make this book a best seller, we are asking all our friends and family (you, dear readers, included) to purchase the book tomorrow November 3rd between these times (*refer to your specific time zone below):

Central (CDT): 12-1pm
Pacific (PDT): 10-11am
Mountain (MDT): 11-12pm
Eastern (EDT): 1-2pm

By purchasing a book during the allotted time, not only will you receive a gorgeous new cookbook, but you will also be entered into a drawing to win one of several fantastic prizes.  Forward your purchase confirmation email to book@foodista.com and you could win:

A $200 gift card from Amazon!


A $100 gift card from MadWine!


A Zojirushi Rice Cooker + Roger Ebert's The Pot and How to Use It


A variety of Andrew McMeel cookbooks!


For more information on the drawing, please visit http://www.foodista.com/blogbook/ and remember, your order must be placed within your specific time period in order to qualify as a valid entry.

October 19, 2010

Mini Sausage, Fontina, and Bell Pepper Stratas

sausage, fontina, and bell pepper strata

Where to begin? So much has transpired since my last post (which was well, over a month ago). I spent nearly 3 of those weeks in Hawaii (both Maui and the Big Island) and I will discuss that surreal and unforgettable experience at a later time. (I plan on doing a Hawaiian series, much like my New York one, with pictures and inspired recipes in the very near future). For now however, I would like to talk about the other major event that has recently taken place.  Please indulge me for a moment while I brag on myself. Are you ready for the big news??? Drumroll please.... My recipe for Pumpkin Latté Crème Brûlée (created for this blog and posted last November) has been published in an internationally distributed cookbook!! I submitted this recipe way back in February and quickly found out I was a finalist, but as the days turned into weeks, and the weeks into months, I began to lose hope in my chances at winning. What a pleasant surprise to find out I was wrong (one of the only circumstances where I will gladly accept and acknowledge the notion of being wrong)!

My recipe was one of 100 selected to be a part of the first grassroots cookbook to emerge from social media. The book, Foodista Best of Food Blogs Cookbook: 100 Great Recipes, Photographs and Voices, was published by Andrews McMeel Publishing and is available through Amazon (there is also a Kindle version) as of today! So support me, Foodista, and the other 99 featured food bloggers and order your copy today. It's a beautiful book with lots of great recipes (mine, of course, being one of those) and I'm so very proud to be a part of it! 

eggs, sausage, cheese, peppers... mmm

Alright, enough bragging I suppose. I'll instead talk about the matter at hand: mini sausage stratas. Stratas are one of my favorite ways to prepare a breakfast casserole. As long as you include eggs, milk or cream and bread, you can pretty much throw whatever other ingredients you have on hand into the mix and come up with something tasty and filling. The type of bread is also easily interchangeable. French bread, sandwich bread, english muffins, you name it. The sheer versatility of this dish is why I often suggest it for catering menus. However, some parties I do are less formal, with standing room only, which can make eating with a knife and fork somewhat of a difficult task. So I wanted to create a way for a strata to become hand held, kind of like a muffin. This was actually a rather simple solution and the end result turned out pretty much just as I hoped it would. 

personal sized strata

Mini Sausage, Fontina, and Bell Pepper Stratas
Heavily Adapted from Epicurious.com

Ingredients:
4 eggs
8 oz half & half
4 oz skim milk
1.5 oz shredded Romano cheese*
¾ tsp dried oregano
½ tsp dried thyme
½ tsp kosher salt
freshly ground pepper to taste
1 cup chopped green onion
¾ lb hot Italian turkey sausage
1 red bell pepper, thinly sliced
8 oz French bread (about half a loaf), cut into ½-inch cubes
1.5 oz shredded Fontina cheese*
2 oz shredded smoked Fontina cheese*
1 oz shredded cheddar cheese*
chives for garnish

10 foil muffin cups

*all cheeses are easily substituted, you what you like!

Directions:
  1. Preheat oven to 350º F.  Arrange folded muffin cups in a regular size muffin pan. Place a foil muffin cup inside each folded muffin cup (this helps eliminate greasy paper muffin cups).  Whisk first 9 ingredients in a medium sized bowl until well combined; set aside.
  2. Place turkey sausage in a large non-stick skillet; push to one side. Add bell pepper to other side of skillet. Sauté over high heat, breaking up sausage with fork, until sausage is cooked through and bell peppers are tender, about 7 minutes.
  3. In a large bowl, combine bread cubes, egg mixture, sausage mixture and Fontina cheeses. Mix with hands to insure bread in thoroughly soaked.  Let stand for 20 minutes or cover and chill overnight.
  4. With a large cookie scoop, evenly divide the strata mixture among the 10 prepared muffin cups.  Sprinkle with cheddar cheese. Bake until puffed and brown, about 35-40 minutes. Let cool, garnish with chopped chives, and serve.

Makes approximately 10 mini stratas

September 11, 2010

Lemony Garlic Hummus

lemony garlic hummus

I felt it today.  That first sign of fall weather to come.  Of course, it could just be the overcast skies and slightly cooler temperatures (it's our first day out of the triple digit summer heat here in Texas) we're experiencing today, but I even thought that for a moment, I caught a whiff, albeit faint, of that fall weather smell.  I don't know how to describe it exactly, but you know what scent I'm referring to, right?  That distinct smell that October, and sometimes September, bring.  It's my favorite scent.  If I could package it and sell it a bottle, I would.  I know we're not quite there yet, but that little tease of cool breeze heightened my anticipation for the approaching season greatly.  Fall weather gets me excited for all the ingredients that have been hibernating for far too long.  Root vegetables, pumpkin, sage, butternut squash.... all of which seem to warm you up from the inside out.

fresh herbs + lemon= YUMM

But I guess before I can relish in the cooler weather, I'll have to stick out the last few weeks of summer. Which I suppose isn't too terrible.  It gives me a few opportunities to bid farewell to my summer time favorites: basil, juicy tomatoes, watermelon, berries, and lemon.  Of course lemon is virtually a season-less fruit, you can find it in supermarkets just about any time of year, but for whatever reason, the sweet and tangy taste of lemon is something I crave just about all summer long.  Perhaps it's the refreshing quality lemons lend or the way they seem to brighten and heighten the flavor of almost any dish.

the perfect bite

I snack on hummus frequently and often in mass quantities.  I eat it on sandwiches and wraps, with veggies and chips, even sometimes just spread on lettuce.  I'm very picky about my hummus, however.  I like a thinner consistency, an un-grainy texture, and lots of flavor.  (Out to Lunch, sold at Whole Foods, is a great brand to try).  Even with all the stipulations that I require of hummus, I've never bothered to make my own. Which is somewhat embarrassing now that I know how easy it actually is.  Seriously, a food processor and 10 minutes is all it takes.  It's even better, and I'm sure healthier, with home made pita chips.

Dig in!

Lemony Garlic Hummus
Recipe by Karlie Kiser

Ingredients:
1 ½, 14-oz cans of garbanzo beans, liquid reserved
¼ cup plus 1 tbsp tahini
½ cup lemon juice
½ tsp lemon zest
5 garlic cloves, roughly chopped
reserved liquid from garbanzo beans (add to achieve desired texture, I would suggest at least 1/3 cup to ½ cup)
½ tsp paprika, divided
¼ tsp cumin
¼ tsp ground coriander (optional)
½ tsp chile powder
¾ tsp kosher salt
fresh pepper to taste
1 tbsp olive oil
2 tbsp parsley, chopped

Directions:
1.  In a large food processor, add the drained garbanzo beans, tahini, lemon juice, zest, and garlic.  Pulse until all ingredients come together.  Add enough of reserved garbanzo bean liquid to achieve desired consistency.  I used a little over 1/3 cup.  Process until the mixture is smooth. 

2.  Add 1/4 tsp paprika, cumin, coriander (if desired), chile powder and salt and pepper to taste.  Pulse mixture to combine.  

3.  Spoon prepared hummus into serving dish, drizzle with olive oil and sprinkle with remaining 1/4 tsp paprika and chopped parsley.  Enjoy with your favorite pita chips or cut veggies. 

August 20, 2010

Strawberry and Rhubarb Galette

a little fresh garnish adds a nice touch

I am writing this post with extreme jubilation.  Or perhaps it's just the after effects of pure relief.  I had an intensely nightmarish occurrence happen to me last week.  My computer crashed.  Upon updating the software on my laptop, only after I was prompted to, the only activity I could get out of it was a blank, white screen.  After doing a little research, I quickly learned that this screen has been maliciously dubbed "the white screen of death."  My heart sank.  My stomach dropped.  I was suddenly unable to swallow past the lump in my throat.  And a single tear ran down my cheek (followed shortly by an unstoppable river).  All of my photos, music, recipes and meticulously crafted spreadsheets (oh yeah, in case you didn't know, I'm OCD- it's unofficially diagnosed, but painfully apparent- I like to think of it as "super-duper-organized").  Basically my whole life was digitally saved and compressed onto this one, tiny little laptop.

concentric circles of strawberries

I suddenly felt like Carrie Bradshaw.  Everyone started asking me if I had "backed-up." To which I would reply with a snarl.  Backing-up had never occurred to me, even though I had seen that particular episode where Carrie's computer crashes and she loses everything she had ever written.  How could I be so naive?  So before I had the chance to take my laptop into the Apple store and receive it's official sentence, I mourned the death that I was certain had befell my computer.  This is the point where my dad, mom, and brother would all tell me I was over reacting.  That I was being a drama queen (like I've never heard that before, ha).  I didn't care.  I felt I had the right to act irrational, because for all I knew my computer was dead and all my memories and work were buried among the intangible space along with it.  

how good does that crust look

I needed to take my mind off the loss.  I needed something to distract me from the harrowing thoughts of what was to become of my computer.  Ahh, yes.  A tart of some kind. The only suitable option for this sort of occasion, because nothing calms the nerves quite like a flaky pie crust does.  I had been itching to make a free form tart anyways, so this seemed like as good a time as any.  I rushed to the grocery store, grabbed what I am certain was the last of the season's rhubarb, and headed home to bake the tension out of me.  I wasn't in the mood to plan or be painstakingly precise, so I threw together a fruit filling concoction, tweaking here and there upon tasting, and placed it in the oven.  The result was surprisingly good, especially considering my state of mind and this spontaneous style of baking that I am unaccustomed to.  The galette did help to alleviate the stress of the evening and I even managed to get some sleep that night.  Perhaps, it even served as a little good luck charm, because, despite the "white screen of death," the Apple geniuses were able to recover all of my files.  So maybe I did over react just a tad, sobbing at what would now be a non-loss of all my photos, music, recipes, and meticulously crafted spreadsheets.  But I learned a valuable lesson.  You better believe I bought myself an external hard drive that day, and now I know to make a habit of backing-up.  In fact, I think I might go do that right now.

love at first bite

Strawberry and Rhubarb Galette 
by Karlie Kiser

Ingredients:
Crust:
2 cups all-purpose flour, plus more for rolling
3 tbsp granulated sugar
1/4 tsp salt
1 medium lemon, zested
1 1/2 sticks cold, unsalted butter, cut into small chunks
1 egg yolk
2 tbsp ice water, plus more if needed

Filling:
2 1/2 cups chopped rhubarb, about 1/2 pound
1/4 cup plus 2 tbsp dark brown sugar, divided
2 1/2 tbsp lemon juice, divided
pinch of salt
3 tbsp cornstarch, divided
2 tbsp uncooked, quick cooking tapioca, ground fine in  a spice mill, divided
1 1/2 pounds strawberries, hulled and sliced
1/4 cup granulated sugar
2 tbsp chopped mint
about 6 tbsp toasted, sliced almonds
1 egg yolk
1 tsp water
2 tbsp turbinado sugar (or granulated sugar)
1 tbsp cold, unsalted butter, cut into very small pieces

Topping (optional):
4 oz crème fraîche
1 tbsp granulated sugar

Directions:
1. For crust: combine flour, sugar, salt and lemon zest in a food processor (or large mixing bowl).  Add butter and pulse (or rub in with fingers if using traditional method) to combine until the mixture resembles course crumbs.

2. Add the egg yolk and ice water (1 tbsp at a time) and pulse (or again, work into the mixture with your hands) just until combined.  (Do not let the dough form a ball in the food processor, pulse just until the mixture comes together.)  There should be enough moisture in the dough so that it binds together without being too wet or sticky.  If it's still crumbly, add a little more ice water, 1 teaspoon at a time.

3. Pour the dough mixture onto a lightly floured surface and bring together forming a ball.  Pat into a disc, wrap in plastic wrap and place in the fridge for at least one hour.

4. After the dough is sufficiently chilled, separate into four equal portions.  On a lightly floured surface, roll each portion into a circle, about 1/4-inch thick.  Cover a large baking sheet with parchment paper, place dough circles on top, cover with plastic wrap and chill in the fridge for 30 minutes.

5. In the meantime, combine the rhubarb, 1/4 cup dark brown sugar, 1 tablespoon lemon juice, salt, 1 teaspoon cornstarch and 1 tablespoon ground tapioca in a medium mixing bowl.  Set aside and let stand for 30 minutes.

6. In another mixing bowl, combine the strawberries, 1/4 cup sugar, 2 tablespoons dark brown sugar, mint, 1 1/2 tablespoons lemon juice, 2 teaspoons cornstarch, and 1 tablespoon ground tapioca.  Set aside and let stand for 10-15 minutes.  Pre-heat oven to 350º F.

7. Remove the dough rounds from the fridge.  Working one at a time, sprinkle about 1 1/2 tablespoons toasted almonds on center of dough round, leaving a 1-inch border.  Place a mound of rhubarb (about 2 spoonfuls) in the center of crust.  Layer strawberry slices in an overlapping circle around the mound of rhubarb, making sure to leave the 1-inch border of dough.  Repeat on remaining dough rounds.  You should have strawberries left over.  Reserve for later use. 

8. Beat the egg yolk and 1 teaspoon water together to make an egg wash.  Brush the border of each dough round with egg wash.  Bring the edge of crust over onto the filling, leaving the fruit exposed in the center.  Gently fold and crimp the dough to seal any cracks.  Repeat on each galette. 

9. With the remaining strawberry slices, evenly divide and layer on top of other exposed strawberries on each galette.  Combine any strawberry and rhubarb juice remaining at bottom of mixing bowls.  Evenly distribute juices among each galette, spooning onto the center of each.  Chill in fridge for 15 minutes.

10. Brush the edges of each crust with remaining egg wash.  Sprinkle each crust with about 1/2 tablespoon turbinado sugar.  Dot each galette with the small pieces of butter.  Place the galettes (still on baking sheet) on the center rack of oven and bake for about 45-50 minutes, or until the crust is golden brown.  Let cool to room temperature and, if desired, serve with crème fraîche sweetened with 1 tablespoon of sugar.  Enjoy!

Makes 4 mini galettes, about 5-inches in diameter 

*This recipe might have a lot of steps and sound complicated, but I promise you it is easy, breezy!  I just wanted the recipe to be as detailed as possible so as to avoid any confusion for novice bakers. 

August 7, 2010

A Tribute to New York City Part 2

Lady Liberty

It’s during this time of year that I start to miss New York the most.  The idea of cooler weather with a slightly salty breeze coming off the Hudson River sounds much more appealing than the extreme temperatures we’ve been experiencing here in Texas.  Seriously, I’m melting as we speak.  When I used to complain about the cold winters (which I do not miss, not one bit.) in New York, people would tell me, “Just wait.  Our summers are brutally hot.”  I’d laugh inside.  Because, really, you’re going to tell me New York summers are more blistering than the ones we have in Texas?  Ha. Ha. HA.  However, there are things about New York that I miss besides the milder temperatures, though most of them are associated with summer time.  I loved the fact that during warmer weather, the city would just come alive- to a completely different level.  On almost any day of the week you could find some kind of outdoor event to while away the hours, whether it be at a regularly scheduled flea market or an outdoor celebration like the Mermaid Parade (celebrating the beginning of summer out on Coney Island).

Brooklyn Botanical Garden

Couldn't resist this gorgeous flower at the BBG

It was around mid-summer during my year spent living in New York that I had made the decision to move back to Texas.  I also made the decision right then and there to do as many “New Yorky” things as possible.  I had a blast checking things off my list.  I made a trip to the Brooklyn Botanical Gardens, Jones Beach out on Long Island, Coney Island, several museums, and the New York Aquarium.

The Wonder Wheel and Coney Island

The funny thing is, that with the exception of the beaches, I could do all those other things right here in Dallas.  For whatever reason, I never bother to here.  Two things I can’t do in Dallas, however, and desperately wish I could, is attend Broadway shows and spend the day at Central Park.

Strawberry Fields in Central Park

Bow Bridge in Central Park

I had a deep love affair with Central Park.  I was in awe of the beauty of that place during all seasons.  Whether it was watching the leaves fall while strolling down The Mall, gazing out upon the blanket of snow from Bow Bridge, welcoming the first spring rain while relaxing in Strawberry Fields, or enjoying a picnic among the sea of people in the Great Lawn.  (I actually took my mom along for one of those picnics when she came to visit.  I made a pretty spectacular spread, if I don’t say so myself, of grilled vegetable panzanella, spicy apricot and molasses glazed shrimp, watermelon, feta and arugula salad, and chocolate espresso caramel bars- now my most requested item.)

On top of the MET

Inside the MET with my favorite artist, Van Gogh

While there is an endless amount of activities and places to visit in New York, there are probably twice as many restaurants.  Of course, there are the classics and the critically acclaimed that stand out from the bunch, too many of which I didn’t have the time or money to enjoy, but there is one restaurant in New York that I could probably call my favorite (or at least mark it as a tie with my other favorite restaurant located here in Dallas): The Spotted Pig.  I only had the opportunity to eat a meal here once, but that was enough to solidify its place in my heart.  The wait for a table is always extreme, but there is a reason for that.  The food is unreal.  It’s a gastro-pub offering a fusion of traditional British fare and Italian cuisine.  The pork belly was succulent.  The shoestring fries, crisped to perfection.  But nothing, nothing, could ever be as decadently delicious as the plump, pillowy, perfection that is their gnudi.   Gnudi, which is literally translated to “naked”, are pasta-like ricotta dumplings that have been shed of their pasta “clothing.”  The ricotta bursts through its thin exterior and immediately changes your world.  They are a revelation.  Trust me, once you eat gnudi, you will never want run-of-the-mill ravioli ever again.

Rise No 1 Souffle

By comparison, my favorite Dallas restaurant, which is much easier to get a table at, is rise nº 1.  It’s an adorable French restaurant specializing in soufflés.  They of course offer other French fare beyond soufflés, but why bother going if you’re not going to indulge in one of their many, many flavors like sun-dried tomato and pesto chèvre, truffle infused mushroom, or the Cajun crab and boursin cheese.  You must save room for a chocolate, strawberry, or praline soufflé to finish your meal, however.  All three are to die for.  On second thought, it’s probably better to go ahead and order all three.

My Williamsburg Bridge

Besides my beloved Central Park and The Spotted Pig, there is perhaps one last thing that I miss more than anything: my bridge (otherwise known as the Williamsburg Bridge).  I ran across it almost daily.  There was something so peaceful and serene about pounding my feet on the pavement as I looked out upon the East River and the Manhattan skyline, breathing in the crisp, salty air.  I loved being able to race toward the Lower East Side with Brooklyn behind me, only to turn around and experience it all over again.  It’s not quite the same running around my flat Plano, TX neighborhood anymore.  I’m always hoping to suddenly approach a vast metal structure that will carry me over a body of water of some kind.  Which, on a side note, up until I lived in New York I never knew how much I loved being around water.  Watching the sun glisten on the water’s surface never failed to make me smile, especially if I was lucky enough to catch a sunset while standing at the water’s edge. 

I spy... Ellis Island and the Statue of Liberty

It’s funny how memories tend to become more dear and precious as time goes on.  As my time spent in New York grows more and more distant, I grow even fonder of my experiences there.  My affection for sunsets, Central Park, and the Spotted Pig may be but mere, fading memories, but they’ll always hold a place in my heart.  And at least I can still have my gnudi, and eat it too.

(Gnudi recipe follows)


gnudi=pillowy perfection

Ricotta Gnudi with Crispy Sage and Brown Butter Sauce
Inspired by The Spotted Pig, adapted from The Paupered Chef

Ingredients:
1 cup fresh ricotta cheese (if possible, use sheep’s milk ricotta or, if you’re up to it, make your own ricotta)
1 cup grated grated Parmesan
2 large eggs
1 egg yolk
1 teaspoon grated nutmeg
½ cup all-purpose flour
4-5 cups semolina flour
6 tablespoons unsalted butter
about 24 sage leaves
¼ cup shredded Parmesan, preferably Parmigiano Reggiano
fresh black pepper to taste

Directions:
1. Combine the ricotta, grated Parmesan, eggs, egg yolk and nutmeg in a medium mixing bowl and whisk vigorously until the mixture is light and airy.

2. Gently fold in the ½ cup flour until it is combined with the ricotta mixture.  If the mixture seems too sticky at this point, add in 1 tablespoon more flour at a time.

3. In a large, shallow dish (but at least 2-inches deep), sprinkle ¼-inch semolina flour on the bottom.  Using a small cookie dough scoop, about an inch in diameter, scoop the ricotta mixture into small, round balls, using floured hands to shape if necessary, and arrange on top of the semolina, making sure not to touch each other or the sides of the dish.  After all the ricotta mixture is scooped, rolled, and arranged, cover the balls completely with the remaining semolina flour. The balls should be buried.  Transfer to the fridge and let sit for at least 12 hours, and up to 24.  *I found that resting the ricotta balls for 24 hours made a thicker “crust” than I would have liked. I would suggest a shorter resting period.

4. Carefully unearth the gnudi and set aside on a baking sheet.  The remaining semolina flour can be sifted and reserved for another future use.  Allow the gnudi to come to room temperature.

5. In the meantime, bring a large pot of salted water to a boil.  In a skillet, melt the butter over medium-high heat.  Watch it carefully, and when the butter solids begin to brown and turn foamy, add the sage leaves.  Continue to cook until the butter turns a nutty brown color.  Be careful not to burn the butter, as it will turn bitter.

6. Once the water is boiling, carefully transfer the gnudi to the pot and cook until they float, about 2 minutes.  Avoid overcooking or the exterior will toughen.

7. Removing the gnudi with a slotted spoon to drain, transfer to the brown butter sauce and serve immediately.  Top with the shredded Parmigiano Reggiano and fresh black pepper.

Serves 4