April 8, 2013
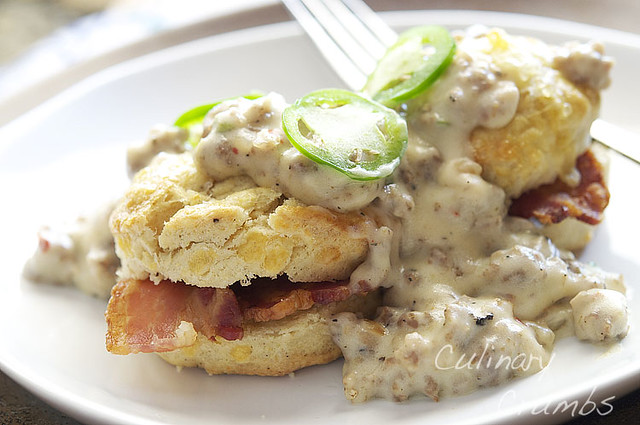
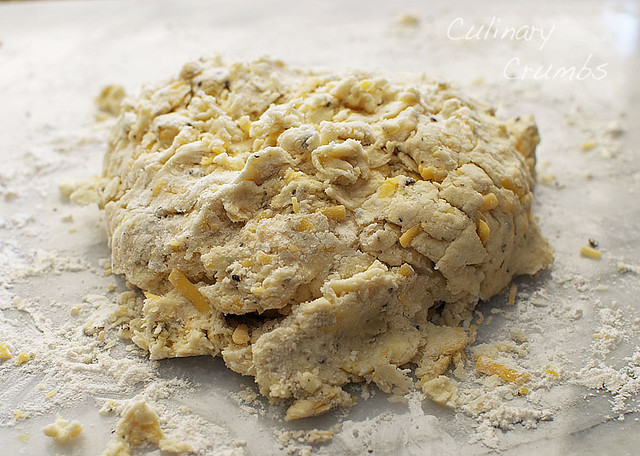
Cheddar and Black Pepper Biscuits with Spicy Sausage Gravy
I want to be the mom that makes the world’s best biscuits and gravy. I want my biscuit making skills to be that of which legends are made of, a tale that my children will spread far and wide, allowing my name to live beyond my years. Yes. I have (unreasonably) high expectations for myself and these biscuits. But I have a confession: I have never made homemade biscuits. Unless, of course, you consider drop biscuits made from the likes of Bisquick powder homemade? I didn’t think so…
October 19, 2010
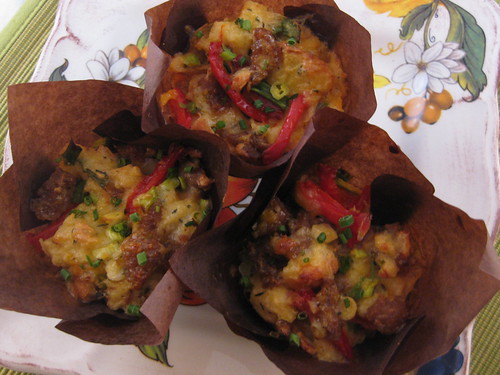
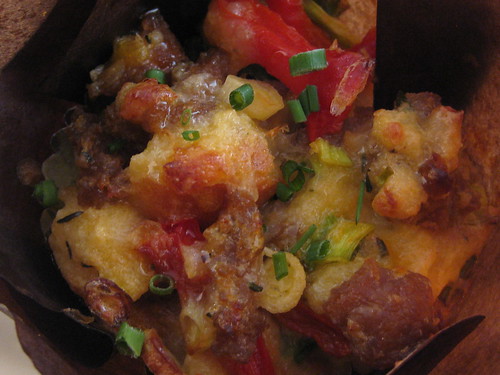
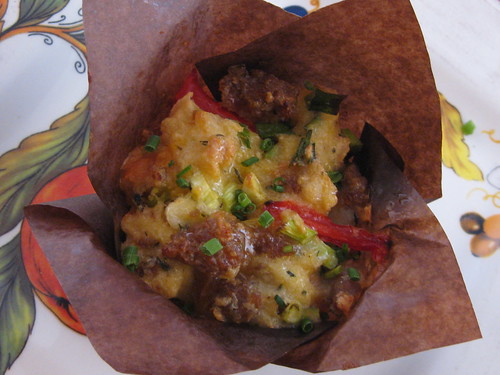
Mini Sausage, Fontina, and Bell Pepper Stratas
Where to begin? So much has transpired since my last post (which was well, over a month ago). I spent nearly 3 of those weeks in Hawaii (both Maui and the Big Island) and I will discuss that surreal and unforgettable experience at a later time. (I plan on doing a Hawaiian series, much like my New York one, with pictures and inspired recipes in the very near future). For now however, I would like to talk about the other major event that has recently taken place. Please indulge me for a moment while I brag on myself. Are you ready for the big news??? Drumroll please.... My recipe for Pumpkin Latté Crème Brûlée (created for this blog and posted last November) has been published in an internationally distributed cookbook!! I submitted this recipe way back in February and quickly found out I was a finalist, but as the days turned into weeks, and the weeks into months, I began to lose hope in my chances at winning. What a pleasant surprise to find out I was wrong (one of the only circumstances where I will gladly accept and acknowledge the notion of being wrong)!
My recipe was one of 100 selected to be a part of the first grassroots cookbook to emerge from social media. The book, Foodista Best of Food Blogs Cookbook: 100 Great Recipes, Photographs and Voices, was published by Andrews McMeel Publishing and is available through Amazon (there is also a Kindle version) as of today! So support me, Foodista, and the other 99 featured food bloggers and order your copy today. It's a beautiful book with lots of great recipes (mine, of course, being one of those) and I'm so very proud to be a part of it!
Alright, enough bragging I suppose. I'll instead talk about the matter at hand: mini sausage stratas. Stratas are one of my favorite ways to prepare a breakfast casserole. As long as you include eggs, milk or cream and bread, you can pretty much throw whatever other ingredients you have on hand into the mix and come up with something tasty and filling. The type of bread is also easily interchangeable. French bread, sandwich bread, english muffins, you name it. The sheer versatility of this dish is why I often suggest it for catering menus. However, some parties I do are less formal, with standing room only, which can make eating with a knife and fork somewhat of a difficult task. So I wanted to create a way for a strata to become hand held, kind of like a muffin. This was actually a rather simple solution and the end result turned out pretty much just as I hoped it would.
- Preheat oven to 350º F. Arrange folded muffin cups in a regular size muffin pan. Place a foil muffin cup inside each folded muffin cup (this helps eliminate greasy paper muffin cups). Whisk first 9 ingredients in a medium sized bowl until well combined; set aside.
- Place turkey sausage in a large non-stick skillet; push to one side. Add bell pepper to other side of skillet. Sauté over high heat, breaking up sausage with fork, until sausage is cooked through and bell peppers are tender, about 7 minutes.
- In a large bowl, combine bread cubes, egg mixture, sausage mixture and Fontina cheeses. Mix with hands to insure bread in thoroughly soaked. Let stand for 20 minutes or cover and chill overnight.
- With a large cookie scoop, evenly divide the strata mixture among the 10 prepared muffin cups. Sprinkle with cheddar cheese. Bake until puffed and brown, about 35-40 minutes. Let cool, garnish with chopped chives, and serve.
December 22, 2009
12 Days of Goodies- Day 10: Meyer Lemon and Wild Blueberry Scones
3 cups self-rising flour
1/2 cup plus 1 1/2 tablespoons sugar
3/4 cup (11/2 sticks) chilled unsalted butter, cut into 1/2-inch cubes
1 1/2 cups dried wild blueberries (about 10 ounces)
1 cup plus 1 tablespoon buttermilk
1 1/2 tablespoons finely grated Meyer lemon peel or regular lemon peel
Directions:
1. Position rack in top third of oven and preheat to 425°F. Line large baking sheet with parchment paper.
2. Whisk self-rising flour and 1/2 cup sugar in large bowl. Using fingertips, rub in chilled butter until pieces are size of small peas. Add dried wild blueberries and toss to coat. Mix 1 cup buttermilk and finely grated lemon peel in glass measuring cup. Pour buttermilk mixture into dry ingredients and stir until dough begins to form (some of flour will not be incorporated).
3. Transfer dough to lightly floured work surface and gather together. Knead dough briefly, about 5 turns. Divide dough in half. Form each dough half into ball and flatten into 1-inch-thick disk. Cut each disk into 6 wedges.
4. Transfer scones to prepared baking sheet, spacing 1 inch apart. Brush tops with remaining 1 tablespoon buttermilk and sprinkle with remaining 1 1/2 tablespoons sugar. Bake until scones are golden brown on top and toothpick inserted into center comes out clean, about 25 minutes.
Makes 12 scones
December 20, 2009
12 Days of Goodies- Day 8: Apple Cider Doughnut Holes
Ingredients:
1 cup apple cider
1 medium Cortland apple, cored, peeled, and chopped
3 1/2 cups flour, plus additional for the work surface
2 teaspoons baking powder
1 teaspoon baking soda
1/2 teaspoon ground cinnamon
1/2 teaspoon salt
1/8 teaspoon ground nutmeg
4 tablespoons (1/2 stick or 2 ounces) butter, at room temperature
1 cup granulated sugar
2 large eggs
1/2 cup buttermilk
Vegetable oil for frying
For cinnamon-sugar coating:
1 cup granulated sugar
1 teaspoon ground cinnamon
For apple cider glaze:
1 cup apple cider (reduced over medium heat in a small saucepan to about 1/4 cup)
1 cup confectioner's sugar
Directions:
1. In a saucepan over medium to medium-low heat, combine the chopped apples and apple cider. Cover and cook until the apples are softened, about 5 minutes. Uncover and continue to cook until the apple cider is reduced to about 1/4 cup, about 10 minutes. Set aside to cool.
2. Meanwhile, in a bowl, combine the flour, baking powder and soda, cinnamon, salt and nutmeg. Set aside.
3. Using an electric mixer on medium speed (with the paddle attachment, if using a stand mixer) cream the butter and granulated sugar together. Add the eggs, one at a time, and continue to beat until the eggs are completely incorporated. Use a spatula to scrape down the sides of the bowl occasionally. Reduce the speed to low and gradually add the reduced apple cider mixture and the buttermilk, mixing until just combined. Add the flour mixture and continue to mix just until the dough comes together.
4. Line two baking sheets with parchment or wax paper and sprinkle them generously with flour. Turn the dough onto one of the sheets and sprinkle the top with flour. Flatten the dough with your hands until it is about 1/2 inch thick. Use more flour if the dough is still wet. Transfer the dough to the freezer until it is slightly hardened, about 20 minutes. Pull the dough out of the freezer. Using a 3-inch or 3 1/2-inch doughnut cutter — or a 3 1/2-inch round cutter for the outer shape and a 1-inch round cutter for the hole, cut out doughnut shapes, (or do as I did, and use just the 1-inch cutter to makes only doughnut holes). Place the cut doughnuts and doughnut holes onto the second sheet pan. Refrigerate the doughnuts for 20 to 30 minutes.
5. While the doughnuts are chilling in the fridge, make the apple cider glaze by whisking together the confectioner's sugar and apple cider reduction until smooth. Combine the granulated sugar and ground cinnamon to make the cinnamon-sugar coating. Set both aside.
6. Add enough oil to a deep-sided pan to measure a depth of about 3 inches. Attach a candy thermometer to the side of the pan and heat over medium heat until the oil reaches 350° F. Have a plate lined with several paper towels ready.
7. Carefully add a few doughnuts to the oil, being careful not to crowd the pan, and fry until golden brown, about 60 seconds. Turn the doughnuts over and fry until the other side is golden, 30 to 60 seconds. Drain on paper towels for a minute after the doughnuts are fried. Coat both sides of each doughnut in the cinnamon-sugar mixture, then drizzle all doughnuts with the apple cider glaze. Serve immediately.
Makes about 18 doughnuts and doughnut holes, or 3 dozen doughnut holes
December 19, 2009
12 Days of Goodies- Day 7: Pistachio, Cherry, and White Chocolate Biscotti
Ingredients:
3 cups all purpose flour
2 teaspoons baking powder
1/2 teaspoon salt
1 cup sugar
3 large eggs
2 tablespoons canola oil
2 1/2 teaspoons almond extract
3/4 cup shelled raw unsalted natural pistachios
1 cup dried raspberries or chopped dried strawberries (about 5 ounces) (I used dried cherries)
1/2 cup chopped high-quality white chocolate (such as Lindt or Perugina)
8 ounces high-quality white chocolate and/or 8 ounces bittersweet or semisweet chocolate, chopped
Directions:
1. Preheat oven to 350°F. Line large baking sheet with parchment paper. Whisk flour, baking powder, and salt in medium bowl to blend. Using electric mixer, beat sugar, eggs, oil, and almond extract in large bowl until well blended. Add flour mixture and beat until combined (the batter should be very stiff). Stir in pistachios, dried berries, and 1/2 cup chopped white chocolate. Drop dough by heaping tablespoonfuls in two 12-inch-long strips on prepared baking sheet, spacing strips 3 inches apart. Using wet fingertips, shape each strip into 3-inch-wide log, pressing evenly (logs may look slightly lumpy).
2. Bake logs until lightly browned and almost firm to touch, about 30 minutes. Cool logs on sheet 30 minutes. Reduce oven temperature to 325°F.
3. Carefully transfer logs to cutting board. Line same baking sheet with parchment paper. Cut each log crosswise into generous 1/2-inch-thick slices. Stand biscotti upright, spacing about 1/4 inch apart, in 3 rows on prepared baking sheet. Bake until pale golden (biscotti may be soft but will firm as they cool), about 20 minutes. Cool completely on baking sheet.
4. Line another large baking sheet with parchment paper. Place 8 ounces chopped white chocolate in medium glass bowl. Place 8 ounces chopped bittersweet chocolate in another medium glass bowl, if desired. Microwave separately on medium in 20-second intervals just until chocolate is soft to touch, about 40 seconds total (do not overheat or chocolate will burn or seize). Stir chocolate until smooth.
5. Dip 1 end or 1 side of each biscotti in chocolate; place on baking sheet. Chill until chocolate is set, about 30 minutes. (Can be made ahead. Arrange in single layer in airtight container and chill up to 5 days or freeze up to 2 weeks.)
October 10, 2009
Banana Nut Bread
Tip: This bread is better the day after it's baked.
Ingredients:
1 tablespoon unsalted butter
2 eggs
1/3 cup buttermilk
1/2 cup vegetable oil
3 large ripe bananas, mashed (about 1 1/4 cups)
1 tsp vanilla extract
1 cup, plus 1 tablespoon granulated sugar
1/2 cup brown sugar, packed
1 3/4 cups all-purpose flour (try substituting 3/4 cup of whole wheat flour for a healthier option)
1 tsp baking soda
1/2 tsp salt
1/2 tsp, plus 1/2 tablespoon cinnamon
1/2 cup chopped pecans or walnuts (I used a mixture of both)
Directions:
Heat the oven to 325 degrees F. Grease a 9x5 inch loaf pan with the 1 tablespoon of butter. In a small ramekin, mix together the 1 tablespoon of granulated sugar and 1/2 tablespoon of cinnamon. Sprinkle the buttered loaf pan liberally with the cinnamon-sugar mixture.
In a large bowl, beat together the eggs, buttermilk, oil, vanilla, and bananas. In a separate, smaller bowl, sift together the sugars, flour, baking soda, salt, and cinnamon. Add the flour mixture to the banana mixture and stir to combine. Add the nuts and stir again.
Pour batter into prepared loaf pan and bake 1 hour and 10 minutes to 1 hour and 20 minutes, or until an inserted cake tester comes out clean. Let cool on a wire rack for at least 15 minutes.
Makes 12 servings

