December 30, 2011

Black-Eyed Pea and Ham Soup with Collard Greens


black-eyed pea soup

It's time to usher in a New Year, yet again (I could have sworn I just celebrated this holiday...).  It really is true that the older you get, the faster the years fly by.  Surely, someone can figure out how to slow time, even a little bit?  Just wishful thinking...

little peas of luck

Anyways, this was Jon and I's first time ringing in the New Year together, so I thought it would be the perfect time to begin some new traditions.  Jon's mother shared with me a few months ago that every Christmas Eve, their family would come together to share a rich and delectable lobster bisque and toast one another with a glass (or three) of champagne.  I loved the idea so much that I thought Jon and I should pick up the tradition for New Year's Eve.

wash, remove stems and cut greens into ribbons

A few problems have since blossomed.  And as I'm sure you have now guessed, the lobster bisque didn't happen.  First of all, I needed a dish that required much less attention than a labor intensive lobster bisque, as I spent New Years weekend recovering from a respiratory infection.  Second, Jon and I have had to buckle down; we are hence forward following a strict budget.  Therefore, a 3 lb live lobster seemed a little impractical and much too frivolous.

hickory smoked ham

So I thought back to a tradition I grew up with, one that had its roots in the South- and you should all know that I'm utterly eager to make Jon as Southern as I possibly can.  My mother encouraged my family to eat a healthy serving of black eyed peas every New Year's Day growing up.  Whether the black eyed peas were canned, dried or frozen and served either in a dip, casserole or soup- no matter what form you ate them in, they were meant to bring you good luck during the upcoming year.

mashed and unmashed peas

Now, I've never really been a big fan of black eyed peas, but year after year I ate my share of them, because I could never afford to turn my cheek on the opportunity for a little extra luck.  2012 brings about the same predicament.  I'm in desperate need of little luck as I enter this new year, meaning that once again, I feel I can't abandon this old Southern tradition.  Hopefully this year's helping of black eyed peas will bring me enough luck that by this time next year, just maybe, I'll be able to have my lobster bisque... and eat it too.

black-eyed peas, ham and collard greens

Black-Eyed Pea and Ham Soup with Collard Greens
Recipe adapted from Epicurious.com

Ingredients
16 oz bag dried black-eyed peas
2 tbsp olive oil
2 tbsp unsalted butter
1 1/2 medium sweet onions, diced
2 ribs celery, diced
1 large green bell pepper, diced
3 garlic cloves, minced
4 cups chicken stock
2 cups water
8-10 oz cooked ham, shredded or diced
3/4 lb collard greens
2 small bay leaves
2 tsp herbs de provence
2 tsp red pepper flakes (or more to suite your taste)
2 sprigs fresh thyme
2 tsp apple cider vinegar
salt and pepper to taste

Directions:
1. Fill a large saucepan with 8 cups cold water.  Add black-eyed peas and set over medium to medium low heat.  Let simmer for 1 hour, but do not let it come to a boil.  Once black-eyed peas are tender, drain, reserving cooking liquid.  Set both liquid and black-eyed peas aside. 

2. In a 3-qt sauce pan or small stock pot, heat 2 tablespoons of butter and 2 tablespoons of olive oil over medium heat.  Add onions, celery and bell pepper and saute until tender, stirring occasionally, about 5 minutes.  Add garlic, season with salt and pepper and saute 2 minutes longer.

3. While onion mixture is cooking, remove and discard stems and center ribs from collard greens and cut leaves into 1-inch ribbons.  Add chicken stock, 2 cups of cooking liquid from black-eyed peas, 2 cups water, ham, collard greens, bay leaves, herbs de provence, red pepper flakes and thyme to onion mixture and simmer 20 minutes, until collard greens are tender.

4. Move a quarter of the black-eyed peas to a small bowl and mash with a fork.  Stir mashed black-eyed peas and another quarter of whole black-eyed peas into the soup.  (Reserve remaining black-eyed peas for another use).  Continue to simmer soup for 5 minutes.  Stir in cider vinegar and season soup to taste with salt and pepper.  Serve and enjoy!

Makes 8-10 servings

December 24, 2011

Christmas Croquembouche


Christmas Croquembouche

It happened again, just as it does every year.  No matter how down on my luck I might be, you can guarantee that I will be bitten by the Spirit of Christmas year after year.  I don't think anyone can help it, really.  As soon as December 1st arrives, that holiday magic bursts into the air, spreading the Christmas Spirit.  It's contagious and it spreads quickly too.  All it takes is a simple wave to your neighbor and the wish of a Happy Holiday or a (less politically correct) Merry Christmas.

the pâte à chou process

I've been sick with the holiday cheer now for about three weeks.  I thought I had a pretty bad case of it, that is until I got home, back to Dallas, to my parents house.  My mom brings Christmas to life.  The walls reverberate with the Spirit of Christmas.  The sheer amount of decorations in the house is astonishing, but it makes you feel so warm and cozy inside.  You almost expect Santa and his elves to pop out from behind the corner somewhere.  

ready to bake and chocolate ready to melt

The Christmas Spirit that lives inside my parent's house inspired me to go the extra mile with a Christmas dessert this year.  I wanted it to embody this time of year.  Now tell me, what represents Christmas more than a Christmas Croquembouche?  It even looks like a Christmas tree!  

poke, fill and dip cream puffs

I'm not going to lie.  It took pretty much all day to make.  Granted, I'd have to stop to make things look pretty and take pictures, but all in all it was rather time consuming.  I even used a less traditional method that involves a styrofoam cone base.  (A traditional croquembouche would be made purely of cream puffs, from the center out).  

assemble the croquembouche

If I was going to make this again, and I just might have to, because it does make for a stunning presentation, I would break up the work.  The cream puffs, which make up the majority of the work, could be made two days ahead, the pastry cream filling and chocolate sauce made 1 day ahead, leaving the assembly for the morning of a festive Christmas get together.  Hey, you could even buy frozen cream puffs, eliminating most of the work, and taking all the credit for yourself.  Just don't tell anyone I told you so.  Merry Christmas!

croquembouche, pretty as a package

Croquembouche
Recipe Adapted from Epicurious.com

Ingredients:
For cream puffs (pâte à chou):
  • 1 1/4 cups water
  • 1 1/2 sticks unsalted butter, cut into 1/2" pieces
  • 1/2 tsp salt
  • 1 1/2 cups all-purpose flour
  • 6 large eggs
For pastry cream filling: 
  • 1 1/2 cups half and half
  • 1/2 cup granulated sugar
  • 2 large eggs
  • 1 large egg yolk
  • 2 tbsp all-purpose flour, sifted
  • 2 tsp vanilla extract
  • 1 cup heavy cream
For chocolate sauce:
  • 1 1/2 cups heavy cream
  • 9 oz bittersweet or semisweet chocolate, finely chopped
Assorted decorations of your choice: fresh cranberries, red hots, red and green M&Ms, silver dragées

Special Equipment:
Large pastry bag with 1/2-inch and 1/4-inch plain tips
clear tape
14-inch styrofoam cone (I bought mine at Michael's)
parchment paper
lots of toothpicks

Directions:

For cream puffs (pâte à chou):
1. Preheat oven to 425º F. 

2. To make the pâte à chou (French name for the dough used to make cream puffs), bring water in a heavy saucepan to a boil with butter and salt over high heat. Once boiling, reduce heat to medium-low. Add flour all at once and beat with a wooden spoon until mixture pulls away from sides of pan, forming a ball of dough.

3. Transfer dough to the bowl of a standing electric mixer and beat in 6 eggs, 1 at a time, on high speed, beating well after each addition. Pâte à chou batter should be stiff enough to hold soft peaks and fall softly from a spoon.

4. Butter and flour 2 baking sheets. Spoon pâte à chou into a large pastry bag fitted with a 1/2-inch plain tip and pipe about 55 mounds onto baking sheets, each about 1 1/2 inches in diameter, leaving 1 1/2 inches between mounds. With wet fingertips, gently smooth pointed tip of each mound to round puffs.

5. Bake puffs in upper and lower thirds of oven 10 minutes, switching position of sheets in oven halfway through baking. Reduce temperature to 400°F. and bake puffs 20 minutes more, or until puffed and golden, again, switching position of sheets in oven halfway through baking. Let puffs stand in turned-off oven 20 minutes. Transfer puffs to racks to cool. 

6. With a skewer, poke a 1/4-inch hole in bottom of each puff. Cream puffs may be made 2 days ahead and kept in an airtight container. Re-crisp puffs in 400°F oven 5 minutes and cool before filling. If making puffs ahead of time, wait to poke holes in each until after re-crisping and ready to assemble.

For Pastry Cream Filling:
1. Bring half and half to simmer in a heavy medium saucepan. Whisk sugar, eggs, egg yolk and sifted flour in a medium bowl to blend.

2. Gradually, and very slowly, whisk in hot half and half as to temper the egg mixture. Transfer mixture back into the saucepan. Whisk over medium-low heat until mixture thickens and comes to boil, about 5 minutes. Boil 1 minute. Pour into another medium sized bowl. Stir in vanilla. Press plastic onto surface of pastry cream. Cover and chill until cold, about 4 hours. (The pastry cream can be made up to this point 1 day ahead. Keep chilled.)

3. On the day your croquembouche will be assembled, place chilled pastry cream base into the bowl of a standing electric mixer. Beat pastry cream until just smooth and soft enough to fold in heavy cream (do not overbeat).

4. In a chilled bowl with cleaned beaters, beat heavy cream until it holds soft peaks. Fold whipped cream into pastry cream. Chill filling, covered, about 1 hour, or until cold.

For chocolate sauce:
1. Bring heavy cream to a simmer in a medium saucepan. Remove from heat and add chopped chocolate; stir until chocolate is melted and smooth. Cool sauce until lukewarm. (Sauce can be prepared 1 day ahead. Cover and refrigerate. When ready to assemble croquembouche, rewarm over low heat until just lukewarm and pourable, stirring frequently.)

To assemble the croquembouche:
1. To fill the cream puffs, transfer pastry cream filling to a large pastry bag fitted with a 1/4-inch plain tip. Insert the tip into the hole in the bottom of each cream puff and barely fill each puff (do not overfill). Set filled puffs aside.

2. Using tape, cover styrofoam cone with parchment paper. Double tape to secure the bottom of cone to a serving platter.

3. Line a tray with wax paper. Working with 1 filled cream puff at a time, dip bottom in chocolate sauce, leaving top 1/3 inch uncoated and letting excess drip off. Set aside on wax paper.

4. Once cream puffs are dipped, arrange 1 ring of puffs around base of cone, placing as closely together as possible and inserting a toothpick through each puff into cone, so as to attach puff to cone. Push toothpick as far into cone as possible.

5. Attach second ring of puffs above first, again packing tightly and staggering so puffs in second ring are not directly above puffs in first ring. Continue in same manner to attach remaining puffs. Finish covering cone with 1 puff attached to the top of cone.

6. Decorate by pushing cranberries, M&Ms, red hots or dragées into the gaps and spaces between the cream puffs.

7. To serve croquembouche, dismantle, 1 puff at a time and enjoy!

December 18, 2011

Vegetarian Wonton Soup


tofu wonton soup

Have I mentioned how much Jon and I like to eat?  Surely, I have.  Because sometimes it feels like that's all we do.  Whether it's snaking, cooking or eating out, the two of us do more than our fair share of consuming.  The upside?  We have a lot of fun doing it.  The foodie in me always knew I would need to end up with someone who loved to eat and try new foods as much as I did.

vegetable broth

Jon is a very adventurous eater.  He has helped me expand my food horizons immensely.  I've ventured out and learned to like oysters, mussels and clams thanks to him (Jon is a lover of seafood).  But we've also had many foodie firsts as a couple.  Whilst pushing aside the thought of what a certain food might actually entail, together we have tried bone marrow, sweetbreads (the thymus glands of veal, young beef, pork or lamb), foie gras and just last week, tongue tacos.  Yep, it's been a lot of fun.

sautéed tofu

The downside of our gluttony?  We've put on a combined weight of about 20 pounds in the four months that we've lived together.  Interestingly enough, the two of us are also very active people.  With winter setting in, however, mountain biking and hiking are becoming less likely weekend activities, while snuggling by the fire in front of the TV has become increasingly more common.  More accurately, snuggling in front of the TV with a glass of wine in one hand and something edible in the other.  Hence, the 20 pounds.

wonton filling

I think it's fairly easy to guess what Jon and I's New Years resolutions will be this year.  Not only is the idea to shed that extra weight, but we would also like to introduce more vegetarian based meals into our diet.  Vegetarian meals can be just as satisfying, hearty and delicious as those loaded with meat (perhaps, with the exception of a bloody ribeye...).  The added bonus: a diet with more veggie filled meals is not only more friendly on the waistline, it's much kinder to your bank account as well.

spoon filling, fold over and pinch corners

So, in the spirit of "practice makes perfect", I thought it wouldn't hurt to test out some vegetarian recipes a little early this year.  Don't get me wrong, Jon and I have yet to break our bad eating habits.  I mean, who can really stick to a strict diet around this time of year anyways?  But, as soon as that clock strikes midnight, you can bet that Jon and I are going meat free.  Well, at least two days a week that is.

wonton soup

Vegetarian Wonton Soup
Recipe by Karlie Kiser

Ingredients:
For the stock-
8 oz onions, coarsely chopped
4 oz leeks, outer layer peeled off and coarsely chopped
8 oz carrots, peeled and coarsely chopped
6 oz celery, coarsely chopped
½ bunch parsley
5 cloves garlic, peeled
2-inch piece fresh ginger, peeled and chopped
5 sprigs fresh thyme
2 bay leaves
1 tbsp black peppercorns
6-8 cups cold water

For the wontons-
8 oz firm tofu
1 ½ tbsp low sodium soy sauce
1 tsp rice vinegar
½ tsp sesame oil
2 tsp chili garlic sauce (available in the Asian food section of most supermarkets)
1 egg
2 scallions, minced (both white and green ends)
1 ½-inch piece fresh ginger, peeled and minced
2 cloves garlic, minced
¼ cup carrots, julienned then minced
¼ cup water chestnuts, minced
½ jalapeno, seeded and minced
½ tsp Kosher salt
¼ tsp black pepper
About 25 wonton wrappers

For the soup-
1 lb baby bok choy, leaves halved lengthwise, then sliced crosswise
6 oz shitake mushrooms, thinly sliced
½ cup water chestnuts
2 oz baby spinach
2 scallions, thinly sliced

Directions:
1. Place all ingredients for the stock, with the exception of water, in a 6 qt. stockpot. Add cold water to cover contents by 1 inch, about 6-8 cups and simmer over medium heat 45 minutes to 1 hour; do not let stock come to a boil. Skim off and discard any impurities or foam that rise and settle on the surface.

2. While the stock is cooking, heat a skillet over medium heat, spray with non-stick spray and crumble the tofu into the pan. Add soy sauce, rice vinegar, sesame oil and chili garlic sauce, stir and sauté for about 2 minutes. Remove pan from heat, scrape tofu into a large bowl and set aside to cool.

3. Once the tofu is cool enough to handle, add the egg, scallions, ginger, garlic, carrots, water chestnuts, jalapeno, salt and pepper. Mix together with your hands until just combined.

4. Put 1 wonton wrapper on a work surface (keep remaining wrappers covered with plastic wrap). Spoon a rounded teaspoon of filling in center of square, then brush water around the wonton’s edges. Lift 2 opposite corners together to form a triangle and enclose filling, pressing edges firmly around mound of filling to eliminate air pockets and seal. Moisten opposite corners of long side. Bring moistened corners toward each other and pinch together. Make the remaining wontons in the same manner, repeating the process until the tofu mixture is gone.

5. Once the stock has finished cooking, stir in the bok choy, mushrooms and water chestnuts and season the broth with salt and pepper; continue to simmer for 3-4 minutes, until the bok choy is crisp-tender. Add the spinach, sliced scallions and wontons and simmer, gently stirring, for another 3 minutes. Serve and enjoy!

Makes 6-8 servings

December 7, 2011

Perfect Popovers with Strawberry Butter


perfect popovers

Somehow, someway, the holiday season is already in full swing.  I feel like it was just summer time, as if I was just running errands in flip flops and out walking Dexter in shorts and a tank top.  Come to think of it, I was just wearing flip flops and tank tops.  I live in Arizona now, after all.  Unseasonably warm weather aside, December crept up on me this year.  2011 in general has been a whirlwind, but these last few months in particular have flown by.  I know that Christmas morning will be here before I know it, which means I better get a move on my Christmas shopping.

the popover process

As much as I like buying the perfect gift for a loved one, I'd rather make someone's face light up through the perfect holiday meal instead.  Cooking in my kitchen, glass of wine in hand, is simply more enjoyable, as far as I'm concerned, than fighting the crowds at the mall during this time of year.

ready for the oven

Growing up, my family spent Christmas Eve celebrating with several other families.  Each family provided a certain dish of either ham, dips, appetizers or a simple dessert.  The idea was to mix and mingle and munch.  Every Christmas morning my mom would make breakfast burritos and cinnamon rolls, keeping the food simple so that she could spend as much time with my brother and I, helping us set up and play with our new toys Santa had so lovingly left beneath the tree.

popovers high as the sky

As I get older, I am starting to think about the traditions I want to eventually instill in my family.  Do I want to go the way of a Christmas feast, complete with a roasted rack of lamb, or do I want to follow in my mother's footsteps, providing an uncomplicated, yet heart warming menu.  Knowing myself, I'll probably do a little bit of both.  But there is one item I know I'll include.  It has that impressive quality that I typically like to showcase, but it's also deceptively simple to make.  Enter the popover.

my own personal dishwasher

I can always count on popovers to induce "oohing and ahhing" from my guests.  Not only are popover's sky high heights a sight to behold, but they are also airy, eggy and simply delicious.  I usually serve popovers with a side of honey butter.  This time around, however, I thought I'd try something a little different, strawberry butter.  Boy, am I glad I did.  This butter helps popovers make the move from  simple side to main event, tasty enough to be served up as dessert.

eggy, airy popover

Popovers with Strawberry Butter
Recipe Adapted from Neiman Marcus via Grouprecipes.com

Ingredients:
3 1/2 cups whole milk
4 cups all-purpose flour
1 1/2 tsp salt
1 tsp baking powder
6 large eggs, at room temperature
Strawberry Butter (recipe follows)
* special equipment: nonstick popover pan

Directions:
1. Place milk in a bowl or glass measuring cup and microwave for two minutes or until warm to the touch.  Set aside.

2. Sift flour, salt and baking powder together into a large bowl.  Crack eggs into the bowl of a stand mixer.  Using the whisk attachment, whisk on medium speed for about 3 minutes, until foamy.  Turn mixer speed down to low and gradually add the warm milk.  Next, gradually add the flour mixture and beat for 2 minutes.  Let the batter rest at room temperature for 1 hour. 

3. Preheat oven to 450º F.  Spray popever pan generously with nonstick spray.  Fill each well almost to the top with batter and place the popover pan on a cookie sheet.  Transfer to the oven and bake for 15 minutes.  Turn the heat down to 375º F and continue to bake for 10 minutes longer, until the popovers are deep golden brown.  Remove pan from oven, pop out the popovers and let cool on a wire rack.  Serve hot with Strawberry Butter. 

* There will be extra batter left over.  Just set aside and use once the first batch of popovers are finished.

Makes approximately 18 popovers


strawberry butter

Strawberry Butter

Ingredients:
3/4 cup butter (1 1/2 sticks), at room temperature
1/2 cup good quality strawberry preserves

Directions:
1. Place butter in a medium sized bowl and beat with an electric mixture until smooth, about 2 minutes. Add the strawberry preserves and continue to beat until fluffy, about 2 more minutes. 

November 18, 2011

Truffled Mushroom Tagliatelle


mixed mushroom truffled fricassee

I had a birthday.  Another birthday.  My 27th one to be exact.  I don't feel near as old as I actually am.  Sometimes I think I'm still 22, that is until the monthly bills start rolling in or perhaps when I glance in the mirror and see the early signs of aging starting to appear on my once youthful face.  Despite facing yet another birthday, inching me ever closer to that dreaded 3-0, I like to take this time of year to pamper myself a little bit.

enokitake, chanterelle and oyster mushrooms

Instead of using the birthday money I get from relatives to put towards bills (which is exactly what I should be doing), I allow myself to buy a little something just for me.  I mean, I deserve it right?  I also let myself truly indulge the week of my birthday.  Cake, red meat, an extra margarita or two.  So when it came time to decide what I was going to whip up for this blog last week, I thought it should include one of my absolute favorite things: truffles.

pricey yet delicious chanterelles

Unfortunately, I wasn't able to use actual truffles (I can't afford such luxuries at the moment), but I did use plenty of truffle oil and a beautiful blend of earthy, unctuous mushrooms.  I had found a delicious looking recipe for a mushroom fricassee in September's Bon Appétit.  I had been looking for a good excuse to make it and my birthday seemed as good as any. (Side note: a fricassee by definition is a dish of pieces of meat or vegetables stewed in stock and served in a white sauce).

white truffle oil

Bon Appétit's version of mushroom fricassee called for using only chanterelle mushrooms.  However, when I got to Whole Foods and realized that chanterelle mushrooms were $29.99 a pound, I decided I'd better take a different route.  I went with a mixture of chanterelles, oyster mushrooms and the adorable looking enokitake mushrooms.  Not only did I save myself roughly $15, but I thought the mixture of mushrooms would make for an interesting looking dish.

stewed mushrooms

OK, enough about mushrooms, let's talk more about my birthday.  Jon's gift to me was something I've always wanted.  I got this same gift for my 13th birthday, but for some very odd reasons, the gift fell through.  Jon made it happen for me though.

almost ready for take off

that fire was so hot!

He got me the hot air balloon ride that I've been waiting to take for 14 years.  Despite the 5:30 AM wake up time and the very unexpected hangover, the ride was magical and the view beautiful.

how about that view

my hero ;-)

It was everything I thought it would be and even more, because now I got to share the experience with the man I love.  Thank you, Jon, for making one of my dreams come true.

mixed mushroom tagliatelle

Mixed Mushroom Fricassee with Tagliatelle
Recipe adapted from Bon Appétit, September 2011

Ingredients:
6 tbsp unsalted butter, divided
2 tbsp extra-virgin olive oil, divided
1 small yellow onion, finely chopped
kosher salt
freshly ground black pepper
4 garlic cloves, minced
1/4 cup dry white wine
8 oz chanterelle mushrooms
4 oz oyster mushrooms
4 oz enokitake mushrooms
1/2 cup heavy cream
pinch of freshly ground nutmeg
1 tsp fresh thyme, chopped, plus more for garnish
fresh lemon juice
1/4 lb tagliatelle pasta, cooked al dente
white truffle oil 

Directions:
1. Melt 3 tablespoons of butter with 1 tablespoon of olive oil in a large skillet over medium-high heat.  Add onion, season with salt and pepper and cook, stirring occasionally, until softened and lightly golden, 4-5 minutes.

2. Add garlic and cook for 1 minute.  Add wine, stir to mix and cook until liquid is reduced by half, about 2 minutes.  Add remaining 3 tablespoons of butter, remaining 1 tablespoon of olive oil and mushrooms.  Cook, stirring occasionally, until mushrooms are lightly golden, about 5 minutes. 

3. Add cream and nutmeg and cook until slightly thickened, about 2 minutes.  Stir in 1 teaspoon thyme and season to taste with salt, pepper and lemon juice.  Add cooked pasta and toss until evenly coated.  Drizzle with truffle oil to taste (I like to add 2-3 teaspoons).  Garnish with more thyme and serve.

Makes 4 servings

November 7, 2011

Wildly Wonderful Whiskey Cake


good ol' fashioned Whiskey Cake

It has been just over thirteen weeks since I have unloaded my things (more than I think Jon was expecting) into my new home in Tempe.  It would be a lie to say that I haven't felt the least bit homesick.  Don't get me wrong, Jon is great company- we have so much fun together- but every now and then, I feel that slight pang in my chest; the longing to see my friends, go to lunch or run errands with my mom or even to eat at one of the restaurants that I had grown so fond of.  Living in the Dallas area for over 16 years gave me ample time to grow deep and meaningful relationships with several restaurants.  There are many that became permanent fixtures in my dining out routine, none more so than Mi Cocina (what I would give for a Mambo Taxi...), but Whiskey Cake, quite possibly my new all time favorite restaurant, has been on my mind more often than I would like.

fold that date puree

My constant day dreaming of the food at 
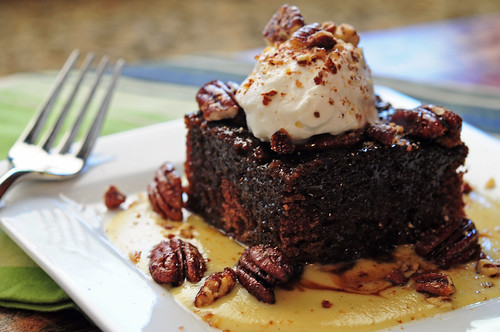
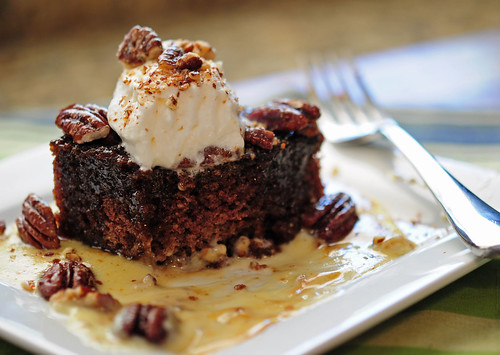
Whiskey Cake is starting to become a problem.  One day it's thoughts of the Mesquite Grilled Redfish, the next it's their "3 Little Pigs" pulled pork sliders.  But most often, I dream of having a large slice of their namesake dessert placed in front of me, their Whiskey Cake.

bourbon sauce ;-)

It is unlike any other dessert I have ever tasted- rich, sticky, stinking of good whiskey and sinfully delicious.  The mere thought of sliding my fork down the edge of that cake into a pool of bourbon sauce is almost enough to get me to book a flight back to Dallas.  Almost.

on it's way...

The thing is, why would I fly all the way back to Texas when I could have Whiskey Cake right here, in the comfort of my new home?  Well, to put it simply, I wouldn't.  Not only does Whiskey Cake serve up fresh, local and seasonal ingredients (a restaurant trend that I hold in the highest regard ), but this restaurant has won me over in another big way.  You can request any recipe for any dish off their menu. Now, in my experience, most restaurants who provide recipes or publish cookbooks supposedly filled with said recipes, will subsequently tweak an ingredient here or leave out an ingredient there, thus resulting in a failed attempt to remake your favorite restaurant dish at home.  My thoughts on this matter: If you don't wan't to give out the real recipe for a dish off your menu, then don't give out the recipe at all.

drizzle that toffee sauce

I can't tell you how many times I have bought a cookbook from a bakery or restaurant only to fully regret that purchase days later after my pursuit to mimic a particular dish ends in complete misery.  My desire for a slice of Whiskey Cake was too strong to let this deter me, however.  I figured I should give this particular recipe a fair shot, although I will admit I was skeptical of it from the get go.  But with doubts and fears aside, I completed all 5 components needed to make the Whiskey Cake what it is: an absolute masterpiece.  Did I tweak the recipe to make it somewhat my own?  Perhaps...  I may or may not have tripled the amount of whiskey originally called for...  I'll let you be the judge of that.

Whiskey Cake with a little extra whiskey

Whiskey Cake
Recipe slightly adapted and interpreted from Whiskey Cake, in Plano, Texas

Ingredients:
Date Cake (see recipe below)
Bourbon Sauce (see recipe below)
Toffee Sauce (see recipe below)
Spiced Pecans (see recipe below)
Whipped Cream (see recipe below)

* I know this recipe looks like a lot of work, what with there being 5 separate components, but in order to make it a little easier on yourself, make 3 components one day and 2 the next.  Each component really doesn't require that much time and I promise the effort will be well worth it!

Directions:
1. Cut the Date Cake into 12 equal pieces.  Poke several holes in the top of each piece using a wooden skewer or chopstick.  Arrange the cake pieces on a baking sheet covered with nonstick foil.

2. Heat the oven to 500º.  Pour 1/4 cup of Toffee Sauce over each piece of Date Cake.  Place toffee soaked cake pieces in the oven for about 4-5 minutes, until the Toffee Sauce is bubbling and the cake is warmed throughout.

3. Spoon 1/4 cup of Bourbon Sauce onto 12 individual plates or bowls.  Place each piece of warmed cake in the middle of each pool of Bourbon Sauce.  Finish each piece with a large dollop of Whipped Cream and a sprinkling of Spiced Pecans.  Enjoy!

Makes 12 servings


Date Cake

Ingredients:
1, 8 oz package of dried pitted dates, chopped into 1/2" pieces
2 tsp baking soda
1 3/4 cup boiling water
1 stick unsalted butter, softened
1 cup + 2 tbsp granulated sugar
3 jumbo eggs, at room temperature
1 3/4 cup self rising flour (*see note below to make your own)
3 tbsp Sugar in the Raw (turbinado sugar)

Directions:
1. Heat the oven to 350º.  Place dates, baking soda and boiling water in a medium sized bowl.  Allow to sit for 15-20 minutes until the dates are softened.  Place the date mixture in a food processor for 2 minutes to form a paste.

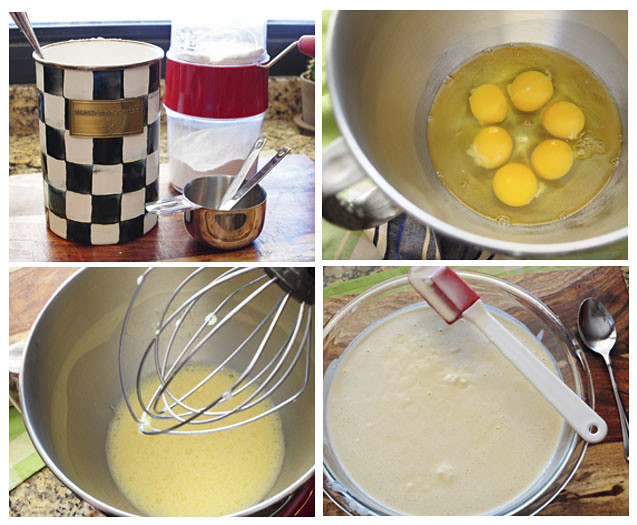
2. Using a stand mixer fitted with the paddle attachment, cream the butter on medium speed for about 1 minute.  Add the sugar and continue to cream for 3 minutes longer.  Scrape down the sides of the bowl using a rubber spatula.  Add the eggs, one at a time, mixing in between to fully incorporate each egg.  Scrape down the sides of the bowl.  With the mixer running on low, add the flour, about 1/2 cup at a time, and mix just until the flour is no longer visible.

3. Remove the bowl from the stand mixer.  Add the date paste and gently fold in using a rubber spatula.

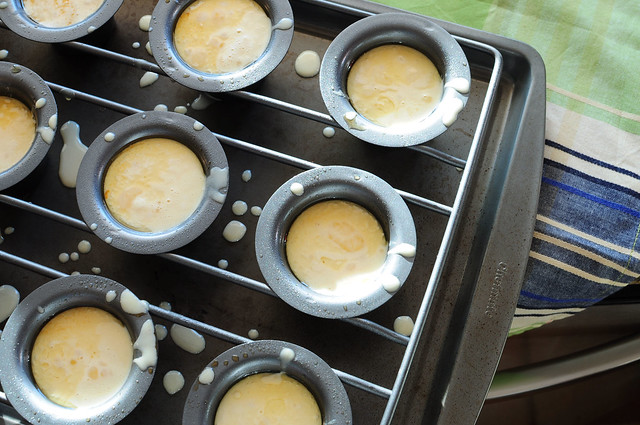
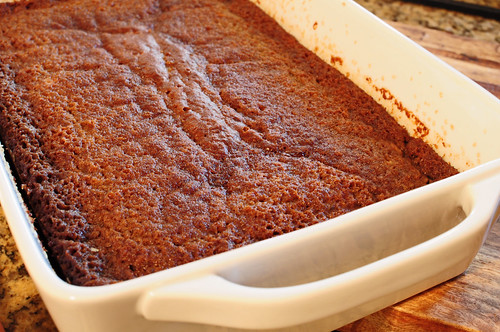
4. Spray an 8"x14" cake pan with non-stick spray.  Sprinkle the turbinado sugar into the cake pan and move the pan around until the sugar coats the bottom and all sides.   Pour in the cake batter and bake for 30-40 minutes or until a toothpick comes out clean.

5. Allow the cake to cool at room temperature for 20 minutes.  Flip the cake out onto a parchment paper lined tray.  Leave at room temperature to cool completely.  Wrap the cake in plastic wrap and store at room temperature until ready to use.

*To make Self-Rising Flour:  mix together 3 cups of all purpose flour, 2 tsp of iodized salt and 1 tablespoon of baking powder in a medium sized bowl.  Use immediately or store in an airtight container.


Bourbon Sauce

Ingredients:
2 cups heavy cream
1/2 cup granulated sugar, divided
1vanilla bean, split
4 jumbo egg yolks
1 tsp vanilla extract
2 tbsp good bourbon (I used Maker's Mark)

Directions:
1. Bring heavy cream, 1/4 cup sugar and vanilla bean to a simmer in a small to medium sized sauce pot.

2. In a mixing bowl, whisk the egg yolks and other 1/4 cup sugar together until frothy.

3. While stirring, slowly add about 1/2 of the heavy cream mixture to the eggs.  Stir together gently.  Pour the egg mixture into the pot of remaining heavy cream.  Continue to cook over medium-low heat until the mixture thickens and coats the back of a spatula or spoon.

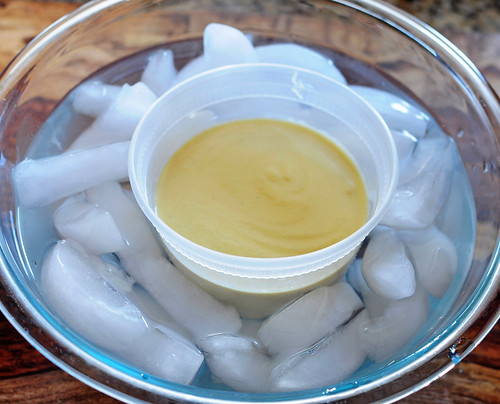
4. Stir in the vanilla extract and bourbon and remove from heat.  Pour the mixture through a strainer into a container.  Place the container of bourbon sauce in an ice bath until cool.

5. Either use the sauce immediately, or store in the fridge until ready to use.  If stored in the fridge before use, re-heat in the microwave at 10 second intervals on 50% power until thinned and slightly luke warm.


Toffee Sauce

Ingredients:
1 stick unsalted butter
1 lb light brown sugar
2 cups heavy cream
2 tbsp good bourbon
1 tbsp vanilla extract

Directions:
1. Place butter in a heavy bottom sauce pot over medium heat.  Once melted, add brown sugar and continue to cook for about 8 minutes, stirring occasionally.

2. Add heavy cream and allow to cook for another 6-7 minutes, still stirring occasionally.

3. Remove pan from heat and stir in bourbon and vanilla. Use sauce immediately or store in the fridge for up to 3 days.  Reheat before using.


Spiced Pecans

Ingredients:
1 lb pecan halves
2 tsp water
3/4 cup maple syrup
1/2 tsp Kosher salt
1/2 tsp black pepper
1/2 tsp cayenne pepper

Directions:
1.  Heat oven to 350º.  Mix water, syrup, salt, and both peppers together in a small bowl.  Place pecans in a medium sized bowl.  Pour maple syrup mixture over pecans and mix until all are evenly coated.

2. Spread the pecans out on a baking sheet covered with foil.  Bake for 12-15 minutes.

3. As soon as the pecans come out of the oven, scrape the pecans off the pan and break up pecan clumps to prevent from sticking together.  Let cool completely.  Store in an airtight plastic container at room temperature.

(At this point, I chopped up about half of the pecans to sprinkle on top of the cake.  I left the other portion of pecans whole to use for other purposes, like as a salad topping).


Whipped Cream

Ingredients:
2 cups heavy cream
1/2 cup granulated sugar
1 tsp vanilla extract

Directions:
1. Using a stand mixer fitted with the whisk attachment, add the heavy cream, sugar and vanilla to the bowl.  Beginning at low speed and slowly increasing the speed to high, whip the mixture together until slightly stiff peaks form.

2. Use immediately or store in the fridge until ready to use.

October 27, 2011

Tecate Skirt Steak Tacos


tecate skirt steak tacos

I’m not sure if I’ve ever talked about my love for Mexican food on this blog or not…. (The majority of you reading this blog know me personally, but my goal is to reach an audience who has never met me. So sharing some personal details is imperative). I believe my passion for chips and salsa, tacos and a cheesy enchilada was instilled in me at birth. My mom craves Mexican food unlike any other person I’ve ever met. She has always said that she could eat Tex-Mex food morning, noon and night, every day of the week. I, without a doubt, believe that statement to be true. Therefore, I’d like to think that my need for Mexican cuisine is genetic; an inherited trait passed on from my mother.

AZ Taco Festival Taco #1

Luckily, for me, Jon shares the same passion. He too, can eat Mexican food every day of the week. One of our greatest commonalities is our shared love of food, whether it be cooking, eating, dining out or ordering in, I can always count on him to share a good meal. However, when it comes to Mexican food, Jon likes things just a tad bit spicier than I do. A tad bit spicier might be an understatement… This guy can swallow an extraordinary amount of spice, and I thought I liked things spicy!

AZ Taco Festival Taco #2

You can imagine our delight when we found out about the 2nd Annual Arizona Taco Festival. It was almost as if this festival was created with the two of us in mind. A whole day of sampling tacos… after tacos… after tacos. Oh yeah, and lots of tequila. It was a day of pure bliss.

mustache anyone

I tried to prepare myself in advance. I studied the taco vendors that would be peddling their incarnation of the ideal street taco. I wanted to have a plan of which taco stands were an absolute must to try out. Did I mention there were 42 of them? I had to use my time (and money) wisely.

AZ Taco Festival Taco #3

Ok… So here is the point where I was going to, oh so eloquently, describe the “best of the best” tacos I consumed on that glorious day. But, as it just so happens, I am, at this very moment, sitting on a plane on my way to Chicago, trying to use my time wisely by writing this blog post and I just realized I forgot my Taco Festival notes at home… I knew, standing in that security line, that I had most definitely left something behind. Damn. I guess I’ll just have to describe what I can from memory…

AZ Taco Festival Taco #4

There are two tacos that stand out in my mind. I’d have to assume that those are the two I’d consider to be the “best” or at least most memorable…

golf ball sized tortilla rounds

#1: The Duck Confit Tacos from El Hefe
The flavor of the duck was exceptional, with a delicious cherry compote reduction.

tortilla tortilla

#2: The Wild Mushroom Tacos from T. Cook’s
Not exactly the biggest fan of vegetarian tacos, I’d have to say these were the most original in my opinion. The flavor was earthy and complex. Bonus: amazing corn tortillas, thick with an almost “al dente” like texture.

smoky chipotle salsa

From here, the plan was to recreate my favorite taco from the festival for this blog, however, out of the 20 plus tacos I tried, the duck tacos from El Hefe won me over. Sorry, but at this point in my life, I don’t exactly have the time to confit anything. So, instead, I decided to create a taco that I would have served if given the opportunity to auction off tacos from a humble tent in the Arizona heat. I present to you a Tecate Skirt Steak Taco. The Arizona Taco Festival, in my opinion, was lacking steak tacos, so I thought I’d fill that void. I tried my best at some homemade tortillas, marinated the steak for 24 hours and made a chipotle salsa. I was pretty pleased with the results, especially the flavor of the steak, which was the only component of the taco that I completely came up with myself, thank you very much. Overall though, it is a pretty tasty taco. Jon even gave his approval, and considering his taste for tacos, I’d have to say my Tecate Skirt Steak Tacos are a winner. Try ‘em for yourself, and let me know what you think!

taco, burrito, what's comin' out of...

Tecate Skirt Steak Tacos 
Recipe by Karlie (with the help of others) 

Basic Ingredients:
Tortillas (see recipe below)
Tecate marinated skirt steak (see recipe below)
Smoky chipotle salsa (see recipe below)
1 avocado
1 fresno chili
¼ cup crumbled cotija cheese
¼ cup cilantro leaves
lime wedges

Directions:
1. Make sure the tortillas are warm and ready to use. Top each tortilla with a few slices of warm skirt steak, a spoonful of chipotle salsa, a slice of avocado, a slice or two of Fresno chili, cotija cheese, cilantro leaves and a squeeze of lime. Enjoy!

Enough for about 10-12 tacos


Flour Tortillas (Recipe adapted from AllRecipes.com)

Ingredients:
3 cups all-purpose flour
2 tsp baking powder
1 ½ tsp salt
¾ cup (plus the optional addition of 1-2 tbsp) shortening
¾ cup hot water (just under boiling)

Directions:
1. Combine the flour, baking powder and salt in a large bowl or in the bowl of a stand mixer. Drop the shortening, in small clumps, into the bowl and rub into the flour mixture by hand until the mixture looks crumbly. At this point, if the mixture does not resemble course corn meal, add 1-2 tablespoons of shortening. Add the hot water, so that the mixture is moist.

2. Using the dough hook of a stand mixture (or your hands) knead the dough until it all comes together and forms a soft round shape. If the dough is still to crumbly, or won’t come together at this point, add 1-2 more tablespoons of flour.

3. Separate the dough into about 15-18 golf ball sized balls. Place on a cookie sheet and cover with a damp towel. Let rest for 1 hour at room temperature.

4. Lightly flour a work space, and roll each ball with a rolling pin to about 1/8 inch thickness. The edges will be rough. You can use the top of a round glass, coffee mug or Tupperware to cut out a perfectly round tortilla if you like.

5. Using a cast iron skillet on medium heat, cook each tortilla for about 1 to 2 minutes on each side, or until the tortilla starts to brown slightly. Keep the tortillas warm until ready to use.

Makes about 15-18 4 inch tortillas


Marinated Skirt Steak (Recipe by Karlie Kiser)

Ingredients:
1 lb skirt steak
1, 12oz can Tecate beer
2 tbsp soy sauce
1 tbsp liquid smoke
½ lime, juiced
2-3 cloves garlic, pressed
¼ cup packed brown sugar
1 tsp freshly grated ginger

Directions:
1. Lay the skirt steak on a cutting board, or flat surface. Using a meat tenderizer (I used a potato masher) pound the meat on both sides several times to break down the tissue. Place steak in a small casserole dish or large Ziplock bag if you like.

2. Mix the Tecate beer, soy sauce, liquid smoke, lime juice, garlic, brown sugar and ginger in a medium sized bowl until combined. Pour over the steak and let marinate for at least 12 hours, or up to 1 day. If using a casserole dish, be sure to flip the steak half way through the marinating process.

3. Heat either an outside grill or stove top grill to medium high heat. Cook the steak for about 5-6 min on each side for medium rare. Let the steak rest for 5 minutes before slicing thinly across the grain.


Smoky Chipotle Salsa (Recipe adapted from Men’s Health, September 2011)

Ingredients:
3 canned chipotle chilies in adobo, plus 1 ½ tbsp adobo sauce
2 cups canned fire roasted tomatoes (I used Muir Glen)
½ cup sliced sweet Vidalia onion
3 tbsp tomato paste
1 tbsp honey
3 garlic cloves, sliced
1 tsp grated orange zest, plus 2 tbsp of juice from the orange
1/3 cup cilantro leaves
½ jalapeno sliced
½ tsp salt
freshly ground pepper to taste

Directions:
1. In a blender or food processor, puree all the ingredients until smooth.

2. In a medium sized saucepan, bring the puree to a boil; lower the heat and simmer until it no longer tastes raw, about 5 minutes. Pour the sauce into a large, freshly washed jar. It will keep in the fridge for up to 1 month.

Makes about 2 cups