It's time to usher in a New Year, yet again (I could have sworn I just celebrated this holiday...). It really is true that the older you get, the faster the years fly by. Surely, someone can figure out how to slow time, even a little bit? Just wishful thinking...
Anyways, this was Jon and I's first time ringing in the New Year together, so I thought it would be the perfect time to begin some new traditions. Jon's mother shared with me a few months ago that every Christmas Eve, their family would come together to share a rich and delectable lobster bisque and toast one another with a glass (or three) of champagne. I loved the idea so much that I thought Jon and I should pick up the tradition for New Year's Eve.
A few problems have since blossomed. And as I'm sure you have now guessed, the lobster bisque didn't happen. First of all, I needed a dish that required much less attention than a labor intensive lobster bisque, as I spent New Years weekend recovering from a respiratory infection. Second, Jon and I have had to buckle down; we are hence forward following a strict budget. Therefore, a 3 lb live lobster seemed a little impractical and much too frivolous.
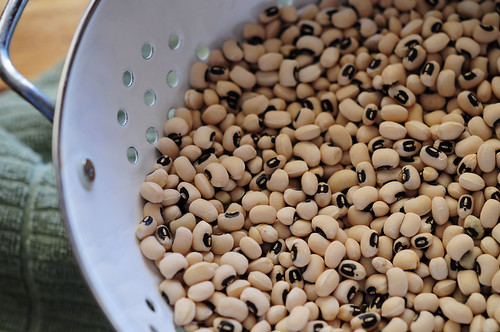
So I thought back to a tradition I grew up with, one that had its roots in the South- and you should all know that I'm utterly eager to make Jon as Southern as I possibly can. My mother encouraged my family to eat a healthy serving of black eyed peas every New Year's Day growing up. Whether the black eyed peas were canned, dried or frozen and served either in a dip, casserole or soup- no matter what form you ate them in, they were meant to bring you good luck during the upcoming year.
Now, I've never really been a big fan of black eyed peas, but year after year I ate my share of them, because I could never afford to turn my cheek on the opportunity for a little extra luck. 2012 brings about the same predicament. I'm in desperate need of little luck as I enter this new year, meaning that once again, I feel I can't abandon this old Southern tradition. Hopefully this year's helping of black eyed peas will bring me enough luck that by this time next year, just maybe, I'll be able to have my lobster bisque... and eat it too.

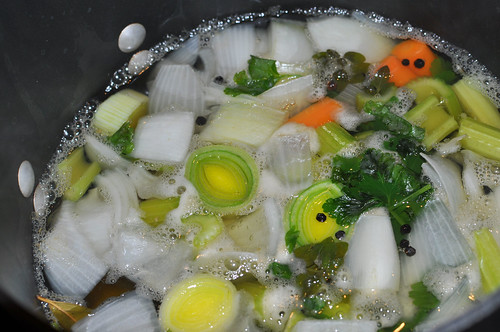
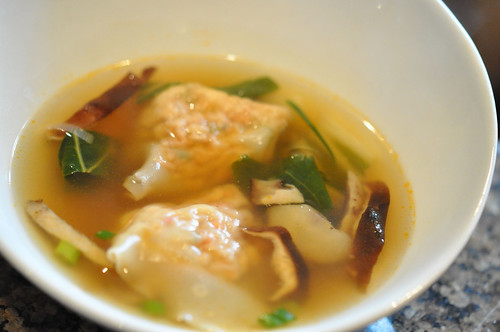
Black-Eyed Pea and Ham Soup with Collard Greens
Recipe adapted from Epicurious.com
Ingredients:
16 oz bag dried black-eyed peas
2 tbsp olive oil
2 tbsp unsalted butter
1 1/2 medium sweet onions, diced
2 ribs celery, diced
1 large green bell pepper, diced
3 garlic cloves, minced
4 cups chicken stock
2 cups water
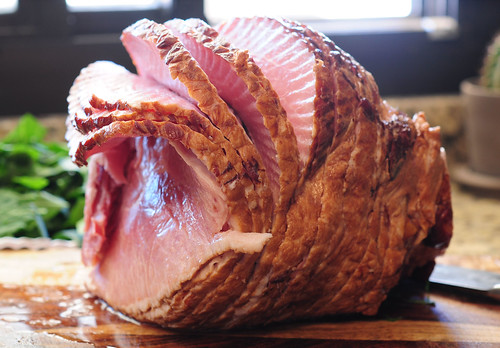
8-10 oz cooked ham, shredded or diced
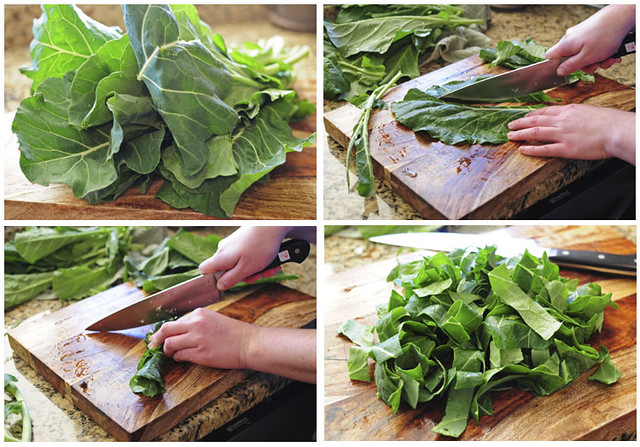
3/4 lb collard greens
2 small bay leaves
2 tsp herbs de provence
2 tsp red pepper flakes (or more to suite your taste)
2 sprigs fresh thyme
2 tsp apple cider vinegar
salt and pepper to taste
Directions:
1. Fill a large saucepan with 8 cups cold water. Add black-eyed peas and set over medium to medium low heat. Let simmer for 1 hour, but do not let it come to a boil. Once black-eyed peas are tender, drain, reserving cooking liquid. Set both liquid and black-eyed peas aside.
2. In a 3-qt sauce pan or small stock pot, heat 2 tablespoons of butter and 2 tablespoons of olive oil over medium heat. Add onions, celery and bell pepper and saute until tender, stirring occasionally, about 5 minutes. Add garlic, season with salt and pepper and saute 2 minutes longer.
3. While onion mixture is cooking, remove and discard stems and center ribs from collard greens and cut leaves into 1-inch ribbons. Add chicken stock, 2 cups of cooking liquid from black-eyed peas, 2 cups water, ham, collard greens, bay leaves, herbs de provence, red pepper flakes and thyme to onion mixture and simmer 20 minutes, until collard greens are tender.
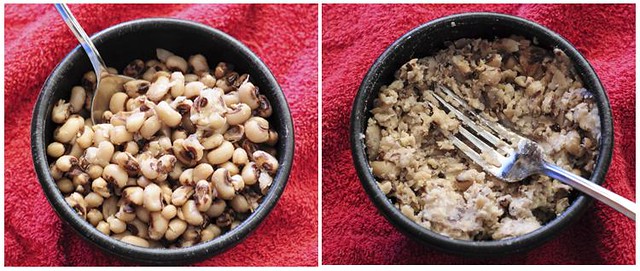
4. Move a quarter of the black-eyed peas to a small bowl and mash with a fork. Stir mashed black-eyed peas and another quarter of whole black-eyed peas into the soup. (Reserve remaining black-eyed peas for another use). Continue to simmer soup for 5 minutes. Stir in cider vinegar and season soup to taste with salt and pepper. Serve and enjoy!
Makes 8-10 servings