Showing posts with label Desserts. Show all posts

September 22, 2012

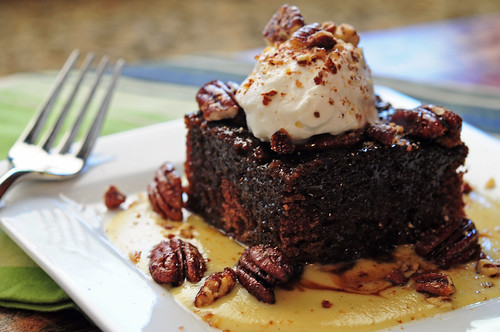
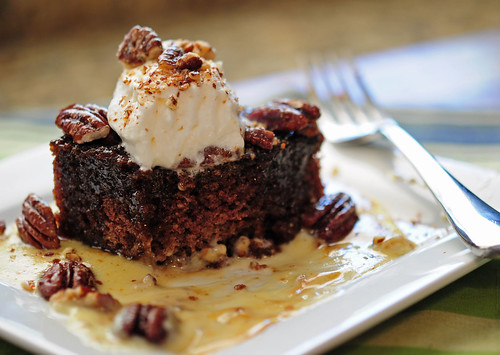
Knock You Naked Brownies


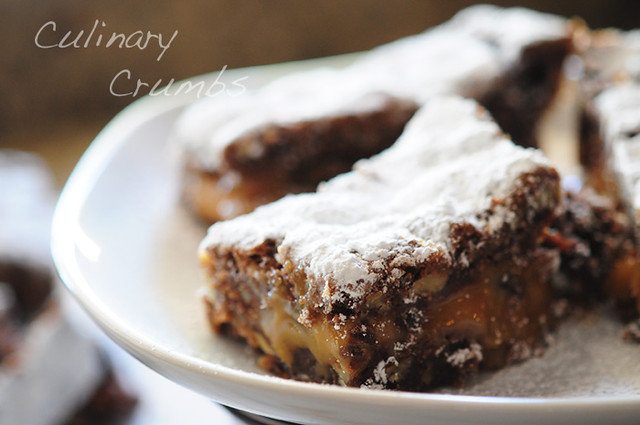
knock you naked brownies

If you knew me well, you would know that I can almost always relate a life experience to an episode of Friends.  It’s one of my many valuable and indispensable traits.  Quoting one-liners from Ross, Rachel, Chandler, Joey, Monica or Phoebe has become almost a pastime for my family.  We do it so often, in fact, that it has really become second nature.  It’s scary sometimes.  Perhaps though, it’s because I can relate to those characters so much, especially Monica with her obsessive behavior and OCD like qualities where everything has to be in its place and freakishly clean.  Yep.  That’s me.

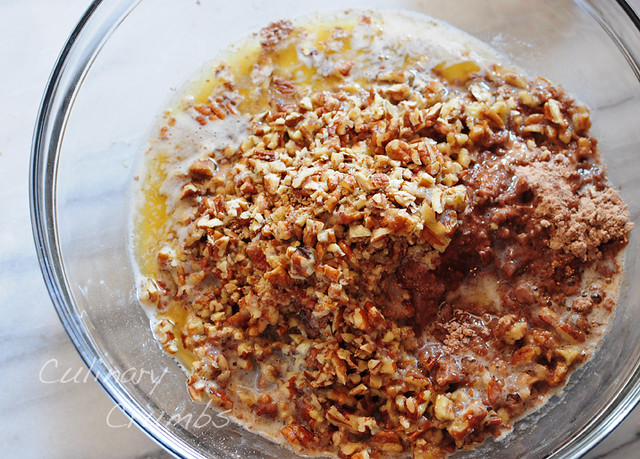
sugar, pecans and glorious butter

There is one particular episode where Monica physically exhausts herself to make the apartment guest ready, complete with a presentation of baked goods, and as the other Friends arrive, she proclaims in a voice of exasperation, yet contentment “I’m always the hostess.”  Well, that’s me too.  I feel such a burning need to provide and impress guests sometimes that it can become overwhelming and stressful.  I know I’m not alone in these emotions, but even when I tell myself that there is simply not enough time or resources to project the welcoming I intend to, my need to be a good hostess almost always takes over. 

July 12, 2012

Lemon Bars


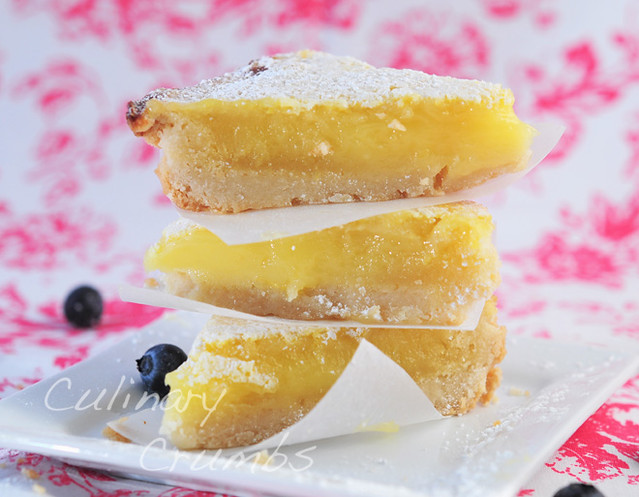
silky, lucious lemon bars

I’m still trying to figure out if I’m more of a sweet tooth or salty fan. You would think I’d have that figured out by now. The thing is I’m pretty sure I like both equally. There are times when I down right crave a bag of salt & vinegar chips. Then again, there are also days when nothing else will do but a heaping scoop of Bluebell Banana Split Ice Cream. (Have you had this flavor of ice cream? No? Do your self a favor and go to your nearest grocery store and buy some NOW. It’s life changing).

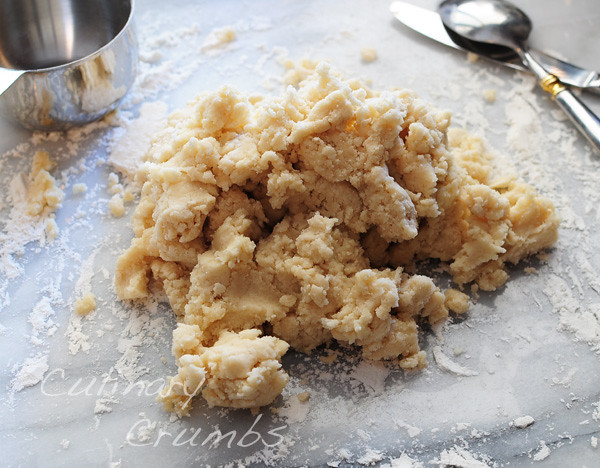
crumbly buttery dough

The days that I do crave sweets, I’m often torn between satisfying myself with something chocolate or fruity. Do I want a dessert that’s more rich and substantial or do I want something lighter and perhaps a little tart? That’s often my predicament. Decisions like this make for quite the stress filled life, I know.

June 17, 2012

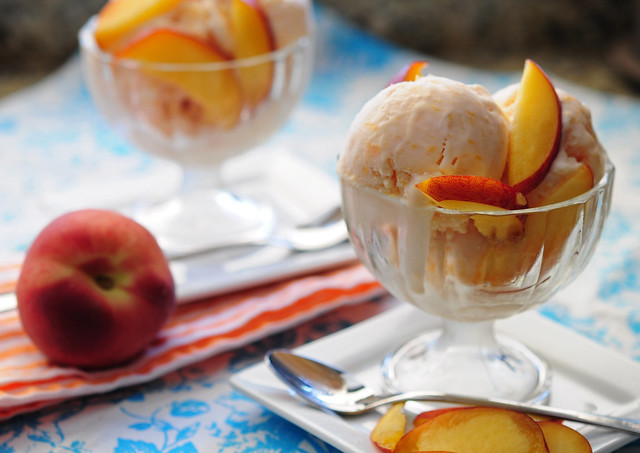
Peach Ice Cream


peach ice cream

There are so many reasons to love this time of year, despite the blistering heat and lack of rain that has left our herb garden sad and shriveled. Summer promises golden tan lines (and freckles for moi), pool parties, barbeques, vacations, slip ‘n slides and blockbuster movie releases. More importantly, however, is the fact that along with the arrival of summer comes peach season, and there is just something so special about biting into that first ripe, juicy, sweet and succulent peach of the year.

summer peaches, nature's treat

I must say, that of all the fruit fillings that are available to fill a flaky, buttery crust- and let’s face it, the options are pretty much endless- the simple filling of peaches, cooked down with a little water and sugar, is by far my favorite. I don’t think there are many other things in this world that can satisfy me and put such a smile on my face like a plate of good ol’ fashioned peach cobbler. Peach desserts don’t need the addition of any bells and whistles. If you buy them ripe enough, you hardly even need to add sugar. Peach cobblers, peach pies or whichever way you prefer to eat your peaches- they’re better off when kept simple, allowing the peaches to really sing.


December 24, 2011

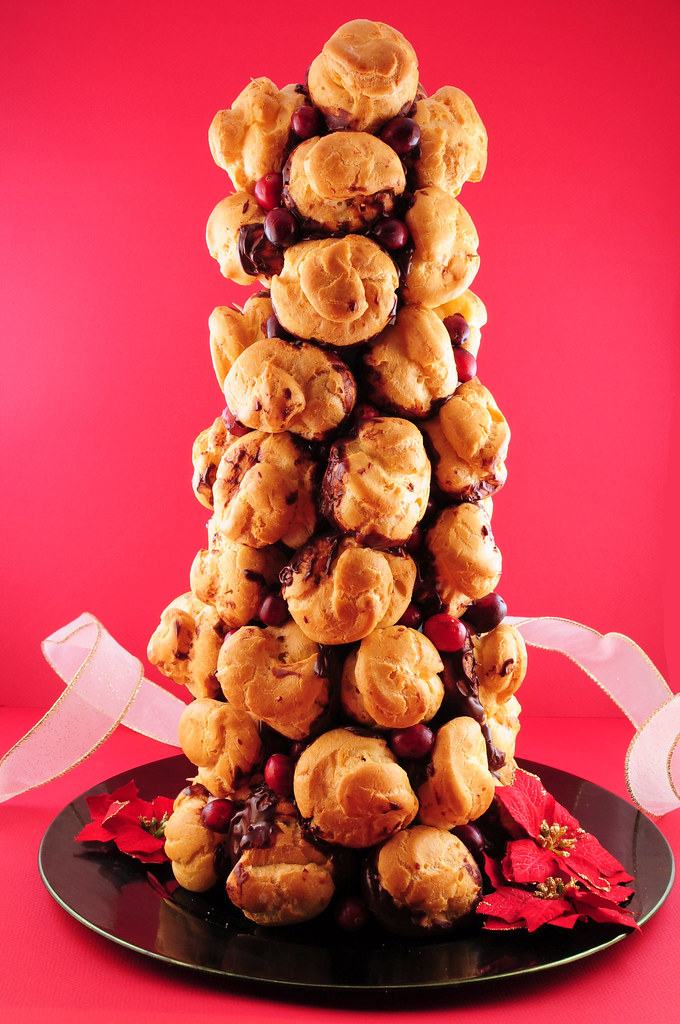
Christmas Croquembouche


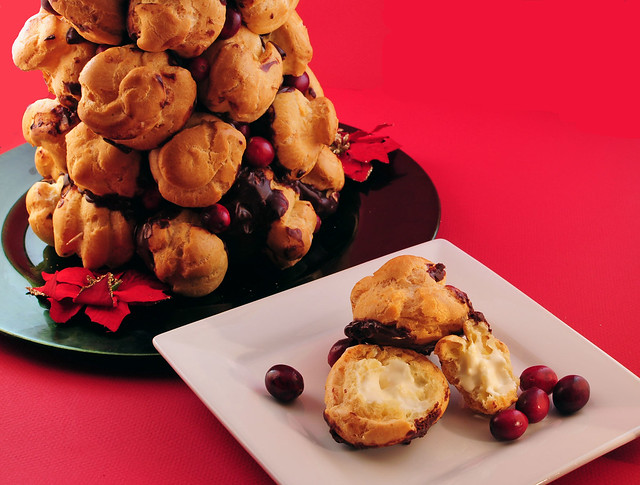
Christmas Croquembouche

It happened again, just as it does every year.  No matter how down on my luck I might be, you can guarantee that I will be bitten by the Spirit of Christmas year after year.  I don't think anyone can help it, really.  As soon as December 1st arrives, that holiday magic bursts into the air, spreading the Christmas Spirit.  It's contagious and it spreads quickly too.  All it takes is a simple wave to your neighbor and the wish of a Happy Holiday or a (less politically correct) Merry Christmas.

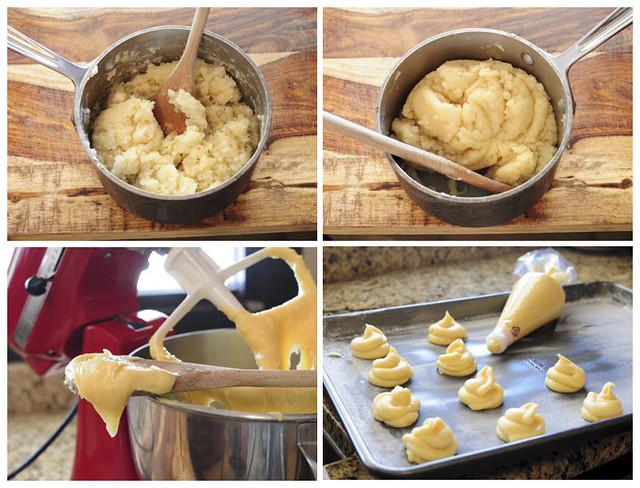
the pâte à chou process

I've been sick with the holiday cheer now for about three weeks.  I thought I had a pretty bad case of it, that is until I got home, back to Dallas, to my parents house.  My mom brings Christmas to life.  The walls reverberate with the Spirit of Christmas.  The sheer amount of decorations in the house is astonishing, but it makes you feel so warm and cozy inside.  You almost expect Santa and his elves to pop out from behind the corner somewhere.  

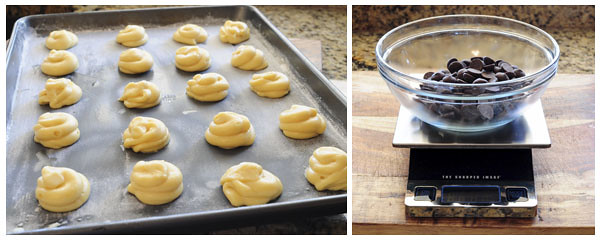
ready to bake and chocolate ready to melt

The Christmas Spirit that lives inside my parent's house inspired me to go the extra mile with a Christmas dessert this year.  I wanted it to embody this time of year.  Now tell me, what represents Christmas more than a Christmas Croquembouche?  It even looks like a Christmas tree!  

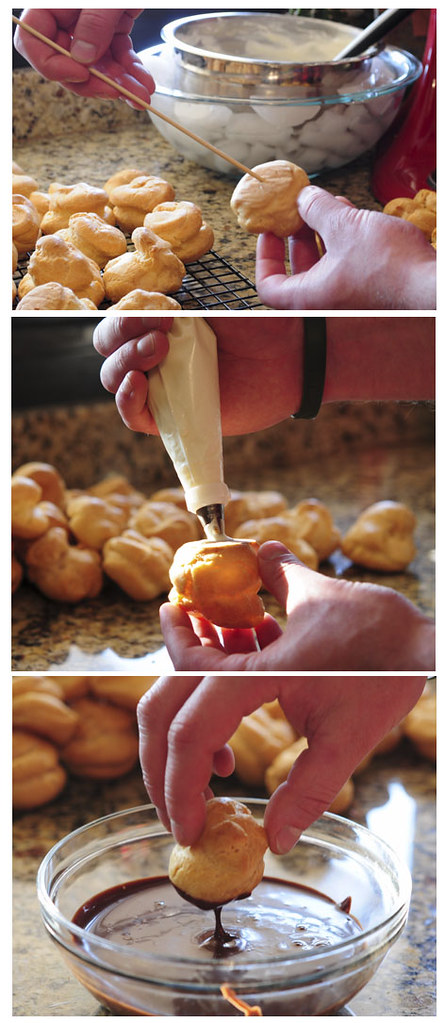
poke, fill and dip cream puffs

I'm not going to lie.  It took pretty much all day to make.  Granted, I'd have to stop to make things look pretty and take pictures, but all in all it was rather time consuming.  I even used a less traditional method that involves a styrofoam cone base.  (A traditional croquembouche would be made purely of cream puffs, from the center out).  

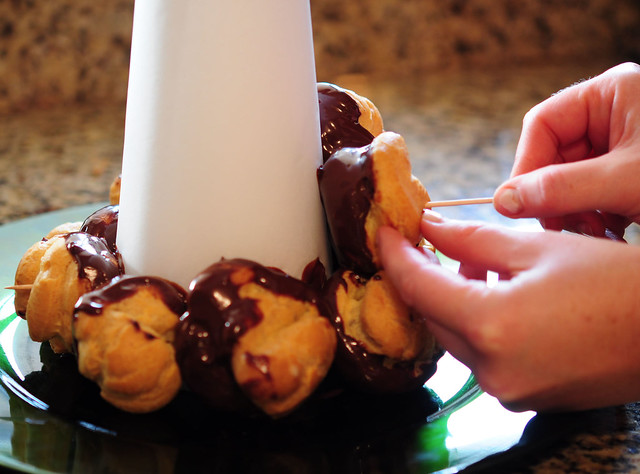
assemble the croquembouche

If I was going to make this again, and I just might have to, because it does make for a stunning presentation, I would break up the work.  The cream puffs, which make up the majority of the work, could be made two days ahead, the pastry cream filling and chocolate sauce made 1 day ahead, leaving the assembly for the morning of a festive Christmas get together.  Hey, you could even buy frozen cream puffs, eliminating most of the work, and taking all the credit for yourself.  Just don't tell anyone I told you so.  Merry Christmas!

croquembouche, pretty as a package

Croquembouche
Recipe Adapted from Epicurious.com

Ingredients:
For cream puffs (pâte à chou):
  • 1 1/4 cups water
  • 1 1/2 sticks unsalted butter, cut into 1/2" pieces
  • 1/2 tsp salt
  • 1 1/2 cups all-purpose flour
  • 6 large eggs
For pastry cream filling: 
  • 1 1/2 cups half and half
  • 1/2 cup granulated sugar
  • 2 large eggs
  • 1 large egg yolk
  • 2 tbsp all-purpose flour, sifted
  • 2 tsp vanilla extract
  • 1 cup heavy cream
For chocolate sauce:
  • 1 1/2 cups heavy cream
  • 9 oz bittersweet or semisweet chocolate, finely chopped
Assorted decorations of your choice: fresh cranberries, red hots, red and green M&Ms, silver dragées

Special Equipment:
Large pastry bag with 1/2-inch and 1/4-inch plain tips
clear tape
14-inch styrofoam cone (I bought mine at Michael's)
parchment paper
lots of toothpicks

Directions:

For cream puffs (pâte à chou):
1. Preheat oven to 425º F. 

2. To make the pâte à chou (French name for the dough used to make cream puffs), bring water in a heavy saucepan to a boil with butter and salt over high heat. Once boiling, reduce heat to medium-low. Add flour all at once and beat with a wooden spoon until mixture pulls away from sides of pan, forming a ball of dough.

3. Transfer dough to the bowl of a standing electric mixer and beat in 6 eggs, 1 at a time, on high speed, beating well after each addition. Pâte à chou batter should be stiff enough to hold soft peaks and fall softly from a spoon.

4. Butter and flour 2 baking sheets. Spoon pâte à chou into a large pastry bag fitted with a 1/2-inch plain tip and pipe about 55 mounds onto baking sheets, each about 1 1/2 inches in diameter, leaving 1 1/2 inches between mounds. With wet fingertips, gently smooth pointed tip of each mound to round puffs.

5. Bake puffs in upper and lower thirds of oven 10 minutes, switching position of sheets in oven halfway through baking. Reduce temperature to 400°F. and bake puffs 20 minutes more, or until puffed and golden, again, switching position of sheets in oven halfway through baking. Let puffs stand in turned-off oven 20 minutes. Transfer puffs to racks to cool. 

6. With a skewer, poke a 1/4-inch hole in bottom of each puff. Cream puffs may be made 2 days ahead and kept in an airtight container. Re-crisp puffs in 400°F oven 5 minutes and cool before filling. If making puffs ahead of time, wait to poke holes in each until after re-crisping and ready to assemble.

For Pastry Cream Filling:
1. Bring half and half to simmer in a heavy medium saucepan. Whisk sugar, eggs, egg yolk and sifted flour in a medium bowl to blend.

2. Gradually, and very slowly, whisk in hot half and half as to temper the egg mixture. Transfer mixture back into the saucepan. Whisk over medium-low heat until mixture thickens and comes to boil, about 5 minutes. Boil 1 minute. Pour into another medium sized bowl. Stir in vanilla. Press plastic onto surface of pastry cream. Cover and chill until cold, about 4 hours. (The pastry cream can be made up to this point 1 day ahead. Keep chilled.)

3. On the day your croquembouche will be assembled, place chilled pastry cream base into the bowl of a standing electric mixer. Beat pastry cream until just smooth and soft enough to fold in heavy cream (do not overbeat).

4. In a chilled bowl with cleaned beaters, beat heavy cream until it holds soft peaks. Fold whipped cream into pastry cream. Chill filling, covered, about 1 hour, or until cold.

For chocolate sauce:
1. Bring heavy cream to a simmer in a medium saucepan. Remove from heat and add chopped chocolate; stir until chocolate is melted and smooth. Cool sauce until lukewarm. (Sauce can be prepared 1 day ahead. Cover and refrigerate. When ready to assemble croquembouche, rewarm over low heat until just lukewarm and pourable, stirring frequently.)

To assemble the croquembouche:
1. To fill the cream puffs, transfer pastry cream filling to a large pastry bag fitted with a 1/4-inch plain tip. Insert the tip into the hole in the bottom of each cream puff and barely fill each puff (do not overfill). Set filled puffs aside.

2. Using tape, cover styrofoam cone with parchment paper. Double tape to secure the bottom of cone to a serving platter.

3. Line a tray with wax paper. Working with 1 filled cream puff at a time, dip bottom in chocolate sauce, leaving top 1/3 inch uncoated and letting excess drip off. Set aside on wax paper.

4. Once cream puffs are dipped, arrange 1 ring of puffs around base of cone, placing as closely together as possible and inserting a toothpick through each puff into cone, so as to attach puff to cone. Push toothpick as far into cone as possible.

5. Attach second ring of puffs above first, again packing tightly and staggering so puffs in second ring are not directly above puffs in first ring. Continue in same manner to attach remaining puffs. Finish covering cone with 1 puff attached to the top of cone.

6. Decorate by pushing cranberries, M&Ms, red hots or dragées into the gaps and spaces between the cream puffs.

7. To serve croquembouche, dismantle, 1 puff at a time and enjoy!

November 7, 2011

Wildly Wonderful Whiskey Cake


good ol' fashioned Whiskey Cake

It has been just over thirteen weeks since I have unloaded my things (more than I think Jon was expecting) into my new home in Tempe.  It would be a lie to say that I haven't felt the least bit homesick.  Don't get me wrong, Jon is great company- we have so much fun together- but every now and then, I feel that slight pang in my chest; the longing to see my friends, go to lunch or run errands with my mom or even to eat at one of the restaurants that I had grown so fond of.  Living in the Dallas area for over 16 years gave me ample time to grow deep and meaningful relationships with several restaurants.  There are many that became permanent fixtures in my dining out routine, none more so than Mi Cocina (what I would give for a Mambo Taxi...), but Whiskey Cake, quite possibly my new all time favorite restaurant, has been on my mind more often than I would like.

fold that date puree

My constant day dreaming of the food at Whiskey Cake is starting to become a problem.  One day it's thoughts of the Mesquite Grilled Redfish, the next it's their "3 Little Pigs" pulled pork sliders.  But most often, I dream of having a large slice of their namesake dessert placed in front of me, their Whiskey Cake.

bourbon sauce ;-)

It is unlike any other dessert I have ever tasted- rich, sticky, stinking of good whiskey and sinfully delicious.  The mere thought of sliding my fork down the edge of that cake into a pool of bourbon sauce is almost enough to get me to book a flight back to Dallas.  Almost.

on it's way...

The thing is, why would I fly all the way back to Texas when I could have Whiskey Cake right here, in the comfort of my new home?  Well, to put it simply, I wouldn't.  Not only does Whiskey Cake serve up fresh, local and seasonal ingredients (a restaurant trend that I hold in the highest regard ), but this restaurant has won me over in another big way.  You can request any recipe for any dish off their menu. Now, in my experience, most restaurants who provide recipes or publish cookbooks supposedly filled with said recipes, will subsequently tweak an ingredient here or leave out an ingredient there, thus resulting in a failed attempt to remake your favorite restaurant dish at home.  My thoughts on this matter: If you don't wan't to give out the real recipe for a dish off your menu, then don't give out the recipe at all.

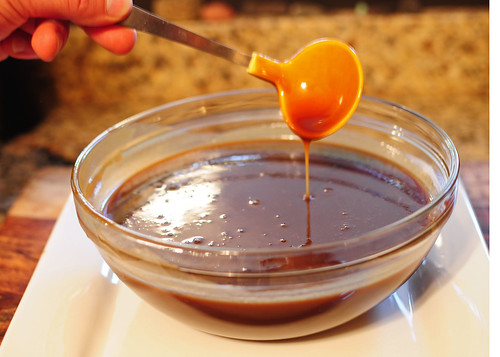
drizzle that toffee sauce

I can't tell you how many times I have bought a cookbook from a bakery or restaurant only to fully regret that purchase days later after my pursuit to mimic a particular dish ends in complete misery.  My desire for a slice of Whiskey Cake was too strong to let this deter me, however.  I figured I should give this particular recipe a fair shot, although I will admit I was skeptical of it from the get go.  But with doubts and fears aside, I completed all 5 components needed to make the Whiskey Cake what it is: an absolute masterpiece.  Did I tweak the recipe to make it somewhat my own?  Perhaps...  I may or may not have tripled the amount of whiskey originally called for...  I'll let you be the judge of that.

Whiskey Cake with a little extra whiskey

Whiskey Cake
Recipe slightly adapted and interpreted from Whiskey Cake, in Plano, Texas

Ingredients:
Date Cake (see recipe below)
Bourbon Sauce (see recipe below)
Toffee Sauce (see recipe below)
Spiced Pecans (see recipe below)
Whipped Cream (see recipe below)

* I know this recipe looks like a lot of work, what with there being 5 separate components, but in order to make it a little easier on yourself, make 3 components one day and 2 the next.  Each component really doesn't require that much time and I promise the effort will be well worth it!

Directions:
1. Cut the Date Cake into 12 equal pieces.  Poke several holes in the top of each piece using a wooden skewer or chopstick.  Arrange the cake pieces on a baking sheet covered with nonstick foil.

2. Heat the oven to 500º.  Pour 1/4 cup of Toffee Sauce over each piece of Date Cake.  Place toffee soaked cake pieces in the oven for about 4-5 minutes, until the Toffee Sauce is bubbling and the cake is warmed throughout.

3. Spoon 1/4 cup of Bourbon Sauce onto 12 individual plates or bowls.  Place each piece of warmed cake in the middle of each pool of Bourbon Sauce.  Finish each piece with a large dollop of Whipped Cream and a sprinkling of Spiced Pecans.  Enjoy!

Makes 12 servings


Date Cake

Ingredients:
1, 8 oz package of dried pitted dates, chopped into 1/2" pieces
2 tsp baking soda
1 3/4 cup boiling water
1 stick unsalted butter, softened
1 cup + 2 tbsp granulated sugar
3 jumbo eggs, at room temperature
1 3/4 cup self rising flour (*see note below to make your own)
3 tbsp Sugar in the Raw (turbinado sugar)

Directions:
1. Heat the oven to 350º.  Place dates, baking soda and boiling water in a medium sized bowl.  Allow to sit for 15-20 minutes until the dates are softened.  Place the date mixture in a food processor for 2 minutes to form a paste.

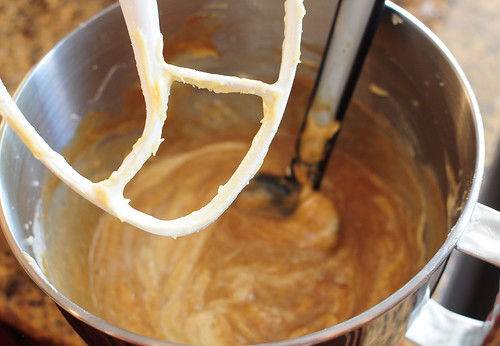
2. Using a stand mixer fitted with the paddle attachment, cream the butter on medium speed for about 1 minute.  Add the sugar and continue to cream for 3 minutes longer.  Scrape down the sides of the bowl using a rubber spatula.  Add the eggs, one at a time, mixing in between to fully incorporate each egg.  Scrape down the sides of the bowl.  With the mixer running on low, add the flour, about 1/2 cup at a time, and mix just until the flour is no longer visible.

3. Remove the bowl from the stand mixer.  Add the date paste and gently fold in using a rubber spatula.

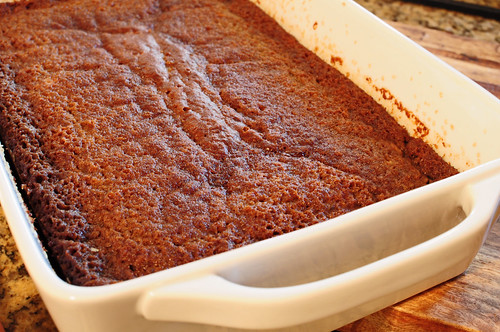
4. Spray an 8"x14" cake pan with non-stick spray.  Sprinkle the turbinado sugar into the cake pan and move the pan around until the sugar coats the bottom and all sides.   Pour in the cake batter and bake for 30-40 minutes or until a toothpick comes out clean.

5. Allow the cake to cool at room temperature for 20 minutes.  Flip the cake out onto a parchment paper lined tray.  Leave at room temperature to cool completely.  Wrap the cake in plastic wrap and store at room temperature until ready to use.

*To make Self-Rising Flour:  mix together 3 cups of all purpose flour, 2 tsp of iodized salt and 1 tablespoon of baking powder in a medium sized bowl.  Use immediately or store in an airtight container.


Bourbon Sauce

Ingredients:
2 cups heavy cream
1/2 cup granulated sugar, divided
1vanilla bean, split
4 jumbo egg yolks
1 tsp vanilla extract
2 tbsp good bourbon (I used Maker's Mark)

Directions:
1. Bring heavy cream, 1/4 cup sugar and vanilla bean to a simmer in a small to medium sized sauce pot.

2. In a mixing bowl, whisk the egg yolks and other 1/4 cup sugar together until frothy.

3. While stirring, slowly add about 1/2 of the heavy cream mixture to the eggs.  Stir together gently.  Pour the egg mixture into the pot of remaining heavy cream.  Continue to cook over medium-low heat until the mixture thickens and coats the back of a spatula or spoon.

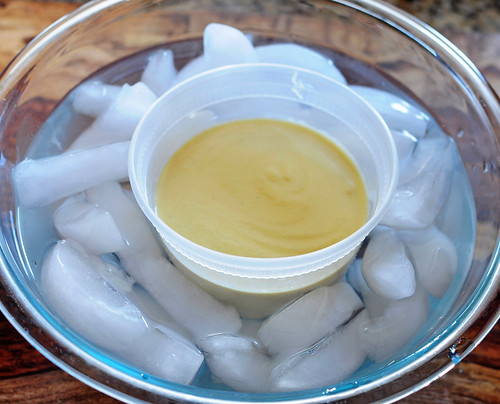
4. Stir in the vanilla extract and bourbon and remove from heat.  Pour the mixture through a strainer into a container.  Place the container of bourbon sauce in an ice bath until cool.

5. Either use the sauce immediately, or store in the fridge until ready to use.  If stored in the fridge before use, re-heat in the microwave at 10 second intervals on 50% power until thinned and slightly luke warm.


Toffee Sauce

Ingredients:
1 stick unsalted butter
1 lb light brown sugar
2 cups heavy cream
2 tbsp good bourbon
1 tbsp vanilla extract

Directions:
1. Place butter in a heavy bottom sauce pot over medium heat.  Once melted, add brown sugar and continue to cook for about 8 minutes, stirring occasionally.

2. Add heavy cream and allow to cook for another 6-7 minutes, still stirring occasionally.

3. Remove pan from heat and stir in bourbon and vanilla. Use sauce immediately or store in the fridge for up to 3 days.  Reheat before using.


Spiced Pecans

Ingredients:
1 lb pecan halves
2 tsp water
3/4 cup maple syrup
1/2 tsp Kosher salt
1/2 tsp black pepper
1/2 tsp cayenne pepper

Directions:
1.  Heat oven to 350º.  Mix water, syrup, salt, and both peppers together in a small bowl.  Place pecans in a medium sized bowl.  Pour maple syrup mixture over pecans and mix until all are evenly coated.

2. Spread the pecans out on a baking sheet covered with foil.  Bake for 12-15 minutes.

3. As soon as the pecans come out of the oven, scrape the pecans off the pan and break up pecan clumps to prevent from sticking together.  Let cool completely.  Store in an airtight plastic container at room temperature.

(At this point, I chopped up about half of the pecans to sprinkle on top of the cake.  I left the other portion of pecans whole to use for other purposes, like as a salad topping).


Whipped Cream

Ingredients:
2 cups heavy cream
1/2 cup granulated sugar
1 tsp vanilla extract

Directions:
1. Using a stand mixer fitted with the whisk attachment, add the heavy cream, sugar and vanilla to the bowl.  Beginning at low speed and slowly increasing the speed to high, whip the mixture together until slightly stiff peaks form.

2. Use immediately or store in the fridge until ready to use.

January 18, 2011

Hawaiian Adventures Part 2: The Big Island

Kona, where all your dreams come true!

It's cold outside.  The sky is gray, the air frigid and the sun just won't show its face.  With no relief in sight, at least not for several months, what's one to do?  Perhaps the more affluential can hop a plane to Jamaica or Barbados, soaking up the sun to escape winter's grasp.  For the rest of us however, reminiscing on vacations past is the only way to vicariously travel to the equator.  While dwelling on such a thought, it occurred to me that I never shared the second leg of my Hawaiian adventure.  It seems that now would be as good a time as ever and hopefully my tale will provide a few of you with your necessary getaway.

Have you noticed I like taking pics of sunsets?

I believe I made it clear that the week I spent in Maui was pure bliss.  Food, sun, beaches and a little adventure.  It was the perfect vacation.  If you can believe it, I actually managed to experience a completely different type of vacation on the Big Island of Hawaii.  It was all social camaraderie, lot's of adventure and even a little romance (which, unfortunately, is a part of the story I must decline to share).  Upon arriving in Kona, I was immediately introduced to Abe's local friends.  (Abe was my gracious host and a friend I've known and cherished since I was 17).  They were all around my age and from different backgrounds and places.  Each had their own story on how they came to arrive in Kona from California, Seattle, Virginia or even Kentucky.  They all embraced me and showed me what it was like to live with the "Aloha Spirit."

Waipi'o

During my visit, Abe was busy studying for the GMAT, so I was pawned off to different friends that were given the burden of showing me around for the day (although I don't think any of them really minded all that much).  The first day I joined two of his buddies for one of their (almost) daily snorkels. Until this day, snorkeling had not been one of my favorite pastimes.  I'm not the biggest fan of swallowing salt water.  However, this particular time snorkeling will long exist as one of the most memorable experiences I've ever had.  After timidly wading into the water, I became increasingly comfortable with the crystal clear sea.  I was enjoying myself while paddling through the warm water, gazing down at the ocean floor, comprised of endless miniature valleys of sand.  Without notice, I was suddenly in deep water, the earth's surface a good 70 feet below me.  The panic slowly started to rise like a lump of coal in my throat, but just as quickly as it appeared, it vanished.  For the next thing I knew, I was swimming among dolphins.  Nearly 30 of them, in all directions.  To my left, to my right, above and below me.  There were big mama dolphins gliding through the water next to their babies, guiding them with their fins.  It seemed as if some of them were playing with their children, tickling them even.  For ten minutes these dolphins let me into their world and allowed me to observe them.  It was the single most awe inspiring moment of my life, even if I was digesting marine mammal feces (it was unavoidable; it was floating everywhere).  However, fish poop is a small price to pay for a majestic moment such as this.

a lazy parrot at Mauna Kea Beach Resort

It seemed my vacation in Kona had peaked on the very first day.  Wrong again.  After some much needed relaxation on various beaches, a booze soaked day at the Mauna Kea resort, followed by indulgent gluttony at Merriman's cafe (menu: mango margaritas, margherita pizza, caponata bruschetta, hummus, truffled mac and cheese, meatball subs, and the most divine Hamakua- local Hawaiian mushrooms- tagliatella.  All of which was followed by chocolate soufflés from Roy's.  Oh yeah, this was all for 4 people), we packed up the car and headed for a weekend of camping on the other side of the island in Hilo.
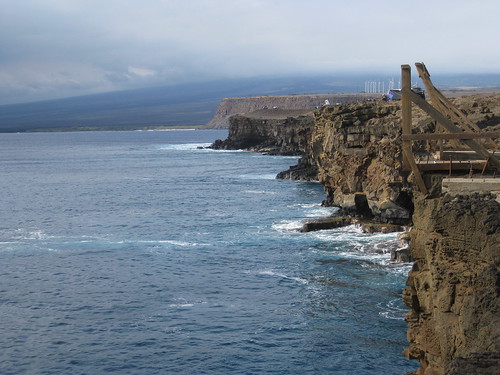
the cliffs at Ka Lae

With a caravan of adventurous Hawaiian souls (I was now one of them), we stopped at Ka Lae or South Point, the southern most tip of the Big Island and the Unites States, to jump off the cliffs.  Easily a 60-foot drop, I was hesitant to make the leap, but how could I refuse such an opportunity?  It was exhilarating plunging into the dark blue water with nothing but miles and miles of ocean in front of you.  Only after you look up from the water, while climbing a very rickety, seemingly ancient ladder to the top of the cliff do you realize how far down the drop really is.
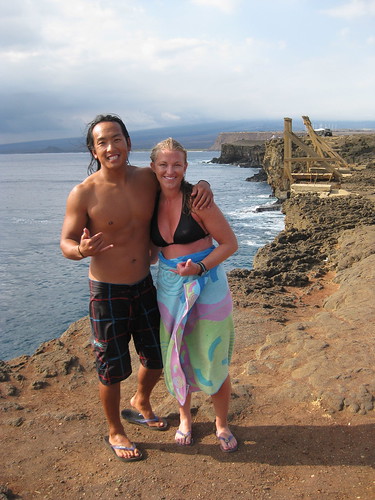
Abe and I after leaping off the South Point cliffs

After a couple more stops along the way to Hilo, we arrived and set up camp mere meters from the ocean's edge.  We (illegally) hiked toward natural steam caves, lost our way to the hot ponds, picked up the occasional patchouli drenched hitch hiker ("we're going wherever the wind takes us, man"), and gazed at the stars while listening to waves crash on the beach.  Never a fan of sleeping outdoors, but I could live like this forever.

the view from our Hilo camp site

Guess what?  It gets even better.  The second day in Hilo was reserved for a 6 mile hike to the lava flow. We could see the billowing pinkish-gray smoke from a distance on our drive in, but I was eager to see real live lava up close and personal (or as close as one can get to molten magma).  The lava flow on the Big Island is constant, more visible at certain times than others, as it makes its way through a tube beneath the surface and sparks and spills into the ocean.
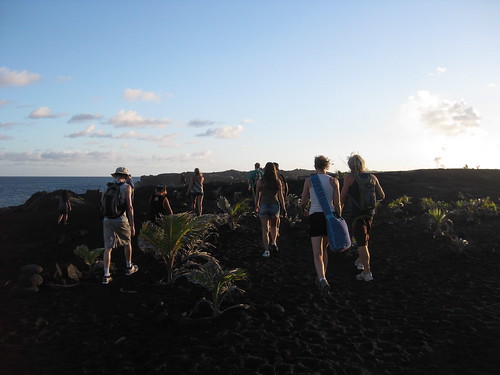
hiking to the lava flow

The land that we were traversing toward the eruption was actually new land formed from former eruptions.  The hardened rock beneath our feet was black and shiny, smelled of sulfur and became increasingly warm as we neared the cascading lava.  Once we hiked as far as we could, without singeing our eyebrows, we looked for small lava fissures to roast marshmallows.  Though a very cool and rare way to make s'mores, it doesn't make for the best tasting treat, that is unless you enjoy the crunch of lava rock between your teeth and the faint aftertaste of sulfur which induces a slight panic of being poisoned.

look at that magma!

My trip was coming to an end, but there were still so many things I had yet to cross off my list.  I mean I had been in Hawaii for 14 days and still had not tried my hand at surfing.  What was a girl to do?  I called the airline and inquired on the cost of changing my flight.  Far too expensive.  But according to my new Hawaiian friend, by way of Seattle (a seasoned traveler who has been to every exotic local one could think of), the easiest way to reschedule a flight was to "miss" that flight and plea (with girlish charms and perhaps some teary sniffles thrown into the mix) for a seat on the next flight out.  Well, as luck would have it, the next available flight was three days later.  Shucks.

where I learned to "surf"

So I was granted three extra days in paradise, 2 of which I would spend "surfing."  Yes, the quotation marks are essential as I'm not sure you could qualify what I did as surfing.  Abe did tell me I did quite well for my first time out (I rode a wave for about a split second at one point), but I still believe he was just being nice.  However, in my defense, I was taken out to one of the hardest spots to learn surfing.  A beach that was spotted with black rocks just waiting to tear the flesh off one's foot.  I gave it my all for about 30 minutes but then resigned to the notion that I would never be a "hot surfer babe."  I decided to instead sun bathe and watch others surf while pretending to take notes.

early morn on the high seas

The last day and final thrill of my Hawaiian adventure had finally arrived, but this excursion began at 5 am (after a heavy night of drinking and singing karaoke- and please note I never sing karaoke, so my rendition of Madonna's "Like a Virgin" should serve as an indicator of how much drinking was actually involved) on a chartered fishing boat.  Abe, Jesse (the seasoned traveler), her Australian friend Kristofer, myself and the captain ventured out onto the open seas.  Just as I finished my egg McMuffin, breathed in the salty air and set my gaze on the glassy water's surface, the nausea hit me like a rock.  It was hard to tell at this point whether it was sea sickness, the whiskey I had consumed only mere hours before or perhaps even the egg mcMuffin (I hate those things but they're hard to turn down in the event of a hangover).  Whatever it was, it took hold of me in fierce fashion and wouldn't release its talons for a good 5 hours.
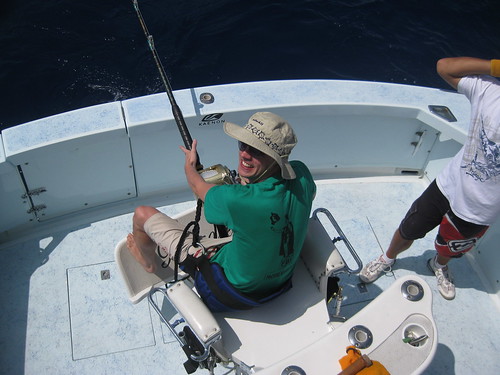
Kristofer about to catch a blue marlin

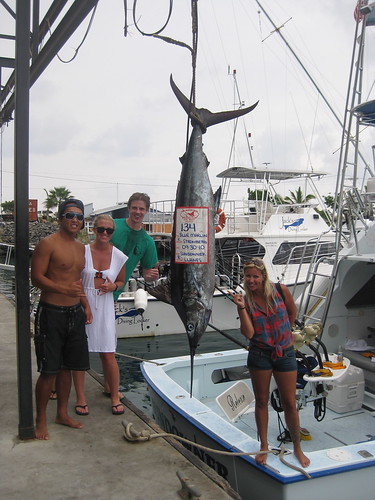
Luckily, fishing is a waiting game and just as the fog of nausea started to lift, the line pulled tight.  Kristofer, who had been in bad shape as well, vomiting at least twice more than I, jumped to the fighting chair and battled with the mighty fish at the end of the line.  All thoughts of nausea disappeared as the excitement escalated with the sudden and methodical actions of the crew.  Kristofer continued to reel in the fish (which had now been identified as a blue marlin since his great leap from the surface), sweat emerging from his pores, hands cramping with strain, but a wide grin remaining glued to his face.
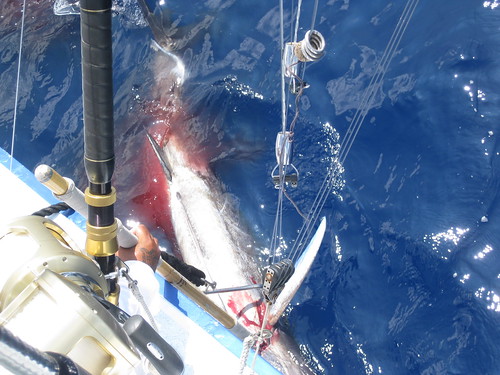
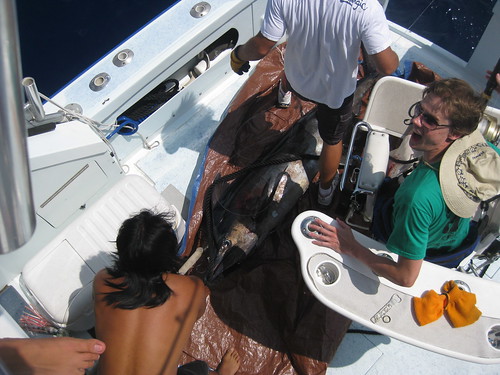
after they clubbed the poor fish

Abe pulling the beast on board

As the marlin reached the edge of the boat, the crew took over.  The great fish thrashed about, struggling to free itself from the hook.  The captain took a club to its head, an action I deemed cruel but was argued as necessary by all others.  The marlin was hauled on board and wrapped in tarp as we made our way back to shore.  We took the trophy to be weighed and photographed and our day out at sea was declared a victory, nausea and vomiting included.

our 134 pound trophy

I took my sea legs to shore, packed my bags and bid farewell to my new kindred spirits.  My Hawaiian adventure may have been over, but the memories and friendships I forged will last forever.

Hula Cheesecake

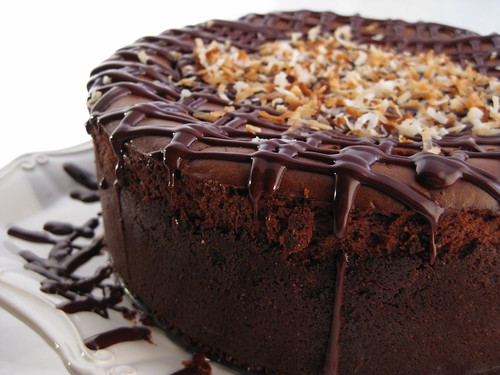
Hula pie is a sweet staple among the chain of the Hawaiian islands.  A wide variety of versions exist, but all include these essential ingredients: chocolate, coconut, coffee, and macadamia nuts.  I, of course, was working on my own adaptation all the while traveling, sight seeing and tanning.  I came home and put my mental creation to the test, serving it to a deserving and knowledgeable audience: my grandparents who had come over from Maui to stay with us during the holidays.  Ganny said it was perfection, but that sort of praise is expected from a grandmother.  However, I think my Hula Cheesecake was just about as good as any hula pie I ate while vacationing in paradise.
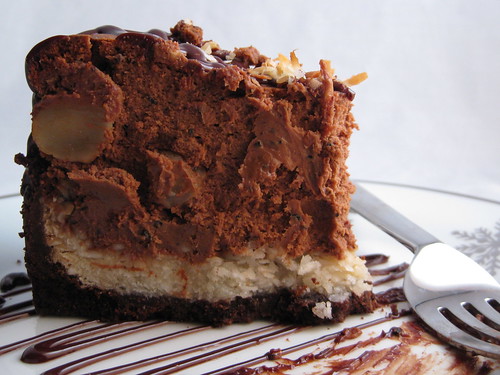
a bite of Hawaii

Hula Cheesecake
Recipe by Karlie Kiser

Ingredients:
Crust:
9 oz chocolate wafers
2 tbsp sugar
4 oz semisweet chocolate, chopped
1 stick unsalted butter, melted
pinch of salt

Macaroon layer
3/4 cup evaporated cane juice (super fine sugar can be substituted)
2 1/2 cups unsweetened shredded coconut (available at Whole Foods)
2 egg whites
1/2 tsp almond extract
1/2 tsp vanilla extract
pinch of sea salt

Cheesecake filling:
8 oz bittersweet chocolate, chopped
32 oz cream cheese, at room temperature
1 1/4 cups sugar
1 tbsp flour
1/4 cup Kahlua (or other coffee liqueur)
2 tbsp espresso powder
2 tbsp ground coffee (use a Kona blend if possible)
1 1/2 tbsp coconut extract
1 tsp vanilla extract
4 eggs
3/4 cup coarsely chopped macadamia nuts

Glaze:
1/2 cup plus 2 tbsp heavy cream
5 oz bittersweet chocolate, chopped

1/4 cup sweetened coconut, toasted

Directions:
1. Preheat oven to 350º F.  Spray the bottom and sides of a 9-inch springform pan with nonstick spray.  Line with a round of parchment paper if so desired.

2. For the crust, finely grind chocolate wafers and 2 tablespoons sugar together in a food processor.  Add semisweet chocolate and pulse until chocolate is efficiently chopped and combined.  Add melted butter and salt and pulse until mixture comes together.  Press crumb mixture onto bottom and half way up sides of the prepared springform pan.  Set aside.

3. For the macaroon layer, mix evaporated can juice, coconut, egg whites, almond and vanilla extracts and sea salt together in a small bowl with your hands (get messy- cooking is hands on!).  Press mixture onto top of chocolate crust (don't go up the sides).  You can use all the macaroon mixture or reserve some for other use, make this layer as thick as you like.  Bake in preheated oven for 8 minutes.

4. Melt 8 ounces bittersweet chocolate in a double boiler or bain marie over simmering water.  Stir until smooth and melted.  Set aside to cool slightly.

5. For the cheesecake filling, beat cream cheese and sugar together with an electric mixer (or stand mixer fitted with paddle attachment) until smooth and blended.  Beat in 1 tablespoon flour. 

6. In a small bowl, stir Kahlua, espresso powder, ground coffee and coconut and vanilla extracts together until espresso powder dissolves.  Beat into cream cheese mixture until combined, scraping down the sides as necessary. 

7. Add eggs 1 at a time, beating after each addition until just combined. 

8. Slowly stir in the melted chocolate, beating at low speed until fully combined.  Fold in the macadamia nuts. 

9. Pour cheesecake filling into crust and place on a baking sheet.  Bake until top is puffed and center 2-inches move only slightly when pan is gently shaken, about 1 hour (or more depending on your oven).

10.  Let cool at room temperature, then chill in fridge for at least 4 hours. 

11. For the glaze, warm heavy cream in a bowl set over a pan of simmering water, about 2 minutes.  Add the 5 oz bittersweet chocolate, let sit for 1 minute, then stir until melted and smooth.  Remove from heat and let cool only slightly, about 5 minutes.  Drizzle ganache glaze over chilled cheesecake in any manner you like.  I like to pour the ganache into a large squeeze bottle.  I find this to be the easiest way to control the direction of the drizzle.  Before the glaze sets, top the center of the cheesecake with toasted coconut.  Slice, serve and enjoy!

Serves at least 12

December 24, 2010

Pumpkin Whoopie Pies


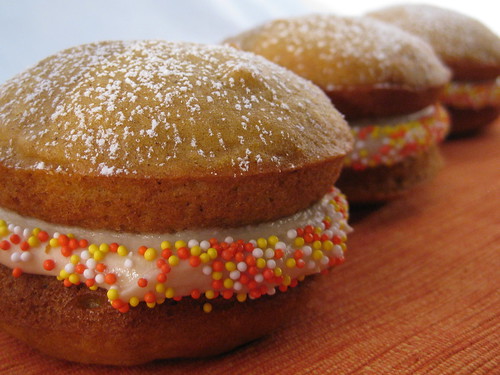
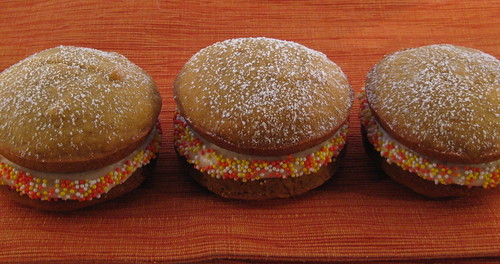
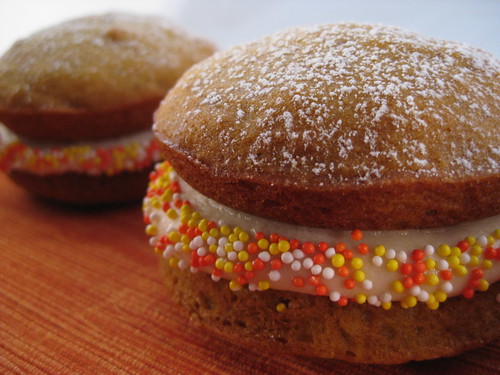
i wanna lick that frosting

I realize that pumpkin is technically more suited for the likes of November's seasonal eating.  You're probably thinking that perhaps I should have made an egg nog inspired whoopie pie or even basic chocolate ones flecked with peppermint candy canes. But ya know what?  I had already made these. Over a month ago. And I had already photographed these.  So I thought, the hell with it.  I'm posting them anyway.

Come to think of it, why do we, on average, only eat pumpkin one month out of the year?  It's sold year round in supermarkets, the canned version anyway.  It's delicious. It's healthy.  So why not?  Maybe I'll just have to make it my mission to change this.

three little whoopies all in a row...

Pumpkin or no pumpkin, however, whoopie pies are becoming increasingly popular.  Some even claim it's on its way to replacing the cupcake as the next "It" dessert.  There are others out there, however, who believe it's the French macaroon that is on its way to the top.  I prefer macaroons to whoopie pies, but macaroons take a skilled hand. (You might recall this from last December- a humiliating display of macaroon technique. I plan to give this another go within the upcoming weeks). The beauty of the whoopie pie although, is that there is basically an endless array of flavor combinations.  If it can work as a cupcake (or cake), it can work as a whoopie pie.  After all, whoopie pies began their existence as a way to use up leftover cake batter, which is merely plopped by the spoonful onto a baking sheet, the same way cookie dough is.

Now, the whoopie pie purist might be some what put off by my use of a cream cheese frosting in this recipe. Original whoopie pies were made with a marshmallow fluff filling, but that's not very fun.  Or creative.  Or very forgiving to flavor additions. So I'll make my whoopie pies any way I see fit.  And you can too.

Whoopie! I love pies!


Pumpkin Whoopie Pies with Maple Cream Cheese Frosting

Pumpkin Spice Cake
recipe heavily adapted from Bon Appètit 

Ingredients:
3 cups all purpose flour
2 teaspoons baking soda
2 teaspoons baking powder
1 teaspoon cinnamon
1/2 teaspoon ground ginger
1/4 teaspoon ground cloves
1/4 teaspoon freshly grated nutmeg
1/4 teaspoon ground allspice
1 15-ounce can pure pumpkin
1 1/2 cups sugar
1 1/4 cups vegetable oil
4 large eggs
1 teaspoons finely grated orange peel

Directions:
1. Preheat oven to 350°F. Lightly spray a whoopie pie pan with nonstick cooking spray. (If not using a whoopie pie pan, use a large baking sheet lined with parchment paper). Whisk first 8 ingredients in large bowl. Using electric mixer, beat pumpkin, sugar, and oil in another large bowl. Add eggs 1 at a time, beating to incorporate between additions. Mix in orange peel. Add flour mixture; beat on low speed until just combined. Spoon 2 tablespoons of batter into each cavity of pan; spread batter to the edges. Cavity should be about 2/3 full. (If not using pan, drop 2 tablespoons of batter on to prepared baking sheet and flatten slightly with the back of a spoon).

2. Bake for 8-10 minutes or until the top of the cake springs back when touched. Cool in pan 8 minutes. Remove cakes from pan and allow to cool completely on a wire rack before filling. Repeat process with remaining batter. 

3. To assemble pies, spread frosting (or pipe with a piping bag filled with frosting) on the flat side of half the cakes.  Top each frosted cake with another cake.  Voila! 

*I poured sprinkles around the edges of the frosting for added decoration.  Chopped pecans would be yummy too!
makes 20-24 whoopie pies

Maple Cream Cheese Frosting

Ingredients:
16 oz cream cheese, softened
1 cup butter softened
6 cups confectioner's sugar
6 tablespoons pure maple syrup
1/2 tsp maple extract (optional)

Directions:
1. Beat the cream cheese and butter together in a large bowl until blended and creamy.  Gradually add the confectioners sugar and beat until combined.  Add the maple syrup and extract if using and beat until smooth.  Store in refrigerator for up to one week. 

makes 3 cups

August 20, 2010

Strawberry and Rhubarb Galette

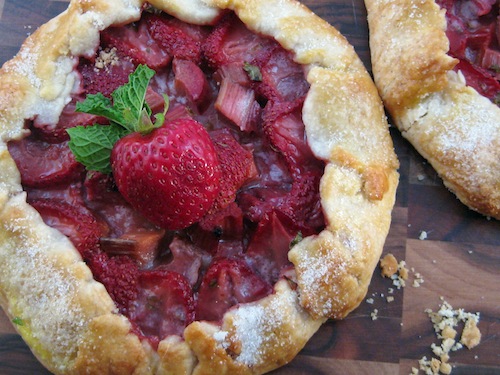
a little fresh garnish adds a nice touch

I am writing this post with extreme jubilation.  Or perhaps it's just the after effects of pure relief.  I had an intensely nightmarish occurrence happen to me last week.  My computer crashed.  Upon updating the software on my laptop, only after I was prompted to, the only activity I could get out of it was a blank, white screen.  After doing a little research, I quickly learned that this screen has been maliciously dubbed "the white screen of death."  My heart sank.  My stomach dropped.  I was suddenly unable to swallow past the lump in my throat.  And a single tear ran down my cheek (followed shortly by an unstoppable river).  All of my photos, music, recipes and meticulously crafted spreadsheets (oh yeah, in case you didn't know, I'm OCD- it's unofficially diagnosed, but painfully apparent- I like to think of it as "super-duper-organized").  Basically my whole life was digitally saved and compressed onto this one, tiny little laptop.

concentric circles of strawberries

I suddenly felt like Carrie Bradshaw.  Everyone started asking me if I had "backed-up." To which I would reply with a snarl.  Backing-up had never occurred to me, even though I had seen that particular episode where Carrie's computer crashes and she loses everything she had ever written.  How could I be so naive?  So before I had the chance to take my laptop into the Apple store and receive it's official sentence, I mourned the death that I was certain had befell my computer.  This is the point where my dad, mom, and brother would all tell me I was over reacting.  That I was being a drama queen (like I've never heard that before, ha).  I didn't care.  I felt I had the right to act irrational, because for all I knew my computer was dead and all my memories and work were buried among the intangible space along with it.  

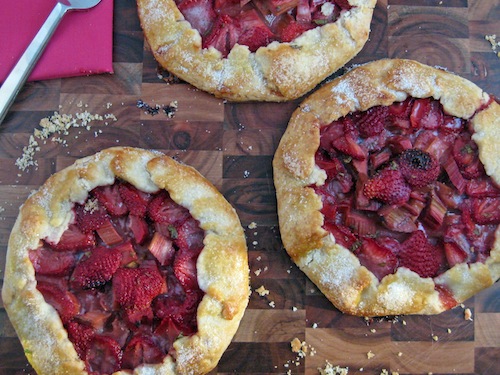
how good does that crust look

I needed to take my mind off the loss.  I needed something to distract me from the harrowing thoughts of what was to become of my computer.  Ahh, yes.  A tart of some kind. The only suitable option for this sort of occasion, because nothing calms the nerves quite like a flaky pie crust does.  I had been itching to make a free form tart anyways, so this seemed like as good a time as any.  I rushed to the grocery store, grabbed what I am certain was the last of the season's rhubarb, and headed home to bake the tension out of me.  I wasn't in the mood to plan or be painstakingly precise, so I threw together a fruit filling concoction, tweaking here and there upon tasting, and placed it in the oven.  The result was surprisingly good, especially considering my state of mind and this spontaneous style of baking that I am unaccustomed to.  The galette did help to alleviate the stress of the evening and I even managed to get some sleep that night.  Perhaps, it even served as a little good luck charm, because, despite the "white screen of death," the Apple geniuses were able to recover all of my files.  So maybe I did over react just a tad, sobbing at what would now be a non-loss of all my photos, music, recipes, and meticulously crafted spreadsheets.  But I learned a valuable lesson.  You better believe I bought myself an external hard drive that day, and now I know to make a habit of backing-up.  In fact, I think I might go do that right now.

love at first bite

Strawberry and Rhubarb Galette 
by Karlie Kiser

Ingredients:
Crust:
2 cups all-purpose flour, plus more for rolling
3 tbsp granulated sugar
1/4 tsp salt
1 medium lemon, zested
1 1/2 sticks cold, unsalted butter, cut into small chunks
1 egg yolk
2 tbsp ice water, plus more if needed

Filling:
2 1/2 cups chopped rhubarb, about 1/2 pound
1/4 cup plus 2 tbsp dark brown sugar, divided
2 1/2 tbsp lemon juice, divided
pinch of salt
3 tbsp cornstarch, divided
2 tbsp uncooked, quick cooking tapioca, ground fine in  a spice mill, divided
1 1/2 pounds strawberries, hulled and sliced
1/4 cup granulated sugar
2 tbsp chopped mint
about 6 tbsp toasted, sliced almonds
1 egg yolk
1 tsp water
2 tbsp turbinado sugar (or granulated sugar)
1 tbsp cold, unsalted butter, cut into very small pieces

Topping (optional):
4 oz crème fraîche
1 tbsp granulated sugar

Directions:
1. For crust: combine flour, sugar, salt and lemon zest in a food processor (or large mixing bowl).  Add butter and pulse (or rub in with fingers if using traditional method) to combine until the mixture resembles course crumbs.

2. Add the egg yolk and ice water (1 tbsp at a time) and pulse (or again, work into the mixture with your hands) just until combined.  (Do not let the dough form a ball in the food processor, pulse just until the mixture comes together.)  There should be enough moisture in the dough so that it binds together without being too wet or sticky.  If it's still crumbly, add a little more ice water, 1 teaspoon at a time.

3. Pour the dough mixture onto a lightly floured surface and bring together forming a ball.  Pat into a disc, wrap in plastic wrap and place in the fridge for at least one hour.

4. After the dough is sufficiently chilled, separate into four equal portions.  On a lightly floured surface, roll each portion into a circle, about 1/4-inch thick.  Cover a large baking sheet with parchment paper, place dough circles on top, cover with plastic wrap and chill in the fridge for 30 minutes.

5. In the meantime, combine the rhubarb, 1/4 cup dark brown sugar, 1 tablespoon lemon juice, salt, 1 teaspoon cornstarch and 1 tablespoon ground tapioca in a medium mixing bowl.  Set aside and let stand for 30 minutes.

6. In another mixing bowl, combine the strawberries, 1/4 cup sugar, 2 tablespoons dark brown sugar, mint, 1 1/2 tablespoons lemon juice, 2 teaspoons cornstarch, and 1 tablespoon ground tapioca.  Set aside and let stand for 10-15 minutes.  Pre-heat oven to 350º F.

7. Remove the dough rounds from the fridge.  Working one at a time, sprinkle about 1 1/2 tablespoons toasted almonds on center of dough round, leaving a 1-inch border.  Place a mound of rhubarb (about 2 spoonfuls) in the center of crust.  Layer strawberry slices in an overlapping circle around the mound of rhubarb, making sure to leave the 1-inch border of dough.  Repeat on remaining dough rounds.  You should have strawberries left over.  Reserve for later use. 

8. Beat the egg yolk and 1 teaspoon water together to make an egg wash.  Brush the border of each dough round with egg wash.  Bring the edge of crust over onto the filling, leaving the fruit exposed in the center.  Gently fold and crimp the dough to seal any cracks.  Repeat on each galette. 

9. With the remaining strawberry slices, evenly divide and layer on top of other exposed strawberries on each galette.  Combine any strawberry and rhubarb juice remaining at bottom of mixing bowls.  Evenly distribute juices among each galette, spooning onto the center of each.  Chill in fridge for 15 minutes.

10. Brush the edges of each crust with remaining egg wash.  Sprinkle each crust with about 1/2 tablespoon turbinado sugar.  Dot each galette with the small pieces of butter.  Place the galettes (still on baking sheet) on the center rack of oven and bake for about 45-50 minutes, or until the crust is golden brown.  Let cool to room temperature and, if desired, serve with crème fraîche sweetened with 1 tablespoon of sugar.  Enjoy!

Makes 4 mini galettes, about 5-inches in diameter 

*This recipe might have a lot of steps and sound complicated, but I promise you it is easy, breezy!  I just wanted the recipe to be as detailed as possible so as to avoid any confusion for novice bakers. 

July 30, 2010

A Tribute to New York City Part 1

* My friend Hannah Flora asked me to be a guest blogger on her blog this week (and next).  She wanted me to write about my time in New York City and how it relates to living in Dallas, TX. You can read the full post here, but make sure to check out her fabulous blog: Hannah Kate Flora

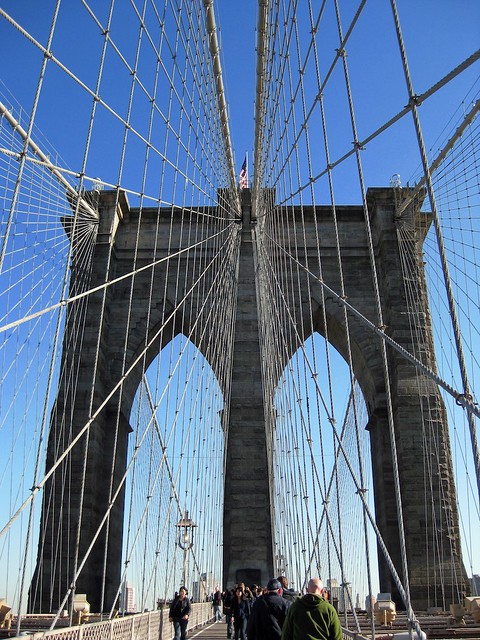
a view from the (Brooklyn) bridge

I’ve known Hannah since we were young, like really young. Braces young. Even training bras young. And though we went to school together for many, many years, I never really got to know her- that is until I moved to New York. I was lucky enough to develop a friendship with Hannah during my brief time in the Big Apple. I had a hard time meeting and making friends there, but Hannah definitely made things easier for me. Honestly one of the sweetest people I’ve had the pleasure of knowing, she was always reaching out and inviting me places. One of my favorite memories with her in New York was going to the Big Apple Barbeque Block Party. Rows upon rows of barbeque vendors from all over the US were there to share their finger lickin’ ribs and pulled pork, even some Texas standards such as The Salt Lick, which if you’re from Texas, you’ve no doubt heard about and hopefully had a chance to try- seriously good stuff.

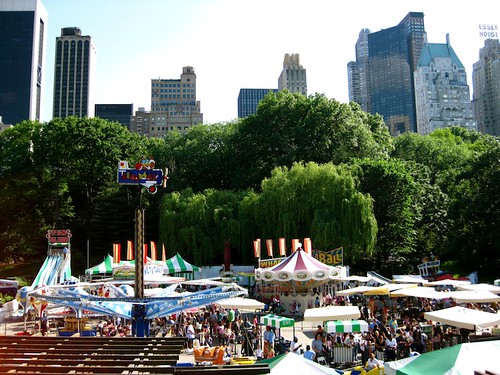
a small oasis in the middle of an urban jungle

It was actually at this block party that Hannah planted the seed, urging me to start my own blog writing about food and cooking, which is wherein my true passion lies. Before then, I was pretty oblivious to the world of blogging, but her suggestion intrigued me, and a couple months later I took Hannah’s advice and opened myself up to a whole new world of food blogging, a world I didn’t even know existed. But exploring this new world of virtual foodie friends and followers and writing and tweeting (twitting...?) about my culinary adventures, has allowed me to discover a new passion for writing, one that I didn’t even know I had, and that is, of course, thanks to Hannah.

A packed Time Square during lunch hour

I may have chosen to leave New York and return to the South, but that doesn’t mean my whole time spent up north was a waste or that it left a bad taste in my mouth.  I’m not bitter about my time there.  I actually had some fantastic experiences and was introduced to quite a few things, besides the smell of subways or how quickly rage could consume me when trying to fight my way trough the sea of people in Times Square.  It was in New York that I had my first encounter with a farmer’s market, which is hard to believe considering my immense love for local and fresh ingredients. 

the Dallas Farmers Market

I guess living in Dallas, the farmer’s markets here were always a destination, where as in New York, every time I stepped out in Union Square (after making my brief, but painful commute from Brooklyn to Manhattan) there were throngs of people scoping out what the vendors on that particular day had to offer.  I’d always stroll- ok rush, I hate crowds- up and down the congested aisles, stopping every so often to linger over a particular piece of produce, but never making a purchase. 

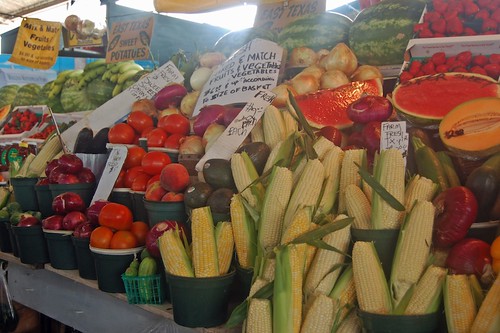
so much produce, so little time

I had always thought farmer’s market purchases were supposed to be cheaper, encouraging folks to buy local instead of the chemical soaked copies that stock the grocery stores.  Alas, the minuscule budget I lived on in New York did not allow me to enjoy the organic fruits and vegetables farmers from upstate had worked so hard to haul down into the city. So a couple of weeks ago I decided to wake up early- on a Saturday (gasp!) no less- and drive all the way to downtown Dallas to check out the Dallas Farmer’s Market. 

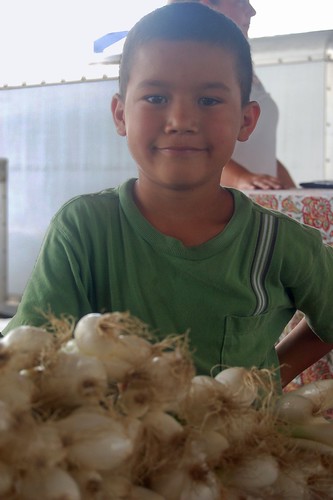
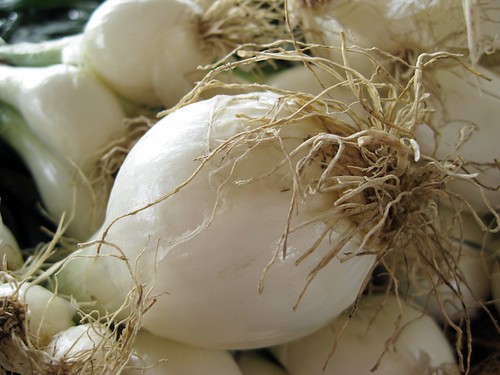
the hard, little worker who sold me green onions

did I mention they where monstrous green onions

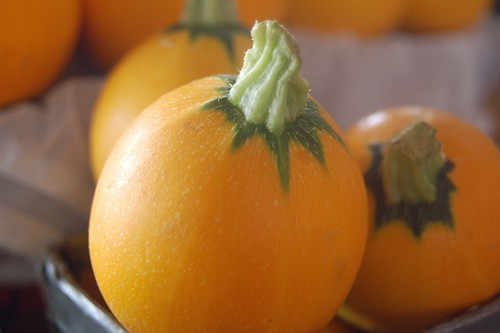
I was like a kid in a candy store, except this candy store wouldn’t give me a stomach ache or rot my teeth.  There were so many choices of plump, juicy red Texas tomatoes, enormous green onions, the most delicious watermelon I’ve ever had, and some new little round “8-ball”squash that I had never seen before. 

a new discovery, the "8-ball" squash

And not to brag or anything, but the farmer’s markets in Texas have got it right, on the prices that is.  A bucket of 16 tomatoes cost $2! Ahhh, visions of bruschetta are dancing through my head… 

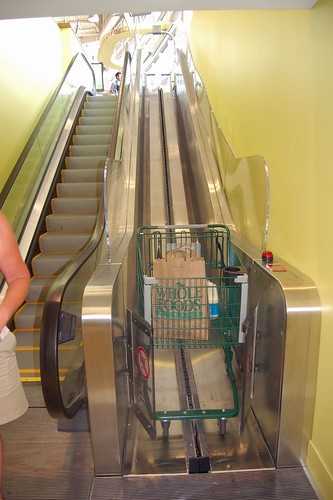
the crazy escalators at the new Whole Foods in Dallas

Another newbie for me in New York, although quite less profound, was the side by side escalators, one of which was for your shopping cart.  You New Yorkers, no doubt, know exactly what I’m talking about, while most Texans, I’m sure, don’t have a clue- that is unless you’ve made a trip to the brand spanking new Whole Foods that opened on Park Lane.  My mom and I first encountered these escalators during our venture out to the Target on Flatbush, deep in the heart of Brooklyn- and man do I mean deep.  My mom and I were pretty astounded at these escalators, which I guess is pretty silly, but that’s how we country bumpkins react to that fancy New York City stuff- ha. 

a friendly greeting on the way to the subway

The idea of 24/7 delivery, of absolutely anything, was also new to me in New York.  Although I was only exposed to this luxury for a brief time, and this luxury was also “limited” to me living in Brooklyn, it has still spoiled me rotten, right to my core.  There have been many, many nights that I have found myself lying on my couch, paralyzed with laziness, wondering what I should have delivered for dinner, and upon making my decision, only then do I realize that I don’t even have that option.  There are sadly very few places that will deliver, and even fewer that do so past 9 pm.  In New York, you could have groceries, wine, greasy Chinese food, and even toothpaste delivered at 4 am if necessary.  How dare Plano make me get in my car and drive all the way to the nearest Asian take-out.

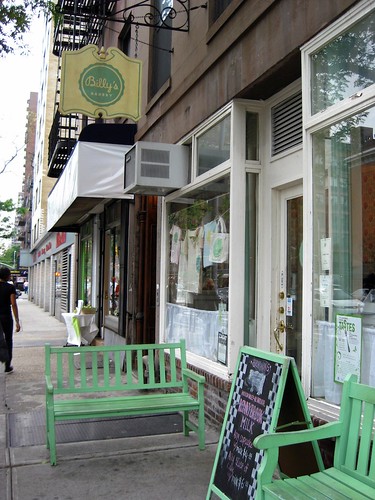
outside Billy's Bakery

Bakeries were obviously not introduced to me during my time in New York, but the immense amount of them was.  I probably could have a tried a different bakery each week during my year there and though I tried quite a few of them, there were more than a few that I never had a chance to sample.  However, the two bakeries that really resonated with me were the two darlings of New York City: Billy’s Bakery and Magnolia Bakery.  The two have long held an infamous rival with one another and it’s easy to see why.  The cupcakes, which were basically made famous by Magnolia with thanks to Sex and the City, were, while delicious, not the real reason why I would frequent these bakeries. (But for anyone wondering which cupcake I favor of the two… I’d have to go with Billy’s- the actual cake of the cupcake is much lighter.)  No, it wasn’t the cupcakes that kept me coming back, not even with their towers of buttercream.  At Billy’s, it was their heavenly banana cake with cream cheese frosting.

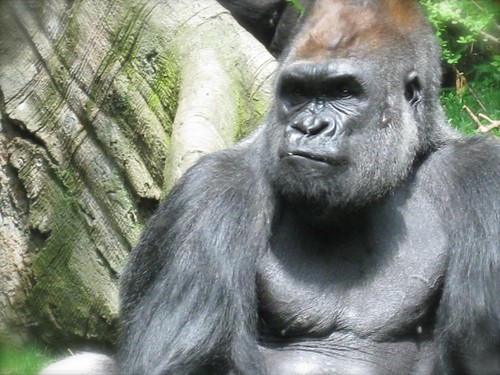
a majestic gorilla at the Bronx Zoo

I remember the exact moment that I had put that first bite into my mouth.  I had just come from the Bronx Zoo and decided to take a detour to Billy’s Bakery.  I took my tired self home, from the Bronx, to Chelsea, and all the way back to Brooklyn, climbed the stairs to my 3rd story apartment, and before I even allowed myself to sit down, I took that first fateful bite of banana cake.  It really was life changing. The creamy, tangy frosting paired with the impossibly moist cake with small bits of banana baked through, (pause to wipe drool) literally made me weak in the knees.  Like I said, heavenly.  Then there is Magnolia Bakery, that has my second and third favorite desserts, and, oddly enough, one of them is also made of bananas.  The banana pudding there is insane.  It’s not your grandma’s banana pudding.  The other dessert is the red velvet cheesecake.  I had never heard of red velvet cheesecake before this.  And I love red velvet anything.  And I adore cheesecake.  So this particular dessert had high standards to live up to.  It did not disappoint, but rather soared right past those expectations. 

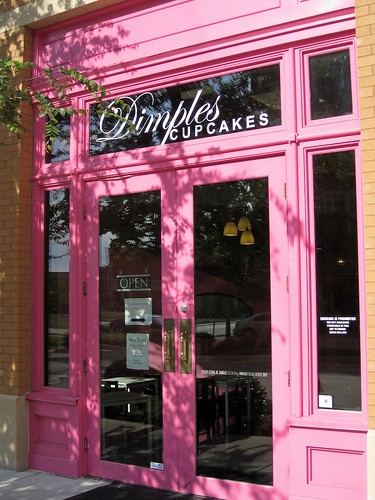
Dimples Cupcakes in Frisco, TX

While I do feel a little sad reminiscing about those delectable desserts from such charming bakeries, don’t feel too sorry for me.  Dallas has some quality competitors.  I ordered a cake for my mom’s 50th birthday from Society Bakery, but this wasn’t just any old cake.  This was a chocolate, turtle, caramel, gooey, rich- did I mention chocolate?- cake.  It was pretty darn awesome.  While I was there picking up the cake, I of course also had to pick up a couple other goodies, a couple of cupcakes and some petit-fours.  The petit-fours are definitely where it’s at.  The cupcakes were somewhat forgettable for me.  If you want a good cupcake in Dallas, check out Dimple’s, they’re delicious and jumbo sized which is always a plus.  I mean, is there such a thing as too much cupcake?

the view from my tiny Brooklyn balcony

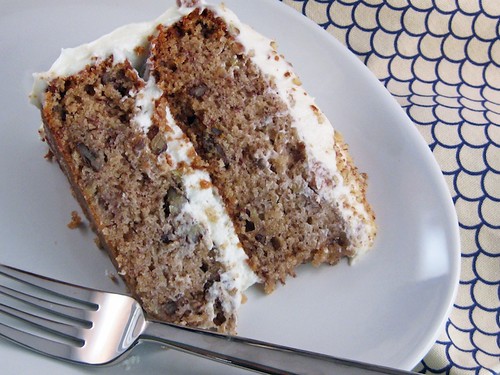
I still haven’t found a worthy replacement of the banana cake, however.  So making my own would have to suffice.  My recipe for Banana Cake is a good enough substitute, so I invite you to indulge in your own “Billy’s Bakery” moment.  For me, it’s like having a little slice of NYC, where each bite allows memories to come flooding back.  I can’t promise the same for you, but it’s worth a shot.  The frosting alone, if nothing else, is worth it.


I’ll be back next Friday with a follow up post on more New York memories and another NYC inspired recipe.


(banana cake recipe follows)


glorious banana cake


Heavenly Banana Cake with Cream Cheese Frosting 
Inspired by Billy's Bakery 


Ingredients:

Crisco for greasing pans

2 3/4 cups cake flour (plus more for pans), sifted

1 cup granulated sugar

3/4 cup brown sugar, packed

1 tsp baking soda

1 tsp ground cinnamon

1/2 tsp salt

3 large eggs, beaten

3/4 cup vegetable oil

1/2 cup sour cream

5 ripe bananas

1 tsp lemon juice

1/2 cup chopped, toasted pecans

1/2 cup chopped, toasted walnuts

1 1/2 tsp pure vanilla extract


Directions:

1. Grease and flour 3, 9-inch round cake pans; set aside. Pre-heat oven to 350º F.


2. Mash the bananas with a fork in a small bowl. Add the lemon juice and stir to combine; set aside.


3. In a large mixing bowl, stir together the flour, sugars, baking soda, cinnamon, and salt. Add the eggs and oil and stir just until the dry ingredients are moistened; do not beat.


4. Gently stir in the sour cream, banana mixture, pecans, walnuts, and vanilla. Divide the batter among the prepared pans and place in the oven. Set a pan of water on the rack below the cakes; it will help to keep the cakes moist. Bake for 23-28 minutes or until a pick inserted in the center comes out clean. Cool the cake layers in the pans for 10 minutes, and then turn them out onto a rack to cool completely.


5. Once completely cooled, assemble, fill and frost the cake. Sprinkle with additional chopped pecans or walnuts. Enjoy!


(cream cheese frosting recipe follows)


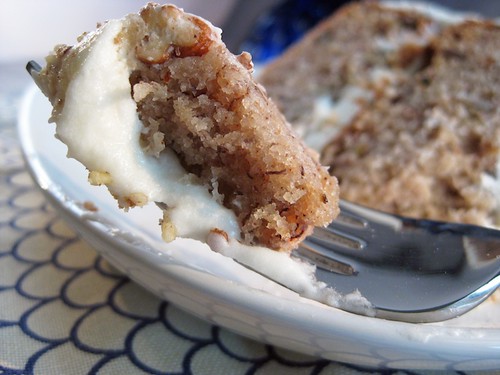
YUMM, cream cheese frosting


Cream Cheese Frosting 
Recipe Courtesy of Paula Deen 


Ingredients:

2, 8-ounce packages cream cheese, at room temperature

1 stick unsalted butter, at room temperature

1 pound confectioner's sugar, sifted

1 tsp pure vanilla extract

1/2 cup chopped, toasted pecans or walnuts


Directions:

1. In a large bowl, beat together the butter and cream cheese until smooth in consistency, about 2 minutes. Gradually add the confectioner's sugar and continue to beat until fluffy. Beat in the vanilla.


2. The pecans/walnuts can be stirred into the frosting or reserved to sprinkle on top of the frosted cake.