Showing posts with label Fruit. Show all posts

October 13, 2012

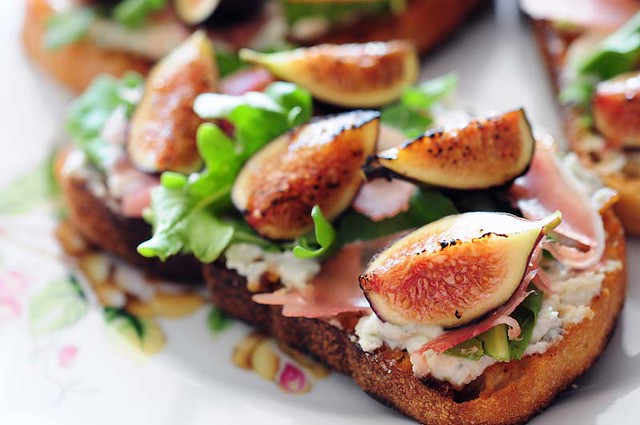
Fresh Fig Bruschetta


fresh fig bruschetta

Let’s talk about simplicity. It can be used to describe so many different facets of life and it’s something I strive for in almost each and every one of them. Simplicity in the way I dress, the overall design and aesthetic of my home, my weekly schedule, and even in my morning routine.

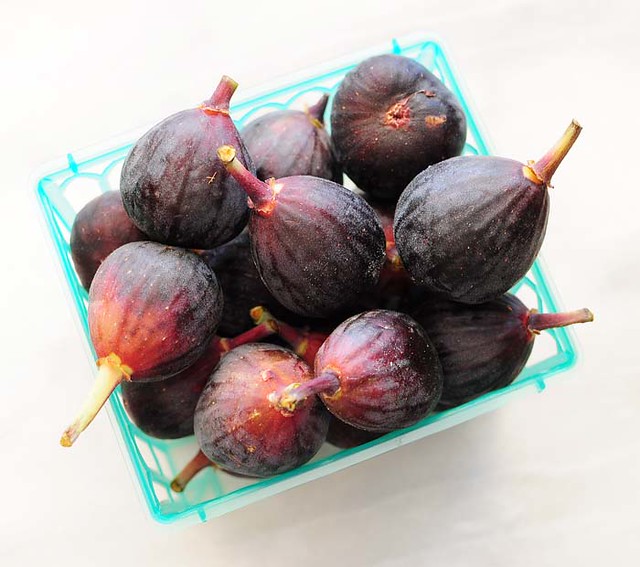
glorious figs

June 17, 2012

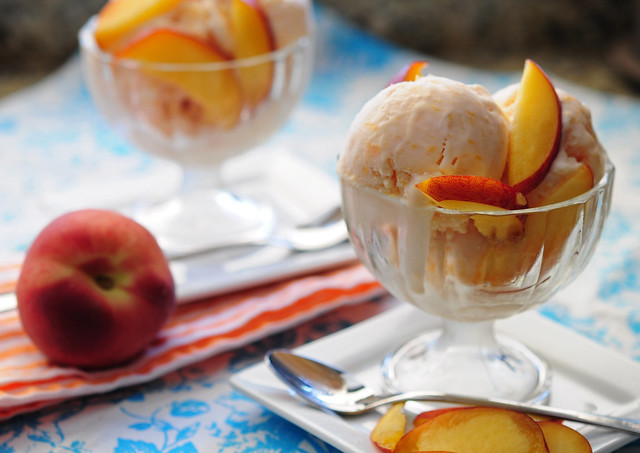
Peach Ice Cream


peach ice cream

There are so many reasons to love this time of year, despite the blistering heat and lack of rain that has left our herb garden sad and shriveled. Summer promises golden tan lines (and freckles for moi), pool parties, barbeques, vacations, slip ‘n slides and blockbuster movie releases. More importantly, however, is the fact that along with the arrival of summer comes peach season, and there is just something so special about biting into that first ripe, juicy, sweet and succulent peach of the year.

summer peaches, nature's treat

I must say, that of all the fruit fillings that are available to fill a flaky, buttery crust- and let’s face it, the options are pretty much endless- the simple filling of peaches, cooked down with a little water and sugar, is by far my favorite. I don’t think there are many other things in this world that can satisfy me and put such a smile on my face like a plate of good ol’ fashioned peach cobbler. Peach desserts don’t need the addition of any bells and whistles. If you buy them ripe enough, you hardly even need to add sugar. Peach cobblers, peach pies or whichever way you prefer to eat your peaches- they’re better off when kept simple, allowing the peaches to really sing.


August 20, 2010

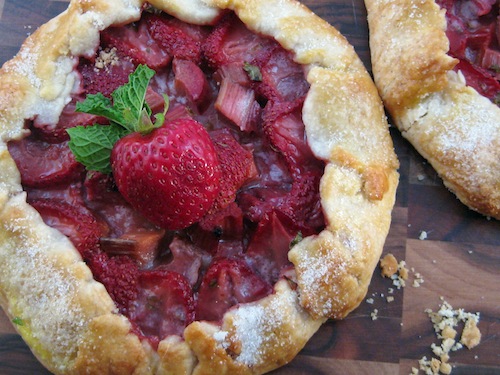
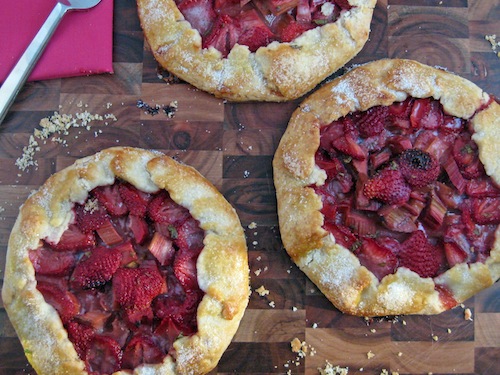
Strawberry and Rhubarb Galette

a little fresh garnish adds a nice touch

I am writing this post with extreme jubilation.  Or perhaps it's just the after effects of pure relief.  I had an intensely nightmarish occurrence happen to me last week.  My computer crashed.  Upon updating the software on my laptop, only after I was prompted to, the only activity I could get out of it was a blank, white screen.  After doing a little research, I quickly learned that this screen has been maliciously dubbed "the white screen of death."  My heart sank.  My stomach dropped.  I was suddenly unable to swallow past the lump in my throat.  And a single tear ran down my cheek (followed shortly by an unstoppable river).  All of my photos, music, recipes and meticulously crafted spreadsheets (oh yeah, in case you didn't know, I'm OCD- it's unofficially diagnosed, but painfully apparent- I like to think of it as "super-duper-organized").  Basically my whole life was digitally saved and compressed onto this one, tiny little laptop.

concentric circles of strawberries

I suddenly felt like Carrie Bradshaw.  Everyone started asking me if I had "backed-up." To which I would reply with a snarl.  Backing-up had never occurred to me, even though I had seen that particular episode where Carrie's computer crashes and she loses everything she had ever written.  How could I be so naive?  So before I had the chance to take my laptop into the Apple store and receive it's official sentence, I mourned the death that I was certain had befell my computer.  This is the point where my dad, mom, and brother would all tell me I was over reacting.  That I was being a drama queen (like I've never heard that before, ha).  I didn't care.  I felt I had the right to act irrational, because for all I knew my computer was dead and all my memories and work were buried among the intangible space along with it.  
how good does that crust look

I needed to take my mind off the loss.  I needed something to distract me from the harrowing thoughts of what was to become of my computer.  Ahh, yes.  A tart of some kind. The only suitable option for this sort of occasion, because nothing calms the nerves quite like a flaky pie crust does.  I had been itching to make a free form tart anyways, so this seemed like as good a time as any.  I rushed to the grocery store, grabbed what I am certain was the last of the season's rhubarb, and headed home to bake the tension out of me.  I wasn't in the mood to plan or be painstakingly precise, so I threw together a fruit filling concoction, tweaking here and there upon tasting, and placed it in the oven.  The result was surprisingly good, especially considering my state of mind and this spontaneous style of baking that I am unaccustomed to.  The galette did help to alleviate the stress of the evening and I even managed to get some sleep that night.  Perhaps, it even served as a little good luck charm, because, despite the "white screen of death," the Apple geniuses were able to recover all of my files.  So maybe I did over react just a tad, sobbing at what would now be a non-loss of all my photos, music, recipes, and meticulously crafted spreadsheets.  But I learned a valuable lesson.  You better believe I bought myself an external hard drive that day, and now I know to make a habit of backing-up.  In fact, I think I might go do that right now.

love at first bite

Strawberry and Rhubarb Galette 
by Karlie Kiser

Ingredients:
Crust:
2 cups all-purpose flour, plus more for rolling
3 tbsp granulated sugar
1/4 tsp salt
1 medium lemon, zested
1 1/2 sticks cold, unsalted butter, cut into small chunks
1 egg yolk
2 tbsp ice water, plus more if needed

Filling:
2 1/2 cups chopped rhubarb, about 1/2 pound
1/4 cup plus 2 tbsp dark brown sugar, divided
2 1/2 tbsp lemon juice, divided
pinch of salt
3 tbsp cornstarch, divided
2 tbsp uncooked, quick cooking tapioca, ground fine in  a spice mill, divided
1 1/2 pounds strawberries, hulled and sliced
1/4 cup granulated sugar
2 tbsp chopped mint
about 6 tbsp toasted, sliced almonds
1 egg yolk
1 tsp water
2 tbsp turbinado sugar (or granulated sugar)
1 tbsp cold, unsalted butter, cut into very small pieces

Topping (optional):
4 oz crème fraîche
1 tbsp granulated sugar

Directions:
1. For crust: combine flour, sugar, salt and lemon zest in a food processor (or large mixing bowl).  Add butter and pulse (or rub in with fingers if using traditional method) to combine until the mixture resembles course crumbs.

2. Add the egg yolk and ice water (1 tbsp at a time) and pulse (or again, work into the mixture with your hands) just until combined.  (Do not let the dough form a ball in the food processor, pulse just until the mixture comes together.)  There should be enough moisture in the dough so that it binds together without being too wet or sticky.  If it's still crumbly, add a little more ice water, 1 teaspoon at a time.

3. Pour the dough mixture onto a lightly floured surface and bring together forming a ball.  Pat into a disc, wrap in plastic wrap and place in the fridge for at least one hour.

4. After the dough is sufficiently chilled, separate into four equal portions.  On a lightly floured surface, roll each portion into a circle, about 1/4-inch thick.  Cover a large baking sheet with parchment paper, place dough circles on top, cover with plastic wrap and chill in the fridge for 30 minutes.

5. In the meantime, combine the rhubarb, 1/4 cup dark brown sugar, 1 tablespoon lemon juice, salt, 1 teaspoon cornstarch and 1 tablespoon ground tapioca in a medium mixing bowl.  Set aside and let stand for 30 minutes.

6. In another mixing bowl, combine the strawberries, 1/4 cup sugar, 2 tablespoons dark brown sugar, mint, 1 1/2 tablespoons lemon juice, 2 teaspoons cornstarch, and 1 tablespoon ground tapioca.  Set aside and let stand for 10-15 minutes.  Pre-heat oven to 350º F.

7. Remove the dough rounds from the fridge.  Working one at a time, sprinkle about 1 1/2 tablespoons toasted almonds on center of dough round, leaving a 1-inch border.  Place a mound of rhubarb (about 2 spoonfuls) in the center of crust.  Layer strawberry slices in an overlapping circle around the mound of rhubarb, making sure to leave the 1-inch border of dough.  Repeat on remaining dough rounds.  You should have strawberries left over.  Reserve for later use. 

8. Beat the egg yolk and 1 teaspoon water together to make an egg wash.  Brush the border of each dough round with egg wash.  Bring the edge of crust over onto the filling, leaving the fruit exposed in the center.  Gently fold and crimp the dough to seal any cracks.  Repeat on each galette. 

9. With the remaining strawberry slices, evenly divide and layer on top of other exposed strawberries on each galette.  Combine any strawberry and rhubarb juice remaining at bottom of mixing bowls.  Evenly distribute juices among each galette, spooning onto the center of each.  Chill in fridge for 15 minutes.

10. Brush the edges of each crust with remaining egg wash.  Sprinkle each crust with about 1/2 tablespoon turbinado sugar.  Dot each galette with the small pieces of butter.  Place the galettes (still on baking sheet) on the center rack of oven and bake for about 45-50 minutes, or until the crust is golden brown.  Let cool to room temperature and, if desired, serve with crème fraîche sweetened with 1 tablespoon of sugar.  Enjoy!

Makes 4 mini galettes, about 5-inches in diameter 

*This recipe might have a lot of steps and sound complicated, but I promise you it is easy, breezy!  I just wanted the recipe to be as detailed as possible so as to avoid any confusion for novice bakers. 

June 28, 2010

Cherry Cobbler with Vanilla Ice Cream


I'm ending my Father's Day menu installment with the recipe for the cherry cobbler I made especially for my Dad. See, he loves cherry pie, but then again who doesn't? It is about as quintessential Americana as the timeless apple pie. Every Thanksgiving, when putting together our menu of sides and desserts to go along with the turkey of choice that year, a cherry pie is always included. My dad doesn't care for pecan, the aforementioned apple, or even pumpkin. Since the cherry pie usually belongs to him and him alone, a canned cherry pie filling and store bought crust usually suffices. However, that is not how I prefer to assemble my desserts. Especially during the peak of cherry season. I bought a large bag of dark, sweet cherries and they certainly tasted as advertised. They were plump and juicy- the flesh the color of a mature merlot. Thankfully I bought more than I needed for the cobbler, because I just couldn't resist eating a handful or two while meticulously pitting each cherry. And though the cherries were the real star of this dessert, the crust was a fierce competitor. It was impossibly fluffy, thanks to the addition of buttermilk and heavy cream. The cobbler didn't need anything else at this point- it was already quite tasty, but I decided to make a batch of homemade vanilla ice cream. Partly because cobbler and vanilla ice cream go together like peas and carrots, but also partly because I had just bought a new ice cream recipe book by David Lebovitz and I was dying to try one of them out. Vanilla ice cream, though standard, is sinfully delicious and rich when made the traditional French way with egg yolks heated with cream, but when paired with a fresh-from-the-oven cherry cobbler, it's out of this world. 


Cherry Cobbler

Ingredients:

For cherry filling-
2 cups sugar
3 tablespoons cornstarch
12 cups fresh or frozen pitted tart cherries (about 4 pounds fresh, picked over)
2 tablespoons Frangelico or Di Saronno Amaretto
1 ½ teaspoons vanilla
1 tsp almond extract
¼ tsp allspice
2 tbsp lemon juice

Topping-
2 1/2 cups all purpose flour
1/2 cup plus 1 tablespoon sugar
1 1/2 teaspoons baking powder
3/4 teaspoon baking soda
1/2 teaspoon salt
1/2 cup (1 stick) chilled unsalted butter, cut into 1/2-inch cubes
3/4 cup chilled buttermilk
3/4 cup chilled whipping cream

Directions:

1. Preheat oven to 375° F.

2. To make filling, whisk together sugar and cornstarch in a large heavy saucepan. Add fresh cherries, liqueur, vanilla, almond extract, allspice and lemon juice and bring to a boil over moderate heat, stirring occasionally. Simmer mixture, stirring, 4-5 minutes and transfer to a 9 x 13 inch baking dish. Set aside.

3. For topping, whisk flour, 1/2 cup sugar and next 3 ingredients in a large bowl to blend. Add butter; rub in with fingertips or use a pastry blender until mixture resembles coarse meal. Slowly add buttermilk and cream, tossing with fork until dough comes together.

4. Drop dough by rounded tablespoonfuls over hot filling to cover. Sprinkle with remaining 1 tablespoon sugar. Bake cobbler until topping is golden and tester inserted into center of topping comes out clean, about 40 minutes. Cool 15 minutes. Serve cobbler warm with whipped cream or ice cream.

Serves 12


Vanilla Ice Cream

Ingredients:

1 cup whole milk
3/4 cup sugar
2 cups heavy cream, divided use
pinch of salt
1 vanilla bean, split in half lengthwise
6 large egg yolks
3/4 teaspoon vanilla extract

Directions:

1. Warm the milk, sugar, 1 cup of the cream, and salt in a medium saucepan. Scrape the seeds from the vanilla bean into the warm milk and add the bean as well. Cover, remove from the heat, and let steep at room temperature for 30 minutes.

2. Pour the remaining 1 cup of cream into a large bowl and set a mesh strainer on top. In a separate medium bowl, whisk together the egg yolks. Slowly pour the warm mixture into the egg yolks, whisking constantly, then scrape the warmed egg yolk mixture back into the saucepan.

3. Stir the mixture constantly over medium heat with a heatproof spatula, scraping the bottom as you stir, until the mixture thickens and coats the spatula. Be careful to not let the mixture boil. Pour the custard through the strainer and stir it into the cream. Put the vanilla bean into the custard, add the vanilla extract, and stir until cool over an ice bath.

4. Chill the mixture thoroughly in the refrigerator. When ready to churn, remove the vanilla bean, rinsing and reserving for another use, and then freeze the mixture in your ice cream maker according to the manufacturer's instructions.

Makes about 1 quart

December 22, 2009

12 Days of Goodies- Day 10: Meyer Lemon and Wild Blueberry Scones


It's hard to believe that I've only been doing this for 10 days, because it feels like a whole lot longer! I hate to admit it, but I'm actually looking forward to a break from the kitchen. I'm starting to lose my sanity ever so slowly. At this point, however, I'm not so much concerned about my sanity, so much as my waist line. I'm literally forcing baked goods upon friends and neighbors, begging them to take things off my hands before I fall into a sugar induced coma, or worse, the next jean size.

But in the meantime, during a couple more days of insanity and chaos, we've got three more sugar filled treats to enjoy. This one being meyer lemon and wild blueberry scones. I've always been a sucker for scones. They sound so sophisticated, especially when eaten with clotted cream. But I actually chose to eat these particular scones with lemon curd. Sadly, it wasn't homemade, but this stuff is so divine, you would never know it came from a jar. It's Stonewall Kitchen Lemon Curd. mmmmmm. Soo good.


Meyer Lemon and Wild Blueberry Scones
Recipe courtesy of Epicurious.com

Ingredients:
3 cups self-rising flour
1/2 cup plus 1 1/2 tablespoons sugar
3/4 cup (11/2 sticks) chilled unsalted butter, cut into 1/2-inch cubes
1 1/2 cups dried wild blueberries (about 10 ounces)
1 cup plus 1 tablespoon buttermilk
1 1/2 tablespoons finely grated Meyer lemon peel or regular lemon peel

Directions:
1. Position rack in top third of oven and preheat to 425°F. Line large baking sheet with parchment paper.

2. Whisk self-rising flour and 1/2 cup sugar in large bowl. Using fingertips, rub in chilled butter until pieces are size of small peas. Add dried wild blueberries and toss to coat. Mix 1 cup buttermilk and finely grated lemon peel in glass measuring cup. Pour buttermilk mixture into dry ingredients and stir until dough begins to form (some of flour will not be incorporated).

3. Transfer dough to lightly floured work surface and gather together. Knead dough briefly, about 5 turns. Divide dough in half. Form each dough half into ball and flatten into 1-inch-thick disk. Cut each disk into 6 wedges.

4. Transfer scones to prepared baking sheet, spacing 1 inch apart. Brush tops with remaining 1 tablespoon buttermilk and sprinkle with remaining 1 1/2 tablespoons sugar. Bake until scones are golden brown on top and toothpick inserted into center comes out clean, about 25 minutes.

Makes 12 scones

December 19, 2009

12 Days of Goodies- Day 7: Pistachio, Cherry, and White Chocolate Biscotti


I've aways liked the idea of dipping a crisp, sweet piece of biscotti in my coffee... perhaps as I'm sitting in a café... reading a good book... listening to French music. Ok, so that's kind of a cliché, but that's the image that comes to mind when I think of biscotti. (That does sound like a great way to while away the hours though, huh?)

The best thing about doing this 12 days series, is that I've been able to make so many things that I've always wanted to. And believe it or not, biscotti has always been high on that list. And the great thing about biscotti, is that there is really no limit as to what you can do with it. You could make almond and lemon biscotti, chocolate hazelnut biscotti, vanilla and honey biscotti, even a savory biscotti! Well, I chose this pistachio, cherry, and white chocolate biscotti, because I liked the colorful cross section of it. And technically, the recipe called for dried raspberries, but I was unable to find any. So I went with cherries. Actually what I found was razzcherries (?) I'm guessing that has to be somewhat related to raspberries, right?


Pistachio, Cherry, and White Chocolate Biscotti
Recipe courtesy of Epicurious.com

Ingredients:
3 cups all purpose flour
2 teaspoons baking powder
1/2 teaspoon salt
1 cup sugar
3 large eggs
2 tablespoons canola oil
2 1/2 teaspoons almond extract
3/4 cup shelled raw unsalted natural pistachios
1 cup dried raspberries or chopped dried strawberries (about 5 ounces) (I used dried cherries)
1/2 cup chopped high-quality white chocolate (such as Lindt or Perugina)
8 ounces high-quality white chocolate and/or 8 ounces bittersweet or semisweet chocolate, chopped

Directions:
1. Preheat oven to 350°F. Line large baking sheet with parchment paper. Whisk flour, baking powder, and salt in medium bowl to blend. Using electric mixer, beat sugar, eggs, oil, and almond extract in large bowl until well blended. Add flour mixture and beat until combined (the batter should be very stiff). Stir in pistachios, dried berries, and 1/2 cup chopped white chocolate. Drop dough by heaping tablespoonfuls in two 12-inch-long strips on prepared baking sheet, spacing strips 3 inches apart. Using wet fingertips, shape each strip into 3-inch-wide log, pressing evenly (logs may look slightly lumpy).

2. Bake logs until lightly browned and almost firm to touch, about 30 minutes. Cool logs on sheet 30 minutes. Reduce oven temperature to 325°F.

3. Carefully transfer logs to cutting board. Line same baking sheet with parchment paper. Cut each log crosswise into generous 1/2-inch-thick slices. Stand biscotti upright, spacing about 1/4 inch apart, in 3 rows on prepared baking sheet. Bake until pale golden (biscotti may be soft but will firm as they cool), about 20 minutes. Cool completely on baking sheet.

4. Line another large baking sheet with parchment paper. Place 8 ounces chopped white chocolate in medium glass bowl. Place 8 ounces chopped bittersweet chocolate in another medium glass bowl, if desired. Microwave separately on medium in 20-second intervals just until chocolate is soft to touch, about 40 seconds total (do not overheat or chocolate will burn or seize). Stir chocolate until smooth.

5. Dip 1 end or 1 side of each biscotti in chocolate; place on baking sheet. Chill until chocolate is set, about 30 minutes. (Can be made ahead. Arrange in single layer in airtight container and chill up to 5 days or freeze up to 2 weeks.)

Makes about 3 dozen


December 4, 2009

Caramel Apple Pie


So I know it's a little late to be writing a post about the Thanksgiving I so thoroughly enjoyed last week, I mean most of us have already moved on into the Christmas mind set, but I really wanted to share with you, at the very least, the pie that I slaved over for more than 5 hours. I was in fact only willing to spend that amount of time on one little pie just so I could take some pretty pictures to upload for all to enjoy. And I really am sorry that it has taken me a whole week to share this recipe. I'm sure some of you may recall the promise that I made after my move back from the north, the one where I vowed to be super committed to this whole blogging thing. And I have just now realized that I only made 5 posts during the whole month of November, but did I also mention the whole catering thing? Yeah, thats a major time commitment, my friends. Also, I confess I've been somewhat of the social butterfly as of late, staying out way too late, thus spending the majority of my days nuzzling my face into a pillow trying to block out the sunlight.


Anyways, I guess sharing this recipe now is better late than never, right? It is worth sharing too, because this pie doesn't just have your run of the mill caramel sauce. No. It has a red wine caramel sauce. Caught your attention didn't I? At first, I wasn't too sure how the red wine would meld with caramel. I actually thought about swapping some Calvados for the wine. (Which I still think would taste divine). But I'm so glad I stuck to the original recipe, because this was such an interesting flavor combination. So rich... and complex... and delicious. I can't wait to incorporate this sauce into something else. However, I should provide a warning. This pie- mainly due to the sauce alone- is not for the impatient. Luckily, I was able to nail the sauce on my second try, but from reading many of the reviews on this recipe, it took others many more times to perfect it, and some never managed to get it right at all.


During my first attempt, I stirred the sugar and water mixture (the only 2 ingredients necessary to make caramel) continuously which resulted in a hardened rock like catastrophe. So I did a little research on the art of making caramel, and I would like to pass along my new found knowledge. The sugar and water should only be stirred together just until the sugar begins to dissolve into the water. Then let the magic happen on its own. The sugar will start to boil, and slowly it will begin to harden, and just when you think you've failed and ruined it, the sugar will melt again, this time turning into a bubbling brownish hue. When you've reached the desired degree of amber, begin to stir it again to smooth out the mixture. This is basic caramel. Adding butter and cream, or in this particular recipe red wine and cream, will result in a caramel sauce. Another little helpful suggestion would be to use a candy thermometer. At around 350º F is when the sugar will begin to brown.


The recipe also suggested using a paring knife to manually slice the apples, or perhaps a mandolin. Well, after three plus hours already invested into this pie, I was desperate to speed things up. I used my new elite food processor to slice the apples. I took all of 5 minutes to very thinly slice 8 rather large apples. Pretty exciting stuff! Hopefully, by offering some of my pearls of wisdom, I'll be able to save some of you some time, if and when you decide to try this pie. Instead of 5 hours, maybe you'll only have to invest, say 3 1/2? Trust me, it's all worth it for the red wine caramel sauce.


Caramel Apple Pie
Recipe adapted from Tyler Florence at Food Network

Ingredients:
3 cups all-purpose flour
pinch of salt
3/4 cup unsalted butter, cold, cut in pieces
2 eggs separated (yolks for pastry, whites for glaze)
3 tablespoons ice water, plus more if needed
For Caramel Apples:
1 cup sugar
3 tablespoons water
1/4 cup heavy cream
1/2 cup red wine
1/2 vanilla bean, split and scraped
1 lemon, juiced
8 apples (I used Granny Smith and Honey Crisp)
1 tablespoon flour
1 tsp ground cinnamon
1/4 cup unsalted butter
cinnamon-sugar spice mixture
Turbinado sugar (optional)

Directions:
1. To make the pastry, combine the flour and salt together in a large bowl. Cut in the pieces of cold butter with a pastry blender, a little at a time, until the dough resembles cornmeal. Add the 2 egg yolks and the ice water, and blend just long enough to pull the dough together and moisten. Be careful not to overwork the dough. Form the dough into a ball, wrap it tightly in plastic wrap, and let it rest in the refrigerator for 1 hour. (To speed up the process, you can use a food processor. Pulse the flour and butter together, add the egg yolks and water, pulse again to moisten the mixture, then form the dough into a ball with your hands).

2. While the dough is resting, prepare the filling. To make the caramel sauce, place the sugar and water in a small pot, and stir until the mixture resembles wet sand. Cook on medium-low heat and stir just until the sugar begins to dissolve. At this point, avoid stirring any further. The sugar will harden (and you will think you have burned it) but it will begin to re-melt and turn brown. A candy thermometer can help you know more exactly when to expect this re-melting process. The sugar will begin to turn brown at around 330º to 340º. Once the sugar is browning, begin to stir again to smooth out the caramel. (This process took me about 20-25 minutes). Remove the pot from the burner and add the cream, and then the wine slowly, so as not to seize the caramel. It may bubble and spit, so be careful. When the sauce has calmed down, return it to the flame, add the vanilla bean scrapings, and heat it slowly, until the wine and caramel are smooth and continue to cook slowly until reduced by half, about 10-12 minutes. Remove from the heat and cool until thickened.

3. Fill a large bowl with cold water and the lemon juice. Peel the apples with a paring knife or peeler, cut them in half, and remove the cores with a melon baller. Put the apple halves in the lemon-water (this will keep them from going brown).

4. Preheat the oven to 350º F. Take the dough out of the refrigerator, unwrap the plastic, and cut the ball in half. Rewrap and return 1 of the balls to the refrigerator, until ready for the top crust. Let the dough rest on the counter for 15 minutes so it will be pliable enough to roll out. Using a rolling pin, roll out the dough on a lightly floured surface into a 12-inch circle. Carefully roll the dough up onto the pin and lay it inside a 10-inch glass pie pan. Press the dough into the pan so it fits tightly.

5. Drain the apples, blot dry with paper towel, and toss with the flour and cinnamon. Slice the apples using a very sharp knife, a mandolin, or a food processor fitted with a slicing blade. The apples need to be thinly sliced so that as the pie bakes, they collapse on top of each other with no air pockets. (I set my food processor slicing blade on 4). This makes a dense, meaty apple pie. Cover the bottom of the pastry with a layer of apples, shingling the slices so there are no gaps. Ladle about 2 ounces of the cooled red wine caramel sauce evenly over the apple slices. Repeat the layers until the pie is slightly overfilled and domed on the top; the apples will shrink down as the pie cooks. Top the apples with pieces of butter.

6. Now, roll out the other ball of dough just as you did the first. Brush the bottom lip of the pie pastry with a little beaten egg white to form a seal. Place the pastry circle on top of the pie, and using some kitchen shears, trim off the overhanging excess from around the pie. Crimp the edges of dough together with your fingers to make a tight seal. Cut slits in the top of the pie so steam can escape while baking. Place the pie on a sheet tray and tent it with a piece of aluminum foil, so the crust does not cook faster than the apples.

7. Bake the caramel apple pie for 25 minutes on the middle rack. Remove the foil from the pie and brush the top with the remaining egg white. Generously sprinkle with the cinnamon-sugar mixture, and if using, a little of the turbinado sugar (this gives it a rustic look). Return the pie to the oven, and continue to bake for another 25 minutes, until the pie is golden and bubbling. Let the apple pie rest at room temperature for at least 1 hour to allow the fruit pectin to gel and set; otherwise the pie will fall apart when you cut into it.

Makes 6 to 8 servings