I know what you've been thinking. Where is she? Where has she gone? I know, too, that you've missed me dearly, assuming only that I had abandoned this blog without even so much as a warning or farewell. Well, that is simply not the case. I never had the intention of ignoring my small audience of Crumbs followers, and I can only assume that I have pushed some of you away. But sometimes "life" happens. It steps in and throws you a curve ball or two, interrupting plans, routines and the way of living one has become accustomed to. That is certainly what has happened to me. Luckily, my curve balls have been blessings. Life, standing unannounced on that pitcher's mound, has thrown me some well deserved (or at least I'd like to think so) opportunities and happiness.

Since my last post (NINE MONTHS AGO!!), I've started a "promising" job, purchased a puppy, fallen in love, quit that job once believed to be promising and moved 1,000 miles away from Dallas to my new home in Tempe, Arizona. As you can see, I've been a little preoccupied with adjusting to some new life changes. In the beginning, I was determined to continue with this blog, even expand on it. All too soon, however, writing a new blog post just became one more thing on my much too long To Do List. I was feeling stressed, pressured even. When am I going to find the time to write on my blog?! Weeks passed and the time that had lapsed became overwhelming. I felt like a failure. Why had I let so much time go by without posting to Culinary Crumbs? The answer: there was simply too much going on in my life at the time. 60+ hour work weeks, taking care of a whimpering puppy at all hours of the night, traveling back and forth from Dallas to Phoenix... I had to consign to the fact that, for the time being, my blog would have to be placed on the back burner until I had figured out how to juggle all the new aspects of my life.

Well I think that time has come. I'm still trying to find my groove here in Arizona, but maintaining this blog is going to be part of my new routine. This blog makes me happy and it has become a project that I truly enjoy. So why would I want to give that up completely? Before I fill you in on my plans for the future of this blog, let's take a step back in time so I can spill the dirty details on the last 9 months of my life...
2011 started off with a bang. At the end of January, I started a new gig working as the Web Manager for an upscale jewelry company based at NorthPark Mall in Dallas. I had every ounce of energy and creativity sucked out of me over the course of the next 6 months; being ruled over by an evil, bipolar dictator. However, I somehow managed to find time to raise a delightful, albeit delinquent, puppy, Dexter.
Now, how cute is he? I wish he still looked like that. I wish he was still that tiny. I wish he was simply small enough to take for a leisurely stroll. You'd be surprised at how strong and how much power an 85 pound puppy can muster up. At 10 months old, my not so tiny puppy has more energy than I know what to do with sometimes. He tests my patience and keeps me on my toes on a daily basis, but it's hard to stay angry at something as cute as he is.
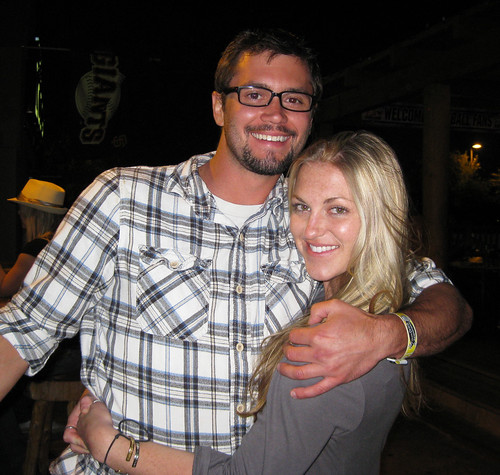
Job, puppy... oh, yes. Boyfriend. Jonathon and I met on a ski trip sponsored by a mutual friend. Jessie, a close friend of mine since middle school, had gone to college at Arizona State with Jon and invited a large group of friends from both Plano and Arizona to spend a weekend at her family's house in Pagosa Springs, Colorado. I guess our romance could be summed up with "love at first sight." I knew almost immediately that this guy was someone special.
Over the next 6 months, Jon and I traveled back and forth from Dallas to Phoenix, and vise versa, visiting each other and getting to know one another. We opened up Southwest Airlines credit cards and committed to making the long distance thing work for as long as we could. But, and I'm sure anyone who has been in a long distance relationship can attest, a weekend together here, and weekend together there, can't quite make up for all those weeks and weekends in between spent apart.
So, with the support of family and friends (along with the disapproval from a few others) I packed up my belongings into boxes (a vast majority of them being labeled "kitchen stuff"), crammed them into a Uhaul and drove the 1,000 plus miles from Plano to Tempe, Arizona in mid-August. I've since settled in, found a temporary job and rediscovered my need to blog.

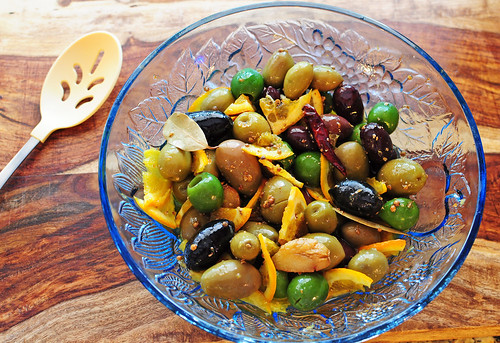
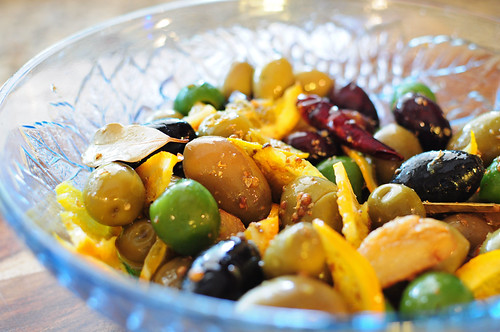
And so here we are. At the present. It's taken me so long to get this blog back up and running but I'm determined to keep it going this time around. I've learned that it's all about the baby steps when trying to adjust to new surroundings and tackle a daunting To Do List. Which is exactly why I've selected such an easy recipe to write about for my first time back from my blogging hiatus. I knew that there would be a plethora of information I would want to share with you regarding my life. And I knew that I would be a little rusty on the more technical aspects of blogging. So in order to not overwhelm myself, I chose a simple recipe of marinated olives. A visually stunning recipe, yes, but a breeze in the kitchen. Exactly what I was looking for.
You see, I have a plan for this blog. I plan on starting off somewhat slow: one post per week, with every week of each month being dedicated to a different category of recipes. Restaurant inspired recipes, sugar centered recipes (ie: desserts, baked goods, perhaps an ice cream), health conscious recipes and, finally, a wild card (read: "whatever the hell I feel like making" recipe). Of course, there will be some special posts correlating to holidays and travels, but this is the general formula I intend to follow. Hold me to it, will you?
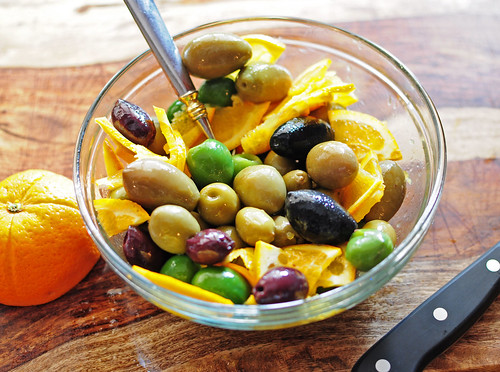
Citrus Marinated Olives
Recipe Courtesy of Bon Appetit, September 2011
Ingredients:
2 cups mixed oil-packed olives
1/2 orange, quartered, then thinly sliced
1/2 cup extra-virgin olive oil
3 garlic cloves
1 tbsp crushed coriander seeds
2 bay leaves
1 small red chile (I used two dried chiles, you could use a fresh Fresno chile, halved lengthwise)
Directions:
1. Place the olives in a medium sized bowl with the sliced oranges.
2. In a small saucepan over low heat, combine the olive oil, garlic cloves, coriander, bay leaves and red chile. Cook until fragrant and garlic begins to brown, about 20 minutes. Remove pan from heat and let steep for 1 hour.
3. Pour oil mixture over olives and stir to coat. Marinate at room temperature for 2 hours or cover and chill up to 4 days. Bring to room temperature before serving.
Makes 2 cups