I understand it's been a three month hiatus. It was a very busy holiday season, as I'm sure it was for all of you. Who doesn't feel a little overwhelmed during that time of the year? But mine was very busy, you see. I started a brand new job the week after Thanksgiving. A great job. The kind I've been looking for, with generous vacation time and health benefits. Yes sir, I went and got myself a big girl job.
Showing posts with label Fall Recipes. Show all posts
February 1, 2013
October 13, 2012
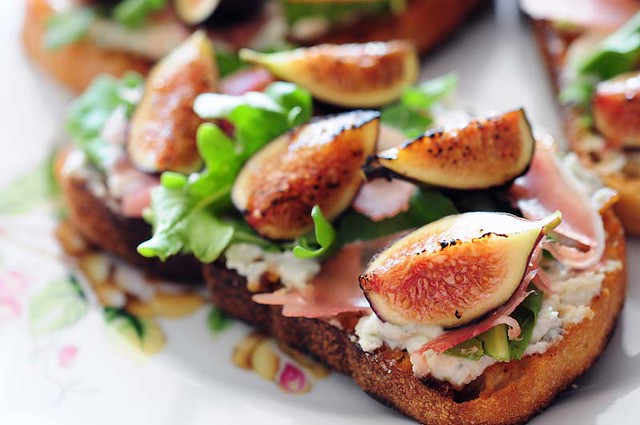
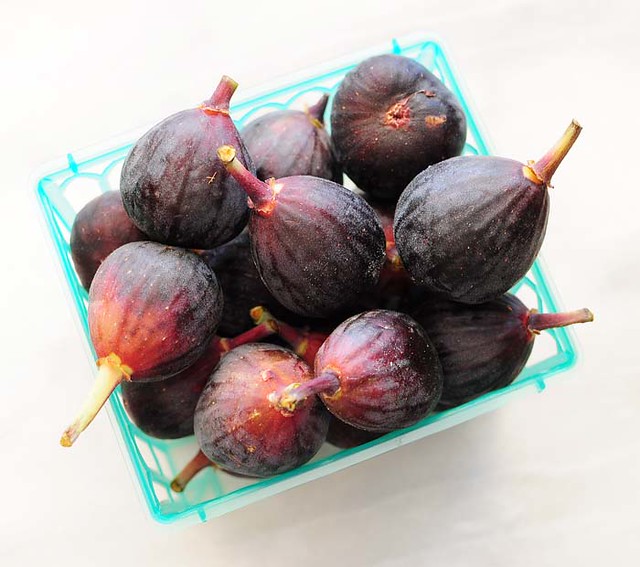
Fresh Fig Bruschetta
Let’s talk about simplicity. It can be used to describe so many different facets of life and it’s something I strive for in almost each and every one of them. Simplicity in the way I dress, the overall design and aesthetic of my home, my weekly schedule, and even in my morning routine.
Posted by
Karlie Kiser
Labels:
Appetizers
,
Cheese
,
Fall Recipes
,
Figs
,
Fruit
,
Quick Recipes
,
Snacks
November 18, 2011
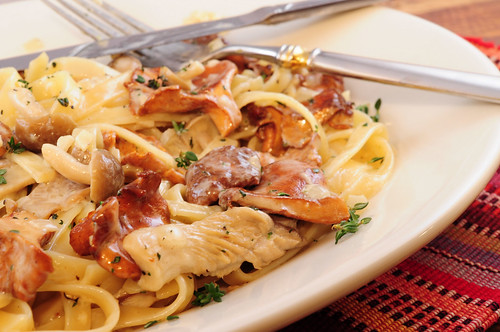
Truffled Mushroom Tagliatelle
I had a birthday. Another birthday. My 27th one to be exact. I don't feel near as old as I actually am. Sometimes I think I'm still 22, that is until the monthly bills start rolling in or perhaps when I glance in the mirror and see the early signs of aging starting to appear on my once youthful face. Despite facing yet another birthday, inching me ever closer to that dreaded 3-0, I like to take this time of year to pamper myself a little bit.
Instead of using the birthday money I get from relatives to put towards bills (which is exactly what I should be doing), I allow myself to buy a little something just for me. I mean, I deserve it right? I also let myself truly indulge the week of my birthday. Cake, red meat, an extra margarita or two. So when it came time to decide what I was going to whip up for this blog last week, I thought it should include one of my absolute favorite things: truffles.
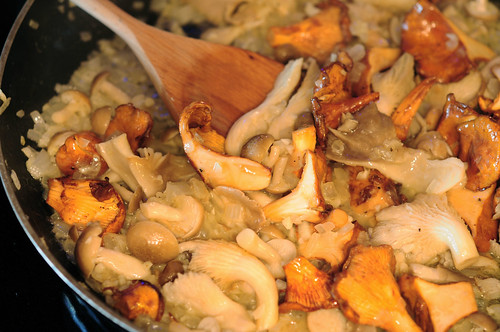
Unfortunately, I wasn't able to use actual truffles (I can't afford such luxuries at the moment), but I did use plenty of truffle oil and a beautiful blend of earthy, unctuous mushrooms. I had found a delicious looking recipe for a mushroom fricassee in September's Bon Appétit. I had been looking for a good excuse to make it and my birthday seemed as good as any. (Side note: a fricassee by definition is a dish of pieces of meat or vegetables stewed in stock and served in a white sauce).
Bon Appétit's version of mushroom fricassee called for using only chanterelle mushrooms. However, when I got to Whole Foods and realized that chanterelle mushrooms were $29.99 a pound, I decided I'd better take a different route. I went with a mixture of chanterelles, oyster mushrooms and the adorable looking enokitake mushrooms. Not only did I save myself roughly $15, but I thought the mixture of mushrooms would make for an interesting looking dish.
OK, enough about mushrooms, let's talk more about my birthday. Jon's gift to me was something I've always wanted. I got this same gift for my 13th birthday, but for some very odd reasons, the gift fell through. Jon made it happen for me though.
He got me the hot air balloon ride that I've been waiting to take for 14 years. Despite the 5:30 AM wake up time and the very unexpected hangover, the ride was magical and the view beautiful.
It was everything I thought it would be and even more, because now I got to share the experience with the man I love. Thank you, Jon, for making one of my dreams come true.
Recipe adapted from Bon Appétit, September 2011
Ingredients:
6 tbsp unsalted butter, divided
2 tbsp extra-virgin olive oil, divided
1 small yellow onion, finely chopped
kosher salt
freshly ground black pepper
4 garlic cloves, minced
1/4 cup dry white wine
8 oz chanterelle mushrooms
4 oz oyster mushrooms
4 oz enokitake mushrooms
1/2 cup heavy cream
pinch of freshly ground nutmeg
1 tsp fresh thyme, chopped, plus more for garnish
fresh lemon juice
1/4 lb tagliatelle pasta, cooked al dente
white truffle oil
Directions:
1. Melt 3 tablespoons of butter with 1 tablespoon of olive oil in a large skillet over medium-high heat. Add onion, season with salt and pepper and cook, stirring occasionally, until softened and lightly golden, 4-5 minutes.
2. Add garlic and cook for 1 minute. Add wine, stir to mix and cook until liquid is reduced by half, about 2 minutes. Add remaining 3 tablespoons of butter, remaining 1 tablespoon of olive oil and mushrooms. Cook, stirring occasionally, until mushrooms are lightly golden, about 5 minutes.
3. Add cream and nutmeg and cook until slightly thickened, about 2 minutes. Stir in 1 teaspoon thyme and season to taste with salt, pepper and lemon juice. Add cooked pasta and toss until evenly coated. Drizzle with truffle oil to taste (I like to add 2-3 teaspoons). Garnish with more thyme and serve.
Makes 4 servings
November 7, 2011
Wildly Wonderful Whiskey Cake
It has been just over thirteen weeks since I have unloaded my things (more than I think Jon was expecting) into my new home in Tempe. It would be a lie to say that I haven't felt the least bit homesick. Don't get me wrong, Jon is great company- we have so much fun together- but every now and then, I feel that slight pang in my chest; the longing to see my friends, go to lunch or run errands with my mom or even to eat at one of the restaurants that I had grown so fond of. Living in the Dallas area for over 16 years gave me ample time to grow deep and meaningful relationships with several restaurants. There are many that became permanent fixtures in my dining out routine, none more so than Mi Cocina (what I would give for a Mambo Taxi...), but Whiskey Cake, quite possibly my new all time favorite restaurant, has been on my mind more often than I would like.
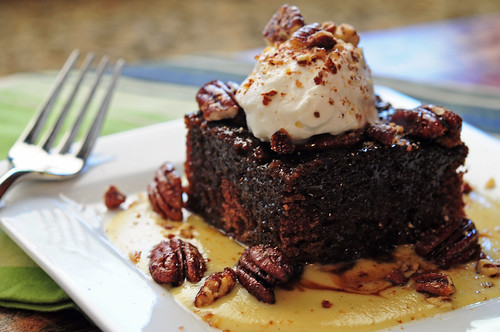
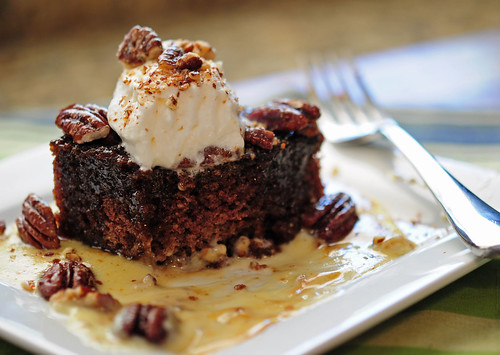
My constant day dreaming of the food at Whiskey Cake is starting to become a problem. One day it's thoughts of the Mesquite Grilled Redfish, the next it's their "3 Little Pigs" pulled pork sliders. But most often, I dream of having a large slice of their namesake dessert placed in front of me, their Whiskey Cake.
It is unlike any other dessert I have ever tasted- rich, sticky, stinking of good whiskey and sinfully delicious. The mere thought of sliding my fork down the edge of that cake into a pool of bourbon sauce is almost enough to get me to book a flight back to Dallas. Almost.
The thing is, why would I fly all the way back to Texas when I could have Whiskey Cake right here, in the comfort of my new home? Well, to put it simply, I wouldn't. Not only does Whiskey Cake serve up fresh, local and seasonal ingredients (a restaurant trend that I hold in the highest regard ), but this restaurant has won me over in another big way. You can request any recipe for any dish off their menu. Now, in my experience, most restaurants who provide recipes or publish cookbooks supposedly filled with said recipes, will subsequently tweak an ingredient here or leave out an ingredient there, thus resulting in a failed attempt to remake your favorite restaurant dish at home. My thoughts on this matter: If you don't wan't to give out the real recipe for a dish off your menu, then don't give out the recipe at all.
I can't tell you how many times I have bought a cookbook from a bakery or restaurant only to fully regret that purchase days later after my pursuit to mimic a particular dish ends in complete misery. My desire for a slice of Whiskey Cake was too strong to let this deter me, however. I figured I should give this particular recipe a fair shot, although I will admit I was skeptical of it from the get go. But with doubts and fears aside, I completed all 5 components needed to make the Whiskey Cake what it is: an absolute masterpiece. Did I tweak the recipe to make it somewhat my own? Perhaps... I may or may not have tripled the amount of whiskey originally called for... I'll let you be the judge of that.
Whiskey Cake
Recipe slightly adapted and interpreted from Whiskey Cake, in Plano, Texas
Ingredients:
Date Cake (see recipe below)
Bourbon Sauce (see recipe below)
Toffee Sauce (see recipe below)
Spiced Pecans (see recipe below)
Whipped Cream (see recipe below)
* I know this recipe looks like a lot of work, what with there being 5 separate components, but in order to make it a little easier on yourself, make 3 components one day and 2 the next. Each component really doesn't require that much time and I promise the effort will be well worth it!
Directions:
1. Cut the Date Cake into 12 equal pieces. Poke several holes in the top of each piece using a wooden skewer or chopstick. Arrange the cake pieces on a baking sheet covered with nonstick foil.
2. Heat the oven to 500º. Pour 1/4 cup of Toffee Sauce over each piece of Date Cake. Place toffee soaked cake pieces in the oven for about 4-5 minutes, until the Toffee Sauce is bubbling and the cake is warmed throughout.
3. Spoon 1/4 cup of Bourbon Sauce onto 12 individual plates or bowls. Place each piece of warmed cake in the middle of each pool of Bourbon Sauce. Finish each piece with a large dollop of Whipped Cream and a sprinkling of Spiced Pecans. Enjoy!
Makes 12 servings
Date Cake
Ingredients:
1, 8 oz package of dried pitted dates, chopped into 1/2" pieces
2 tsp baking soda
1 3/4 cup boiling water
1 stick unsalted butter, softened
1 cup + 2 tbsp granulated sugar
3 jumbo eggs, at room temperature
1 3/4 cup self rising flour (*see note below to make your own)
3 tbsp Sugar in the Raw (turbinado sugar)
Directions:
1. Heat the oven to 350º. Place dates, baking soda and boiling water in a medium sized bowl. Allow to sit for 15-20 minutes until the dates are softened. Place the date mixture in a food processor for 2 minutes to form a paste.
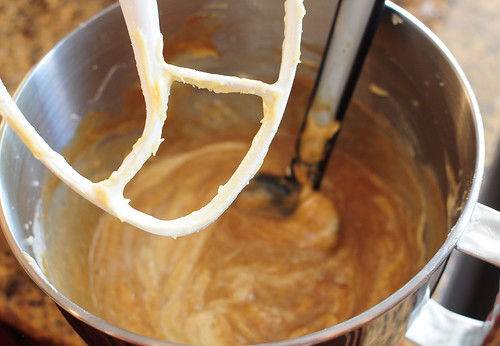
2. Using a stand mixer fitted with the paddle attachment, cream the butter on medium speed for about 1 minute. Add the sugar and continue to cream for 3 minutes longer. Scrape down the sides of the bowl using a rubber spatula. Add the eggs, one at a time, mixing in between to fully incorporate each egg. Scrape down the sides of the bowl. With the mixer running on low, add the flour, about 1/2 cup at a time, and mix just until the flour is no longer visible.
3. Remove the bowl from the stand mixer. Add the date paste and gently fold in using a rubber spatula.
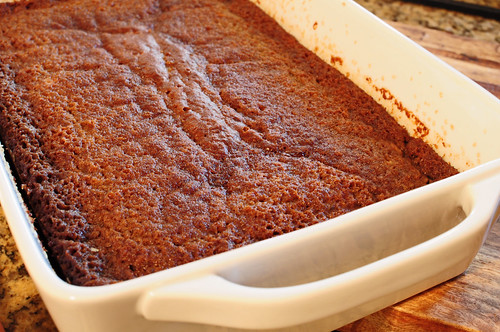
4. Spray an 8"x14" cake pan with non-stick spray. Sprinkle the turbinado sugar into the cake pan and move the pan around until the sugar coats the bottom and all sides. Pour in the cake batter and bake for 30-40 minutes or until a toothpick comes out clean.
5. Allow the cake to cool at room temperature for 20 minutes. Flip the cake out onto a parchment paper lined tray. Leave at room temperature to cool completely. Wrap the cake in plastic wrap and store at room temperature until ready to use.
*To make Self-Rising Flour: mix together 3 cups of all purpose flour, 2 tsp of iodized salt and 1 tablespoon of baking powder in a medium sized bowl. Use immediately or store in an airtight container.
Bourbon Sauce
Ingredients:
2 cups heavy cream
1/2 cup granulated sugar, divided
1vanilla bean, split
4 jumbo egg yolks
1 tsp vanilla extract
2 tbsp good bourbon (I used Maker's Mark)
Directions:
1. Bring heavy cream, 1/4 cup sugar and vanilla bean to a simmer in a small to medium sized sauce pot.
2. In a mixing bowl, whisk the egg yolks and other 1/4 cup sugar together until frothy.
3. While stirring, slowly add about 1/2 of the heavy cream mixture to the eggs. Stir together gently. Pour the egg mixture into the pot of remaining heavy cream. Continue to cook over medium-low heat until the mixture thickens and coats the back of a spatula or spoon.
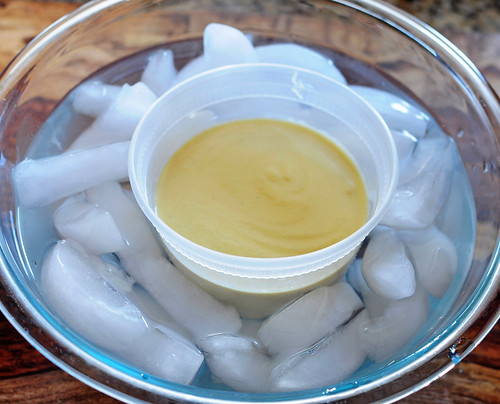
4. Stir in the vanilla extract and bourbon and remove from heat. Pour the mixture through a strainer into a container. Place the container of bourbon sauce in an ice bath until cool.
5. Either use the sauce immediately, or store in the fridge until ready to use. If stored in the fridge before use, re-heat in the microwave at 10 second intervals on 50% power until thinned and slightly luke warm.
Toffee Sauce
Ingredients:
1 stick unsalted butter
1 lb light brown sugar
2 cups heavy cream
2 tbsp good bourbon
1 tbsp vanilla extract
Directions:
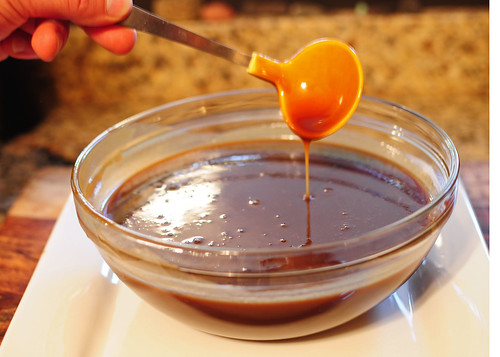
1. Place butter in a heavy bottom sauce pot over medium heat. Once melted, add brown sugar and continue to cook for about 8 minutes, stirring occasionally.
2. Add heavy cream and allow to cook for another 6-7 minutes, still stirring occasionally.
3. Remove pan from heat and stir in bourbon and vanilla. Use sauce immediately or store in the fridge for up to 3 days. Reheat before using.
Spiced Pecans
Ingredients:
1 lb pecan halves
2 tsp water
3/4 cup maple syrup
1/2 tsp Kosher salt
1/2 tsp black pepper
1/2 tsp cayenne pepper
Directions:
1. Heat oven to 350º. Mix water, syrup, salt, and both peppers together in a small bowl. Place pecans in a medium sized bowl. Pour maple syrup mixture over pecans and mix until all are evenly coated.
2. Spread the pecans out on a baking sheet covered with foil. Bake for 12-15 minutes.
3. As soon as the pecans come out of the oven, scrape the pecans off the pan and break up pecan clumps to prevent from sticking together. Let cool completely. Store in an airtight plastic container at room temperature.
(At this point, I chopped up about half of the pecans to sprinkle on top of the cake. I left the other portion of pecans whole to use for other purposes, like as a salad topping).
Whipped Cream
Ingredients:
2 cups heavy cream
1/2 cup granulated sugar
1 tsp vanilla extract
Directions:
1. Using a stand mixer fitted with the whisk attachment, add the heavy cream, sugar and vanilla to the bowl. Beginning at low speed and slowly increasing the speed to high, whip the mixture together until slightly stiff peaks form.
2. Use immediately or store in the fridge until ready to use.
December 4, 2009
Caramel Apple Pie
So I know it's a little late to be writing a post about the Thanksgiving I so thoroughly enjoyed last week, I mean most of us have already moved on into the Christmas mind set, but I really wanted to share with you, at the very least, the pie that I slaved over for more than 5 hours. I was in fact only willing to spend that amount of time on one little pie just so I could take some pretty pictures to upload for all to enjoy. And I really am sorry that it has taken me a whole week to share this recipe. I'm sure some of you may recall the promise that I made after my move back from the north, the one where I vowed to be super committed to this whole blogging thing. And I have just now realized that I only made 5 posts during the whole month of November, but did I also mention the whole catering thing? Yeah, thats a major time commitment, my friends. Also, I confess I've been somewhat of the social butterfly as of late, staying out way too late, thus spending the majority of my days nuzzling my face into a pillow trying to block out the sunlight.
Anyways, I guess sharing this recipe now is better late than never, right? It is worth sharing too, because this pie doesn't just have your run of the mill caramel sauce. No. It has a red wine caramel sauce. Caught your attention didn't I? At first, I wasn't too sure how the red wine would meld with caramel. I actually thought about swapping some Calvados for the wine. (Which I still think would taste divine). But I'm so glad I stuck to the original recipe, because this was such an interesting flavor combination. So rich... and complex... and delicious. I can't wait to incorporate this sauce into something else. However, I should provide a warning. This pie- mainly due to the sauce alone- is not for the impatient. Luckily, I was able to nail the sauce on my second try, but from reading many of the reviews on this recipe, it took others many more times to perfect it, and some never managed to get it right at all.
During my first attempt, I stirred the sugar and water mixture (the only 2 ingredients necessary to make caramel) continuously which resulted in a hardened rock like catastrophe. So I did a little research on the art of making caramel, and I would like to pass along my new found knowledge. The sugar and water should only be stirred together just until the sugar begins to dissolve into the water. Then let the magic happen on its own. The sugar will start to boil, and slowly it will begin to harden, and just when you think you've failed and ruined it, the sugar will melt again, this time turning into a bubbling brownish hue. When you've reached the desired degree of amber, begin to stir it again to smooth out the mixture. This is basic caramel. Adding butter and cream, or in this particular recipe red wine and cream, will result in a caramel sauce. Another little helpful suggestion would be to use a candy thermometer. At around 350º F is when the sugar will begin to brown.
The recipe also suggested using a paring knife to manually slice the apples, or perhaps a mandolin. Well, after three plus hours already invested into this pie, I was desperate to speed things up. I used my new elite food processor to slice the apples. I took all of 5 minutes to very thinly slice 8 rather large apples. Pretty exciting stuff! Hopefully, by offering some of my pearls of wisdom, I'll be able to save some of you some time, if and when you decide to try this pie. Instead of 5 hours, maybe you'll only have to invest, say 3 1/2? Trust me, it's all worth it for the red wine caramel sauce.
Caramel Apple Pie
Recipe adapted from Tyler Florence at Food Network
Ingredients:
3 cups all-purpose flour
pinch of salt
3/4 cup unsalted butter, cold, cut in pieces
2 eggs separated (yolks for pastry, whites for glaze)
3 tablespoons ice water, plus more if needed
For Caramel Apples:
1 cup sugar
3 tablespoons water
1/4 cup heavy cream
1/2 cup red wine
1/2 vanilla bean, split and scraped
1 lemon, juiced
8 apples (I used Granny Smith and Honey Crisp)
1 tablespoon flour
1 tsp ground cinnamon
1/4 cup unsalted butter
cinnamon-sugar spice mixture
Turbinado sugar (optional)
Directions:
1. To make the pastry, combine the flour and salt together in a large bowl. Cut in the pieces of cold butter with a pastry blender, a little at a time, until the dough resembles cornmeal. Add the 2 egg yolks and the ice water, and blend just long enough to pull the dough together and moisten. Be careful not to overwork the dough. Form the dough into a ball, wrap it tightly in plastic wrap, and let it rest in the refrigerator for 1 hour. (To speed up the process, you can use a food processor. Pulse the flour and butter together, add the egg yolks and water, pulse again to moisten the mixture, then form the dough into a ball with your hands).
2. While the dough is resting, prepare the filling. To make the caramel sauce, place the sugar and water in a small pot, and stir until the mixture resembles wet sand. Cook on medium-low heat and stir just until the sugar begins to dissolve. At this point, avoid stirring any further. The sugar will harden (and you will think you have burned it) but it will begin to re-melt and turn brown. A candy thermometer can help you know more exactly when to expect this re-melting process. The sugar will begin to turn brown at around 330º to 340º. Once the sugar is browning, begin to stir again to smooth out the caramel. (This process took me about 20-25 minutes). Remove the pot from the burner and add the cream, and then the wine slowly, so as not to seize the caramel. It may bubble and spit, so be careful. When the sauce has calmed down, return it to the flame, add the vanilla bean scrapings, and heat it slowly, until the wine and caramel are smooth and continue to cook slowly until reduced by half, about 10-12 minutes. Remove from the heat and cool until thickened.
3. Fill a large bowl with cold water and the lemon juice. Peel the apples with a paring knife or peeler, cut them in half, and remove the cores with a melon baller. Put the apple halves in the lemon-water (this will keep them from going brown).
4. Preheat the oven to 350º F. Take the dough out of the refrigerator, unwrap the plastic, and cut the ball in half. Rewrap and return 1 of the balls to the refrigerator, until ready for the top crust. Let the dough rest on the counter for 15 minutes so it will be pliable enough to roll out. Using a rolling pin, roll out the dough on a lightly floured surface into a 12-inch circle. Carefully roll the dough up onto the pin and lay it inside a 10-inch glass pie pan. Press the dough into the pan so it fits tightly.
5. Drain the apples, blot dry with paper towel, and toss with the flour and cinnamon. Slice the apples using a very sharp knife, a mandolin, or a food processor fitted with a slicing blade. The apples need to be thinly sliced so that as the pie bakes, they collapse on top of each other with no air pockets. (I set my food processor slicing blade on 4). This makes a dense, meaty apple pie. Cover the bottom of the pastry with a layer of apples, shingling the slices so there are no gaps. Ladle about 2 ounces of the cooled red wine caramel sauce evenly over the apple slices. Repeat the layers until the pie is slightly overfilled and domed on the top; the apples will shrink down as the pie cooks. Top the apples with pieces of butter.
6. Now, roll out the other ball of dough just as you did the first. Brush the bottom lip of the pie pastry with a little beaten egg white to form a seal. Place the pastry circle on top of the pie, and using some kitchen shears, trim off the overhanging excess from around the pie. Crimp the edges of dough together with your fingers to make a tight seal. Cut slits in the top of the pie so steam can escape while baking. Place the pie on a sheet tray and tent it with a piece of aluminum foil, so the crust does not cook faster than the apples.
7. Bake the caramel apple pie for 25 minutes on the middle rack. Remove the foil from the pie and brush the top with the remaining egg white. Generously sprinkle with the cinnamon-sugar mixture, and if using, a little of the turbinado sugar (this gives it a rustic look). Return the pie to the oven, and continue to bake for another 25 minutes, until the pie is golden and bubbling. Let the apple pie rest at room temperature for at least 1 hour to allow the fruit pectin to gel and set; otherwise the pie will fall apart when you cut into it.
Makes 6 to 8 servings
November 15, 2009
Pumpkin Latte Crème Brûlée
Even though we have been well into the fall season for quite some time now (and almost into winter for that matter), I still feel I should mention my love of pumpkin spice lattes, and how their arrival on the Starbucks menu gets me giddy with anticipation for the upcoming "sweater" weather every year. I had my first of the season a while back, when I was still living in New York, and the tantalizing aromas from the cinnamon and nutmeg combined with the rich espresso got me thinking: wouldn't these flavors make for an excellent dessert? I felt inspired. The wheels started churning and I began to brainstorm the perfect vessel for my pumpkin latte creation.
At first I thought cupcakes, perhaps with a pumpkin cake base topped by a mocha buttercream, but that idea didn't leave me too excited. After several "rough" recipes, I came up with the idea for a crème brûlée that would marry the flavors of pumpkin pie and a latte into one smooth and silky custard. I did some research on crème brûlées and the different ingredients and techniques often used to create them, and was able to come up with a recipe that I felt would mimic the pumpkin spice lattes I've come to love so much.
I am not a very patient person, so I really try my hardest to get a recipe right the first time around. I don't have the time or tenacity (or money) to try a recipe over and over until I get it right. (A personality trait I should probably work on...) So I have to say I was thrilled when this recipe came out damn near perfect on my first try. I felt I achieved the balance of flavors I was looking for, and everything went smoothly (even the texture of the custard) just as I had hoped. At least until I broke out the blow torch, which was an experience all on its own.
Pumpkin Latte Crème Brûlée
Ingredients:
1 cup heavy cream
1 cup half & half
1 cup pumpkin puree (just to clarify, this is the same as pure pumpkin)
1/4 cup granulated sugar
1/4 cup light brown sugar
3/4 tsp cinnamon
1/4 tsp ground ginger
1/4 tsp cloves
1/4 tsp freshly grated nutmeg
1 tablespoon espresso powder
6 egg yolks
pinch of salt
1 tsp vanilla extract
1/4 cup turbinado (raw) sugar, for topping
Special Equipment:
6, 4 oz overproof ramekins
kitchen torch
Directions:
1. Preheat the oven to 325º F.
2. In a medium saucepan, whisk together the first 10 ingredients (cream through espresso powder). Over medium heat, bring the mixture just to a simmer or until steam rises. Remove from heat and set aside.
3. In a large bowl, whisk together the egg yolks and salt. Gradually add cream mixture, while whisking to combine. Stir in vanilla.
4. Strain the mixture into a large measuring cup or bowl with a pour spout. Divide the strained mixture evenly among the 6 ramekins. Arrange filled ramekins in a baking pan, then carefully transfer the pan to the oven. Slowly pour hot water into the pan surrounding the ramekins. Add enough water to reach half way up sides of the ramekins. Bake custards until set around the edges, but still slightly jiggly (like jello) in the center. Depending on personal oven temperatures, custards in shallow crème brûlée ramekins should be baked about 20-25 minutes, while custards in standard soufflé ramekins should be baked for 25-30 minutes. Let the ramekins rest in the water bath for 5 to 10 minutes after baking. Remove the ramekins from the water bath and let cool for another 20 minutes. Cover loosely with plastic wrap and chill for at least 6 hours, preferably overnight.
5. When ready to serve, blot the top of the custards dry with a paper towel. Sprinkle 1 teaspoon of turbinado sugar over each custard in ramekins. Using a small kitchen torch, melt the sugar by waving the torch flame 3-6 inches from the surface of the sugar. Heat the sugar until it is caramelized and no dry sugar is visible. Sprinkle another 1 teaspoon of turbinado sugar over each custard and continue to caramelize with the kitchen torch until a dark amber crust has formed on top of each custard. Chill the custards for 5 to 10 minutes before serving.
Makes 6 servings
Note: the pre-caramalized custards can be made up to 2 days ahead. Keep chilled until ready to serve.
October 20, 2009
Roasted Root Vegetables
Well, I think it's pretty safe to say that fall is officially in full swing. I can't speak for the rest of the country, but up here in the northeast the leaves are beginning to change from green to gold and crimson, fluttering to the ground, and the crisp autumn air has brought about the first chill of the season. I absolutely love this time of year. It's by far my favorite season, and I am grateful that I have the chance to experience one last bona fide fall. (For those of you out of the loop, I am returning to my southern roots in one short week). Growing up in Texas, we never really had four true and distinct seasons. It was more of a hot and cold thing. No gradual temperature changes to ease you into the next quarter of the year. Although, there are some years where the cold part never really even presents itself- I have worn flip-flops through many a December. However, I actually enjoy that barefoot in the winter feeling. After one winter here in New York, I quickly learned that I am with out a doubt a warm weather girl. So while I'm enjoying this brisk breeze here in the Big Apple, I am a wee bit relieved to be skipping out of town before the brutal and bitter cold comes blowing in.
This time of year brings about so many cold weather cravings. Sipping hot coco by a flickering fire, warming the soul with a bowl of hearty stew or a slice of apple pie, tearing into a tender braise... There are so many delicious fall recipes that I can't wait to try! Now, I'm sure your wondering, with all the endless possibilities of sumptuous autumn dishes at my disposal, why would I select root vegetables? Well, I have to tell you, they are actually pretty delicious- in their own way of course, I mean it's no pumpkin pie, but what do you expect? I was introduced to a variation of this recipe in one of my cooking classes I took at Central Market a couple years ago. On a side note, can I just say how frickin' excited I am to go shopping at that food mecca again! It's like Christmas every time I step inside those doors. I'm getting way too excited just thinking about it...
A combination of various root vegetables, roasted in the oven for a good, long hour, lends a surprisingly satisfying dish. The vegetables develop a nice caramelized exterior, providing a rich and more complex flavor. The great thing about this recipe is that it's really more of a template- the outcome is equally as tasty no matter what assortment of vegetables you might decide to use. I settled upon a variety of root vegetables that would lend an array of colors, because like I've said before, visual appeal is just as important as the taste.
So important in fact, that I ventured out in the pouring rain to Dean & Deluca and spent $6 for one pound of purple potatoes. Now those are some expensive spuds! But I just love the color of purple potatoes, especially when you cut into them, revealing this vibrant, rich, and regal hue. Of course, such painstaking measures are not necessary in order to produce a colorful variation of this recipe. The original recipe I learned at Central Market actually used regular new potatoes and provided a splash of color with green and red bell peppers. My version of the recipe is below, but feel free to use any vegetable that suits your tastes, or perhaps ones that don't necessitate a trip out in the rain.
Roasted Root Vegetables
Ingredients:
1 medium rutabaga, peeled and cut into 1" chunks
1 lb baby purple potatoes, quartered (or purple fingerling potatoes halved)
3 large carrots, peeled and cut into 1" pieces
1 fennel bulb, center core removed, and cut into chunks
1 lb sweet potatoes, peeled and cut into 1" pieces
1/2 lb cipollini onions, outer skin removed
1 bunch radishes, outer edges trimmed
1 head of garlic, separated into individual cloves
1 tablespoon chopped fresh thyme
1 tablespoon chopped fresh oregano
1/4 cup olive oil
salt & pepper
Directions:
1. Preheat the oven to 400 degrees F.
2. In a large bowl, toss all vegetables together with the chopped herbs and olive oil. Season to taste with salt and pepper.
3. Spread the vegetables out on a large roasting pan and roast in the oven for 1 hour, stirring occasionally, until the vegetables are tender.
Makes 6-8 servings
October 7, 2009
Savory Pumpkin Soup
Every year, as the beginning of October rolls around, my annual craving for pumpkin kicks in, as if by instinct. This year, my hankering for pumpkin seems particularly strong. Besides actually loving the flavor of pumpkin, I now have another reason to feast on the orange flesh of this winter squash. I learned earlier this week that pumpkin, or more specifically the pepitas (or seeds) are, according to Mexican folklore, know to cure freckles! If I would have known that earlier in life, you can guarantee that I would have eaten a handful of pepitas everyday! So in hoping that the pumpkin itself will lend the same skin transforming benefits, I have made quite a long list of pumpkin flavored treats to make over the next couple of months- I hope most of you enjoy this fall favorite as much as I do! To kick things off, I decided to begin the pumpkin-palooza with a savory soup recipe.
I've actually made a version of this soup before, two Thanksgivings ago, and it seemed to be a pretty big hit. This time around, however, I changed up the recipe a bit by adding in a couple more ingredients- parsnip, turnip, white wine, and a touch of brown sugar- to give it more depth of flavor. Those of you unfamiliar with cooking with pumpkins, sugar pumpkins are best for food related purposes. They work well in both savory or sweet recipes, pairing nicely with either rosemary, salty cheeses, and mushrooms, or honey, maple, and cinnamon. When buying sugar pumpkins, look for ones that are firm, feel heavy for their size, and have dull, not glossy skin.
Last time, I prepared the soup using a food processor, a perfectly fine method, but I'm always looking for excuses to buy myself a new toy for the kitchen! Currently living in New York City has me on a pretty tight budget, but I felt I could justify the purchase of a new kitchen gadget, in this case a food mill, because one of my goals of this blog is to learn and implement new techniques and I figure this will hardly be the only time I use it- an investment in my culinary future! The purpose of a food mill is to properly puree the soup, making for a much smoother texture, but if you prefer a thicker soup, I would use the food processor (a blender or hand blender would work well too) approach. Just note though, if you do decide to use a food mill, and you have one with various sized disks (fine, medium and coarse), stick with the medium. I goofed and used the fine disc and my soup was a little thin for my liking.
I will admit that the garnish for this soup wasn't completely my idea. I stole the concept from an episode of Iron Chef America (best show ever!). I don't remember exactly what garnish was used, but I do know it sparked the idea for what I use here in this recipe: chives, shiitake mushrooms, and... bacon. (Do they have rehab groups for bacon addicts? Hi, I'm Karlie and I'm a pork-a-holic.) This year I also decided to add a drizzle of goat cheese cream. It's definitely not essential to the dish, but I think it adds a nice color contrast and hits on another note of flavor. Also, it might interest some of you to know that this soup freezes particularly well. Skip the last step of adding in the cream, and store in air tight containers in the freezer for up to two months. Add the cream when reheating over a medium-high stove top. I think this soup makes for a great way to start a Thanksgiving meal, but it's also a great way to begin the fall season.
Savory Pumpkin Soup
Ingredients:
1 small sugar pumpkin, halved, seeds and stringy fibers removed and reserved
5 tablespoons unsalted butter
3 cups homemade or low-sodium store-bought chicken stock
1/2 cup water
1 sprig fresh thyme
1 small parsnip (about 3 ounces), peeled and coarsely chopped
1 apple, peeled and coarsely chopped* (see note)
1 small sugar pumpkin, halved, seeds and stringy fibers removed and reserved
5 tablespoons unsalted butter
3 cups homemade or low-sodium store-bought chicken stock
1/2 cup water
1 sprig fresh thyme
1 small parsnip (about 3 ounces), peeled and coarsely chopped
1 apple, peeled and coarsely chopped* (see note)
2 carrots, peeled and coarsely chopped
1/2 small turnip (about 3 ounces), peeled and coarsely chopped
1/2 white onion
1 small shallot, minced (about 3 tablespoons)* (see note)
1/2 cup dry white wine
1/4 cup heavy cream
1 teaspoon packed light-brown sugar
2 teaspoons Kosher salt
Freshly ground pepper, to taste
1/2 small turnip (about 3 ounces), peeled and coarsely chopped
1/2 white onion
1 small shallot, minced (about 3 tablespoons)* (see note)
1/2 cup dry white wine
1/4 cup heavy cream
1 teaspoon packed light-brown sugar
2 teaspoons Kosher salt
Freshly ground pepper, to taste
(garnish and goat cheese drizzle below)
Directions:
Directions:
Preheat oven to 400 degrees. Place pumpkin halves, cut sides down, on a rimmed baking sheet. Bake until soft, about 50 minutes. Scoop out flesh, and puree in a food processor (you should have 2 cups).
Melt 1 tablespoon butter in a small saucepan over medium-high heat. Add reserved seeds and fibers from pumpkin, and cook for 4 minutes. Add stock, water, and thyme, and bring to a gentle simmer. Cook for 9 to 10 minutes.
Meanwhile, melt remaining 4 tablespoons butter in a large saucepan over medium-high heat. Add pumpkin puree, parsnip, apple, carrots, turnip, and onion, and cook for 5 minutes. Add shallots, and cook until soft, about 4 minutes. Add wine, and cook until liquid has reduced by half, about 4-5 minutes.
Strain pumpkin-seed mixture, reserving broth and discarding solids. Add broth to pumpkin-wine mixture. Bring to a simmer; cook 20 minutes. Let cool for 45 minutes to an hour.
Pass soup through a food mill into a clean saucepan, or puree in a food processor in small batches until smooth. (If soup does not reach desired consistency using a food processor, press it through a fine sieve to remove any remaining lumps.)
Melt 1 tablespoon butter in a small saucepan over medium-high heat. Add reserved seeds and fibers from pumpkin, and cook for 4 minutes. Add stock, water, and thyme, and bring to a gentle simmer. Cook for 9 to 10 minutes.
Meanwhile, melt remaining 4 tablespoons butter in a large saucepan over medium-high heat. Add pumpkin puree, parsnip, apple, carrots, turnip, and onion, and cook for 5 minutes. Add shallots, and cook until soft, about 4 minutes. Add wine, and cook until liquid has reduced by half, about 4-5 minutes.
Strain pumpkin-seed mixture, reserving broth and discarding solids. Add broth to pumpkin-wine mixture. Bring to a simmer; cook 20 minutes. Let cool for 45 minutes to an hour.
Pass soup through a food mill into a clean saucepan, or puree in a food processor in small batches until smooth. (If soup does not reach desired consistency using a food processor, press it through a fine sieve to remove any remaining lumps.)
Heat soup in a saucepan over medium-high heat. Stir in cream, sugar, salt, and pepper, ladle into individual bowls, and top with garnish (below).
For the garnish and goat cheese drizzle:
Ingredients:
6 slices of center-cut bacon, chopped
10 oz shiitake mushrooms, cleaned and chopped
1/4 chives, minced
1/3 cup heavy cream
2 oz goat cheese
salt and pepper
a dash of nutmeg
Directions:
Heat a medium nonstick skillet over medium high heat; add the bacon and saute until crispy. Remove the bacon to a plate topped with paper towels, reserving the grease in the pan. Add the mushrooms and saute until browned and tender, about 5 minutes. Remove mushrooms from pan, place in a shallow bowl, add the bacon, and mix to combine.
Meanwhile, heat the cream in a small saucepan over medium heat, and reduce by half. Add the goat cheese and stir until combined. Season the cream mixture with salt and pepper to taste, and add just a dash of nutmeg.
Garnish each bowl with about a tablespoon of bacon-mushroom mixture, a teaspoon of chopped chives, and teaspoon or two of the goat cheese cream mixture. Serve immediately.
Makes 6 to 8 servings
*Note: I used a Honey Crisp apple, a sweeter variety as compared to ones like the Granny Smith. Also, instead of using both an onion and a shallot, one could use a whole white onion, skipping the shallot all together. I just happen to like the mild, garlicky flavor shallots tend to have.
Subscribe to:
Posts
(
Atom
)