November 18, 2011

Truffled Mushroom Tagliatelle


mixed mushroom truffled fricassee

I had a birthday.  Another birthday.  My 27th one to be exact.  I don't feel near as old as I actually am.  Sometimes I think I'm still 22, that is until the monthly bills start rolling in or perhaps when I glance in the mirror and see the early signs of aging starting to appear on my once youthful face.  Despite facing yet another birthday, inching me ever closer to that dreaded 3-0, I like to take this time of year to pamper myself a little bit.

enokitake, chanterelle and oyster mushrooms

Instead of using the birthday money I get from relatives to put towards bills (which is exactly what I should be doing), I allow myself to buy a little something just for me.  I mean, I deserve it right?  I also let myself truly indulge the week of my birthday.  Cake, red meat, an extra margarita or two.  So when it came time to decide what I was going to whip up for this blog last week, I thought it should include one of my absolute favorite things: truffles.

pricey yet delicious chanterelles

Unfortunately, I wasn't able to use actual truffles (I can't afford such luxuries at the moment), but I did use plenty of truffle oil and a beautiful blend of earthy, unctuous mushrooms.  I had found a delicious looking recipe for a mushroom fricassee in September's Bon Appétit.  I had been looking for a good excuse to make it and my birthday seemed as good as any. (Side note: a fricassee by definition is a dish of pieces of meat or vegetables stewed in stock and served in a white sauce).

white truffle oil

Bon Appétit's version of mushroom fricassee called for using only chanterelle mushrooms.  However, when I got to Whole Foods and realized that chanterelle mushrooms were $29.99 a pound, I decided I'd better take a different route.  I went with a mixture of chanterelles, oyster mushrooms and the adorable looking enokitake mushrooms.  Not only did I save myself roughly $15, but I thought the mixture of mushrooms would make for an interesting looking dish.

stewed mushrooms

OK, enough about mushrooms, let's talk more about my birthday.  Jon's gift to me was something I've always wanted.  I got this same gift for my 13th birthday, but for some very odd reasons, the gift fell through.  Jon made it happen for me though.

almost ready for take off

that fire was so hot!

He got me the hot air balloon ride that I've been waiting to take for 14 years.  Despite the 5:30 AM wake up time and the very unexpected hangover, the ride was magical and the view beautiful.

how about that view

my hero ;-)

It was everything I thought it would be and even more, because now I got to share the experience with the man I love.  Thank you, Jon, for making one of my dreams come true.

mixed mushroom tagliatelle

Mixed Mushroom Fricassee with Tagliatelle
Recipe adapted from Bon Appétit, September 2011

Ingredients:
6 tbsp unsalted butter, divided
2 tbsp extra-virgin olive oil, divided
1 small yellow onion, finely chopped
kosher salt
freshly ground black pepper
4 garlic cloves, minced
1/4 cup dry white wine
8 oz chanterelle mushrooms
4 oz oyster mushrooms
4 oz enokitake mushrooms
1/2 cup heavy cream
pinch of freshly ground nutmeg
1 tsp fresh thyme, chopped, plus more for garnish
fresh lemon juice
1/4 lb tagliatelle pasta, cooked al dente
white truffle oil 

Directions:
1. Melt 3 tablespoons of butter with 1 tablespoon of olive oil in a large skillet over medium-high heat.  Add onion, season with salt and pepper and cook, stirring occasionally, until softened and lightly golden, 4-5 minutes.

2. Add garlic and cook for 1 minute.  Add wine, stir to mix and cook until liquid is reduced by half, about 2 minutes.  Add remaining 3 tablespoons of butter, remaining 1 tablespoon of olive oil and mushrooms.  Cook, stirring occasionally, until mushrooms are lightly golden, about 5 minutes. 

3. Add cream and nutmeg and cook until slightly thickened, about 2 minutes.  Stir in 1 teaspoon thyme and season to taste with salt, pepper and lemon juice.  Add cooked pasta and toss until evenly coated.  Drizzle with truffle oil to taste (I like to add 2-3 teaspoons).  Garnish with more thyme and serve.

Makes 4 servings

November 7, 2011

Wildly Wonderful Whiskey Cake


good ol' fashioned Whiskey Cake

It has been just over thirteen weeks since I have unloaded my things (more than I think Jon was expecting) into my new home in Tempe.  It would be a lie to say that I haven't felt the least bit homesick.  Don't get me wrong, Jon is great company- we have so much fun together- but every now and then, I feel that slight pang in my chest; the longing to see my friends, go to lunch or run errands with my mom or even to eat at one of the restaurants that I had grown so fond of.  Living in the Dallas area for over 16 years gave me ample time to grow deep and meaningful relationships with several restaurants.  There are many that became permanent fixtures in my dining out routine, none more so than Mi Cocina (what I would give for a Mambo Taxi...), but Whiskey Cake, quite possibly my new all time favorite restaurant, has been on my mind more often than I would like.

fold that date puree

My constant day dreaming of the food at Whiskey Cake is starting to become a problem.  One day it's thoughts of the Mesquite Grilled Redfish, the next it's their "3 Little Pigs" pulled pork sliders.  But most often, I dream of having a large slice of their namesake dessert placed in front of me, their Whiskey Cake.

bourbon sauce ;-)

It is unlike any other dessert I have ever tasted- rich, sticky, stinking of good whiskey and sinfully delicious.  The mere thought of sliding my fork down the edge of that cake into a pool of bourbon sauce is almost enough to get me to book a flight back to Dallas.  Almost.

on it's way...

The thing is, why would I fly all the way back to Texas when I could have Whiskey Cake right here, in the comfort of my new home?  Well, to put it simply, I wouldn't.  Not only does Whiskey Cake serve up fresh, local and seasonal ingredients (a restaurant trend that I hold in the highest regard ), but this restaurant has won me over in another big way.  You can request any recipe for any dish off their menu. Now, in my experience, most restaurants who provide recipes or publish cookbooks supposedly filled with said recipes, will subsequently tweak an ingredient here or leave out an ingredient there, thus resulting in a failed attempt to remake your favorite restaurant dish at home.  My thoughts on this matter: If you don't wan't to give out the real recipe for a dish off your menu, then don't give out the recipe at all.

drizzle that toffee sauce

I can't tell you how many times I have bought a cookbook from a bakery or restaurant only to fully regret that purchase days later after my pursuit to mimic a particular dish ends in complete misery.  My desire for a slice of Whiskey Cake was too strong to let this deter me, however.  I figured I should give this particular recipe a fair shot, although I will admit I was skeptical of it from the get go.  But with doubts and fears aside, I completed all 5 components needed to make the Whiskey Cake what it is: an absolute masterpiece.  Did I tweak the recipe to make it somewhat my own?  Perhaps...  I may or may not have tripled the amount of whiskey originally called for...  I'll let you be the judge of that.

Whiskey Cake with a little extra whiskey

Whiskey Cake
Recipe slightly adapted and interpreted from Whiskey Cake, in Plano, Texas

Ingredients:
Date Cake (see recipe below)
Bourbon Sauce (see recipe below)
Toffee Sauce (see recipe below)
Spiced Pecans (see recipe below)
Whipped Cream (see recipe below)

* I know this recipe looks like a lot of work, what with there being 5 separate components, but in order to make it a little easier on yourself, make 3 components one day and 2 the next.  Each component really doesn't require that much time and I promise the effort will be well worth it!

Directions:
1. Cut the Date Cake into 12 equal pieces.  Poke several holes in the top of each piece using a wooden skewer or chopstick.  Arrange the cake pieces on a baking sheet covered with nonstick foil.

2. Heat the oven to 500º.  Pour 1/4 cup of Toffee Sauce over each piece of Date Cake.  Place toffee soaked cake pieces in the oven for about 4-5 minutes, until the Toffee Sauce is bubbling and the cake is warmed throughout.

3. Spoon 1/4 cup of Bourbon Sauce onto 12 individual plates or bowls.  Place each piece of warmed cake in the middle of each pool of Bourbon Sauce.  Finish each piece with a large dollop of Whipped Cream and a sprinkling of Spiced Pecans.  Enjoy!

Makes 12 servings


Date Cake

Ingredients:
1, 8 oz package of dried pitted dates, chopped into 1/2" pieces
2 tsp baking soda
1 3/4 cup boiling water
1 stick unsalted butter, softened
1 cup + 2 tbsp granulated sugar
3 jumbo eggs, at room temperature
1 3/4 cup self rising flour (*see note below to make your own)
3 tbsp Sugar in the Raw (turbinado sugar)

Directions:
1. Heat the oven to 350º.  Place dates, baking soda and boiling water in a medium sized bowl.  Allow to sit for 15-20 minutes until the dates are softened.  Place the date mixture in a food processor for 2 minutes to form a paste.

2. Using a stand mixer fitted with the paddle attachment, cream the butter on medium speed for about 1 minute.  Add the sugar and continue to cream for 3 minutes longer.  Scrape down the sides of the bowl using a rubber spatula.  Add the eggs, one at a time, mixing in between to fully incorporate each egg.  Scrape down the sides of the bowl.  With the mixer running on low, add the flour, about 1/2 cup at a time, and mix just until the flour is no longer visible.

3. Remove the bowl from the stand mixer.  Add the date paste and gently fold in using a rubber spatula.

4. Spray an 8"x14" cake pan with non-stick spray.  Sprinkle the turbinado sugar into the cake pan and move the pan around until the sugar coats the bottom and all sides.   Pour in the cake batter and bake for 30-40 minutes or until a toothpick comes out clean.

5. Allow the cake to cool at room temperature for 20 minutes.  Flip the cake out onto a parchment paper lined tray.  Leave at room temperature to cool completely.  Wrap the cake in plastic wrap and store at room temperature until ready to use.

*To make Self-Rising Flour:  mix together 3 cups of all purpose flour, 2 tsp of iodized salt and 1 tablespoon of baking powder in a medium sized bowl.  Use immediately or store in an airtight container.


Bourbon Sauce

Ingredients:
2 cups heavy cream
1/2 cup granulated sugar, divided
1vanilla bean, split
4 jumbo egg yolks
1 tsp vanilla extract
2 tbsp good bourbon (I used Maker's Mark)

Directions:
1. Bring heavy cream, 1/4 cup sugar and vanilla bean to a simmer in a small to medium sized sauce pot.

2. In a mixing bowl, whisk the egg yolks and other 1/4 cup sugar together until frothy.

3. While stirring, slowly add about 1/2 of the heavy cream mixture to the eggs.  Stir together gently.  Pour the egg mixture into the pot of remaining heavy cream.  Continue to cook over medium-low heat until the mixture thickens and coats the back of a spatula or spoon.

4. Stir in the vanilla extract and bourbon and remove from heat.  Pour the mixture through a strainer into a container.  Place the container of bourbon sauce in an ice bath until cool.

5. Either use the sauce immediately, or store in the fridge until ready to use.  If stored in the fridge before use, re-heat in the microwave at 10 second intervals on 50% power until thinned and slightly luke warm.


Toffee Sauce

Ingredients:
1 stick unsalted butter
1 lb light brown sugar
2 cups heavy cream
2 tbsp good bourbon
1 tbsp vanilla extract

Directions:
1. Place butter in a heavy bottom sauce pot over medium heat.  Once melted, add brown sugar and continue to cook for about 8 minutes, stirring occasionally.

2. Add heavy cream and allow to cook for another 6-7 minutes, still stirring occasionally.

3. Remove pan from heat and stir in bourbon and vanilla. Use sauce immediately or store in the fridge for up to 3 days.  Reheat before using.


Spiced Pecans

Ingredients:
1 lb pecan halves
2 tsp water
3/4 cup maple syrup
1/2 tsp Kosher salt
1/2 tsp black pepper
1/2 tsp cayenne pepper

Directions:
1.  Heat oven to 350º.  Mix water, syrup, salt, and both peppers together in a small bowl.  Place pecans in a medium sized bowl.  Pour maple syrup mixture over pecans and mix until all are evenly coated.

2. Spread the pecans out on a baking sheet covered with foil.  Bake for 12-15 minutes.

3. As soon as the pecans come out of the oven, scrape the pecans off the pan and break up pecan clumps to prevent from sticking together.  Let cool completely.  Store in an airtight plastic container at room temperature.

(At this point, I chopped up about half of the pecans to sprinkle on top of the cake.  I left the other portion of pecans whole to use for other purposes, like as a salad topping).


Whipped Cream

Ingredients:
2 cups heavy cream
1/2 cup granulated sugar
1 tsp vanilla extract

Directions:
1. Using a stand mixer fitted with the whisk attachment, add the heavy cream, sugar and vanilla to the bowl.  Beginning at low speed and slowly increasing the speed to high, whip the mixture together until slightly stiff peaks form.

2. Use immediately or store in the fridge until ready to use.

October 27, 2011

Tecate Skirt Steak Tacos


tecate skirt steak tacos

I’m not sure if I’ve ever talked about my love for Mexican food on this blog or not…. (The majority of you reading this blog know me personally, but my goal is to reach an audience who has never met me. So sharing some personal details is imperative). I believe my passion for chips and salsa, tacos and a cheesy enchilada was instilled in me at birth. My mom craves Mexican food unlike any other person I’ve ever met. She has always said that she could eat Tex-Mex food morning, noon and night, every day of the week. I, without a doubt, believe that statement to be true. Therefore, I’d like to think that my need for Mexican cuisine is genetic; an inherited trait passed on from my mother.

AZ Taco Festival Taco #1

Luckily, for me, Jon shares the same passion. He too, can eat Mexican food every day of the week. One of our greatest commonalities is our shared love of food, whether it be cooking, eating, dining out or ordering in, I can always count on him to share a good meal. However, when it comes to Mexican food, Jon likes things just a tad bit spicier than I do. A tad bit spicier might be an understatement… This guy can swallow an extraordinary amount of spice, and I thought I liked things spicy!

AZ Taco Festival Taco #2

You can imagine our delight when we found out about the 2nd Annual Arizona Taco Festival. It was almost as if this festival was created with the two of us in mind. A whole day of sampling tacos… after tacos… after tacos. Oh yeah, and lots of tequila. It was a day of pure bliss.

mustache anyone

I tried to prepare myself in advance. I studied the taco vendors that would be peddling their incarnation of the ideal street taco. I wanted to have a plan of which taco stands were an absolute must to try out. Did I mention there were 42 of them? I had to use my time (and money) wisely.

AZ Taco Festival Taco #3

Ok… So here is the point where I was going to, oh so eloquently, describe the “best of the best” tacos I consumed on that glorious day. But, as it just so happens, I am, at this very moment, sitting on a plane on my way to Chicago, trying to use my time wisely by writing this blog post and I just realized I forgot my Taco Festival notes at home… I knew, standing in that security line, that I had most definitely left something behind. Damn. I guess I’ll just have to describe what I can from memory…

AZ Taco Festival Taco #4

There are two tacos that stand out in my mind. I’d have to assume that those are the two I’d consider to be the “best” or at least most memorable…

golf ball sized tortilla rounds

#1: The Duck Confit Tacos from El Hefe
The flavor of the duck was exceptional, with a delicious cherry compote reduction.

tortilla tortilla

#2: The Wild Mushroom Tacos from T. Cook’s
Not exactly the biggest fan of vegetarian tacos, I’d have to say these were the most original in my opinion. The flavor was earthy and complex. Bonus: amazing corn tortillas, thick with an almost “al dente” like texture.

smoky chipotle salsa

From here, the plan was to recreate my favorite taco from the festival for this blog, however, out of the 20 plus tacos I tried, the duck tacos from El Hefe won me over. Sorry, but at this point in my life, I don’t exactly have the time to confit anything. So, instead, I decided to create a taco that I would have served if given the opportunity to auction off tacos from a humble tent in the Arizona heat. I present to you a Tecate Skirt Steak Taco. The Arizona Taco Festival, in my opinion, was lacking steak tacos, so I thought I’d fill that void. I tried my best at some homemade tortillas, marinated the steak for 24 hours and made a chipotle salsa. I was pretty pleased with the results, especially the flavor of the steak, which was the only component of the taco that I completely came up with myself, thank you very much. Overall though, it is a pretty tasty taco. Jon even gave his approval, and considering his taste for tacos, I’d have to say my Tecate Skirt Steak Tacos are a winner. Try ‘em for yourself, and let me know what you think!

taco, burrito, what's comin' out of...

Tecate Skirt Steak Tacos 
Recipe by Karlie (with the help of others) 

Basic Ingredients:
Tortillas (see recipe below)
Tecate marinated skirt steak (see recipe below)
Smoky chipotle salsa (see recipe below)
1 avocado
1 fresno chili
¼ cup crumbled cotija cheese
¼ cup cilantro leaves
lime wedges

Directions:
1. Make sure the tortillas are warm and ready to use. Top each tortilla with a few slices of warm skirt steak, a spoonful of chipotle salsa, a slice of avocado, a slice or two of Fresno chili, cotija cheese, cilantro leaves and a squeeze of lime. Enjoy!

Enough for about 10-12 tacos


Flour Tortillas (Recipe adapted from AllRecipes.com)

Ingredients:
3 cups all-purpose flour
2 tsp baking powder
1 ½ tsp salt
¾ cup (plus the optional addition of 1-2 tbsp) shortening
¾ cup hot water (just under boiling)

Directions:
1. Combine the flour, baking powder and salt in a large bowl or in the bowl of a stand mixer. Drop the shortening, in small clumps, into the bowl and rub into the flour mixture by hand until the mixture looks crumbly. At this point, if the mixture does not resemble course corn meal, add 1-2 tablespoons of shortening. Add the hot water, so that the mixture is moist.

2. Using the dough hook of a stand mixture (or your hands) knead the dough until it all comes together and forms a soft round shape. If the dough is still to crumbly, or won’t come together at this point, add 1-2 more tablespoons of flour.

3. Separate the dough into about 15-18 golf ball sized balls. Place on a cookie sheet and cover with a damp towel. Let rest for 1 hour at room temperature.

4. Lightly flour a work space, and roll each ball with a rolling pin to about 1/8 inch thickness. The edges will be rough. You can use the top of a round glass, coffee mug or Tupperware to cut out a perfectly round tortilla if you like.

5. Using a cast iron skillet on medium heat, cook each tortilla for about 1 to 2 minutes on each side, or until the tortilla starts to brown slightly. Keep the tortillas warm until ready to use.

Makes about 15-18 4 inch tortillas


Marinated Skirt Steak (Recipe by Karlie Kiser)

Ingredients:
1 lb skirt steak
1, 12oz can Tecate beer
2 tbsp soy sauce
1 tbsp liquid smoke
½ lime, juiced
2-3 cloves garlic, pressed
¼ cup packed brown sugar
1 tsp freshly grated ginger

Directions:
1. Lay the skirt steak on a cutting board, or flat surface. Using a meat tenderizer (I used a potato masher) pound the meat on both sides several times to break down the tissue. Place steak in a small casserole dish or large Ziplock bag if you like.

2. Mix the Tecate beer, soy sauce, liquid smoke, lime juice, garlic, brown sugar and ginger in a medium sized bowl until combined. Pour over the steak and let marinate for at least 12 hours, or up to 1 day. If using a casserole dish, be sure to flip the steak half way through the marinating process.

3. Heat either an outside grill or stove top grill to medium high heat. Cook the steak for about 5-6 min on each side for medium rare. Let the steak rest for 5 minutes before slicing thinly across the grain.


Smoky Chipotle Salsa (Recipe adapted from Men’s Health, September 2011)

Ingredients:
3 canned chipotle chilies in adobo, plus 1 ½ tbsp adobo sauce
2 cups canned fire roasted tomatoes (I used Muir Glen)
½ cup sliced sweet Vidalia onion
3 tbsp tomato paste
1 tbsp honey
3 garlic cloves, sliced
1 tsp grated orange zest, plus 2 tbsp of juice from the orange
1/3 cup cilantro leaves
½ jalapeno sliced
½ tsp salt
freshly ground pepper to taste

Directions:
1. In a blender or food processor, puree all the ingredients until smooth.

2. In a medium sized saucepan, bring the puree to a boil; lower the heat and simmer until it no longer tastes raw, about 5 minutes. Pour the sauce into a large, freshly washed jar. It will keep in the fridge for up to 1 month.

Makes about 2 cups

October 19, 2011

Citrus Marinated Olives- Via Tempe, Arizona


Olive You

I know what you've been thinking.  Where is she?  Where has she gone?  I know, too, that you've missed me dearly, assuming only that I had abandoned this blog without even so much as a warning or farewell.  Well, that is simply not the case.  I never had the intention of ignoring my small audience of Crumbs followers, and I can only assume that I have pushed some of you away.  But sometimes "life" happens.  It steps in and throws you a curve ball or two, interrupting plans, routines and the way of living one has become accustomed to.  That is certainly what has happened to me.  Luckily, my curve balls have been blessings.  Life, standing unannounced on that pitcher's mound, has thrown me some well deserved (or at least I'd like to think so) opportunities and happiness.

welcome to Arizona

Since my last post (NINE MONTHS AGO!!), I've started a "promising" job, purchased a puppy, fallen in love, quit that job once believed to be promising and moved 1,000 miles away from Dallas to my new home in Tempe, Arizona.  As you can see, I've been a little preoccupied with adjusting to some new life changes.  In the beginning, I was determined to continue with this blog, even expand on it.  All too soon, however, writing a new blog post just became one more thing on my much too long To Do List.  I was feeling stressed, pressured even.  When am I going to find the time to write on my blog?!  Weeks passed and the time that had lapsed became overwhelming.  I felt like a failure.  Why had I let so much time go by without posting to Culinary Crumbs?  The answer: there was simply too much going on in my life at the time.  60+ hour work weeks, taking care of a whimpering puppy at all hours of the night, traveling back and forth from Dallas to Phoenix... I had to consign to the fact that, for the time being, my blog would have to be placed on the back burner until I had figured out how to juggle all the new aspects of my life.

we're not in Texas anymore

Well I think that time has come.  I'm still trying to find my groove here in Arizona, but maintaining this blog is going to be part of my new routine.  This blog makes me happy and it has become a project that I truly enjoy.  So why would I want to give that up completely?  Before I fill you in on my plans for the future of this blog, let's take a step back in time so I can spill the dirty details on the last 9 months of my life...

wide open spaces

2011 started off with a bang.  At the end of January, I started a new gig working as the Web Manager for an upscale jewelry company based at NorthPark Mall in Dallas.  I had every ounce of energy and creativity sucked out of me over the course of the next 6 months; being ruled over by an evil, bipolar dictator.  However, I somehow managed to find time to raise a delightful, albeit delinquent, puppy, Dexter.

world's cutest puppy

Now, how cute is he?  I wish he still looked like that.  I wish he was still that tiny.  I wish he was simply small enough to take for a leisurely stroll.  You'd be surprised at how strong and how much power an 85 pound puppy can muster up.  At 10 months old, my not so tiny puppy has more energy than I know what to do with sometimes.  He tests my patience and keeps me on my toes on a daily basis, but it's hard to stay angry at something as cute as he is.

10 months old and growing

Job, puppy... oh, yes.  Boyfriend.  Jonathon and I met on a ski trip sponsored by a mutual friend.  Jessie, a close friend of mine since middle school, had gone to college at Arizona State with Jon and invited a large group of friends from both Plano and Arizona to spend a weekend at her family's house in Pagosa Springs, Colorado.  I guess our romance could be summed up with "love at first sight."  I knew almost immediately that this guy was someone special.

love at first sight

Over the next 6 months, Jon and I traveled back and forth from Dallas to Phoenix, and vise versa, visiting each other and getting to know one another.  We opened up Southwest Airlines credit cards and committed to making the long distance thing work for as long as we could.  But, and I'm sure anyone who has been in a long distance relationship can attest, a weekend together here, and weekend together there, can't quite make up for all those weeks and weekends in between spent apart.

Jon and Karlie sitting in a tree...

So, with the support of family and friends (along with the disapproval from a few others) I packed up my belongings into boxes (a vast majority of them being labeled "kitchen stuff"), crammed them into a Uhaul and drove the 1,000 plus miles from Plano to Tempe, Arizona in mid-August.  I've since settled in, found a temporary job and rediscovered my need to blog.

on top of Camelback

And so here we are.  At the present.  It's taken me so long to get this blog back up and running but I'm determined to keep it going this time around.  I've learned that it's all about the baby steps when trying to adjust to new surroundings and tackle a daunting To Do List.  Which is exactly why I've selected such an easy recipe to write about for my first time back from my blogging hiatus.  I knew that there would be a plethora of information I would want to share with you regarding my life.  And I knew that I would be a little rusty on the more technical aspects of blogging.  So in order to not overwhelm myself, I chose a simple recipe of marinated olives.  A visually stunning recipe, yes, but a breeze in the kitchen.  Exactly what I was looking for.

olive prep

You see, I have a plan for this blog.  I plan on starting off somewhat slow: one post per week, with every week of each month being dedicated to a different category of recipes.  Restaurant inspired recipes, sugar centered recipes (ie: desserts, baked goods, perhaps an ice cream), health conscious recipes and, finally, a wild card (read: "whatever the hell I feel like making" recipe).  Of course, there will be some special posts correlating to holidays and travels, but this is the general formula I intend to follow.  Hold me to it, will you?

how 'bout them olives

Citrus Marinated Olives
Recipe Courtesy of Bon Appetit, September 2011

Ingredients:
2 cups mixed oil-packed olives
1/2 orange, quartered, then thinly sliced
1/2 cup extra-virgin olive oil
3 garlic cloves
1 tbsp crushed coriander seeds
2 bay leaves
1 small red chile (I used two dried chiles, you could use a fresh Fresno chile, halved lengthwise)

Directions:
1. Place the olives in a medium sized bowl with the sliced oranges.

2. In a small saucepan over low heat, combine the olive oil, garlic cloves, coriander, bay leaves and red chile.  Cook until fragrant and garlic begins to brown, about 20 minutes.  Remove pan from heat and let steep for 1 hour.

3. Pour oil mixture over olives and stir to coat.  Marinate at room temperature for 2 hours or cover and chill up to 4 days.  Bring to room temperature before serving.

Makes 2 cups

January 18, 2011

Hawaiian Adventures Part 2: The Big Island

Kona, where all your dreams come true!

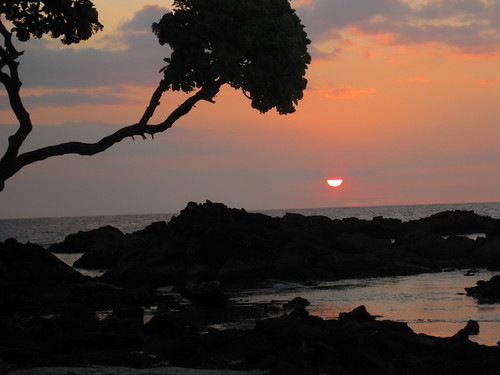
It's cold outside.  The sky is gray, the air frigid and the sun just won't show its face.  With no relief in sight, at least not for several months, what's one to do?  Perhaps the more affluential can hop a plane to Jamaica or Barbados, soaking up the sun to escape winter's grasp.  For the rest of us however, reminiscing on vacations past is the only way to vicariously travel to the equator.  While dwelling on such a thought, it occurred to me that I never shared the second leg of my Hawaiian adventure.  It seems that now would be as good a time as ever and hopefully my tale will provide a few of you with your necessary getaway.

Have you noticed I like taking pics of sunsets?

I believe I made it clear that the week I spent in Maui was pure bliss.  Food, sun, beaches and a little adventure.  It was the perfect vacation.  If you can believe it, I actually managed to experience a completely different type of vacation on the Big Island of Hawaii.  It was all social camaraderie, lot's of adventure and even a little romance (which, unfortunately, is a part of the story I must decline to share).  Upon arriving in Kona, I was immediately introduced to Abe's local friends.  (Abe was my gracious host and a friend I've known and cherished since I was 17).  They were all around my age and from different backgrounds and places.  Each had their own story on how they came to arrive in Kona from California, Seattle, Virginia or even Kentucky.  They all embraced me and showed me what it was like to live with the "Aloha Spirit."

Waipi'o

During my visit, Abe was busy studying for the GMAT, so I was pawned off to different friends that were given the burden of showing me around for the day (although I don't think any of them really minded all that much).  The first day I joined two of his buddies for one of their (almost) daily snorkels. Until this day, snorkeling had not been one of my favorite pastimes.  I'm not the biggest fan of swallowing salt water.  However, this particular time snorkeling will long exist as one of the most memorable experiences I've ever had.  After timidly wading into the water, I became increasingly comfortable with the crystal clear sea.  I was enjoying myself while paddling through the warm water, gazing down at the ocean floor, comprised of endless miniature valleys of sand.  Without notice, I was suddenly in deep water, the earth's surface a good 70 feet below me.  The panic slowly started to rise like a lump of coal in my throat, but just as quickly as it appeared, it vanished.  For the next thing I knew, I was swimming among dolphins.  Nearly 30 of them, in all directions.  To my left, to my right, above and below me.  There were big mama dolphins gliding through the water next to their babies, guiding them with their fins.  It seemed as if some of them were playing with their children, tickling them even.  For ten minutes these dolphins let me into their world and allowed me to observe them.  It was the single most awe inspiring moment of my life, even if I was digesting marine mammal feces (it was unavoidable; it was floating everywhere).  However, fish poop is a small price to pay for a majestic moment such as this.

a lazy parrot at Mauna Kea Beach Resort

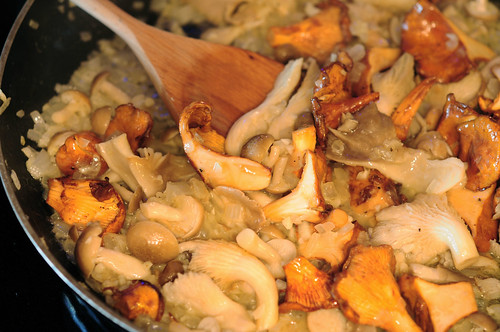
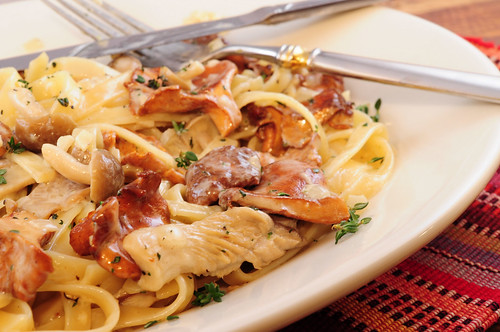
It seemed my vacation in Kona had peaked on the very first day.  Wrong again.  After some much needed relaxation on various beaches, a booze soaked day at the Mauna Kea resort, followed by indulgent gluttony at Merriman's cafe (menu: mango margaritas, margherita pizza, caponata bruschetta, hummus, truffled mac and cheese, meatball subs, and the most divine Hamakua- local Hawaiian mushrooms- tagliatella.  All of which was followed by chocolate soufflés from Roy's.  Oh yeah, this was all for 4 people), we packed up the car and headed for a weekend of camping on the other side of the island in Hilo.

the cliffs at Ka Lae

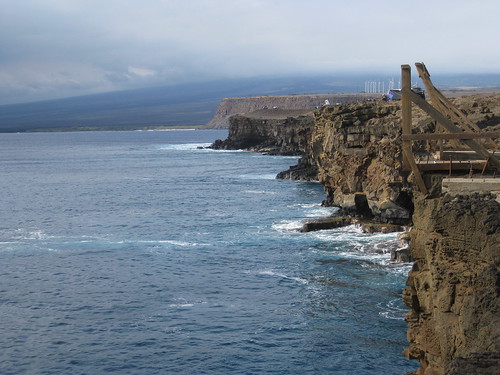
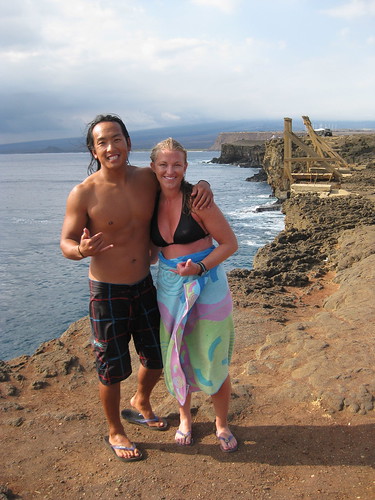
With a caravan of adventurous Hawaiian souls (I was now one of them), we stopped at Ka Lae or South Point, the southern most tip of the Big Island and the Unites States, to jump off the cliffs.  Easily a 60-foot drop, I was hesitant to make the leap, but how could I refuse such an opportunity?  It was exhilarating plunging into the dark blue water with nothing but miles and miles of ocean in front of you.  Only after you look up from the water, while climbing a very rickety, seemingly ancient ladder to the top of the cliff do you realize how far down the drop really is.

Abe and I after leaping off the South Point cliffs

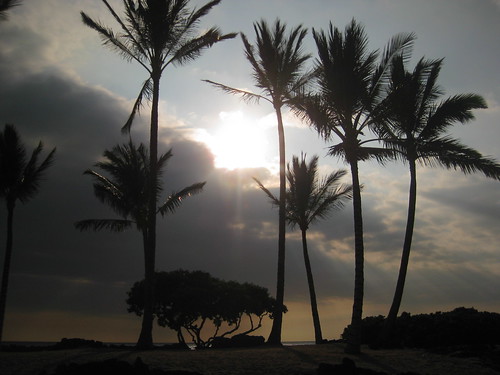
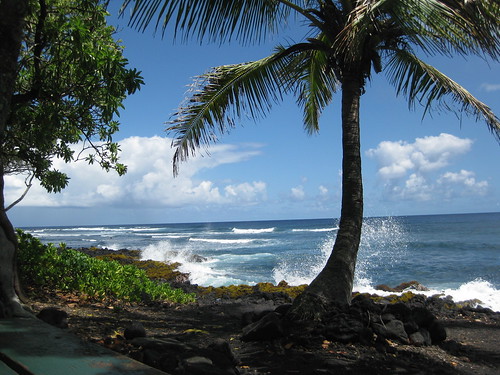
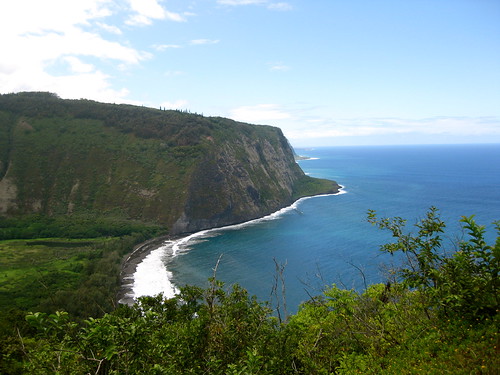
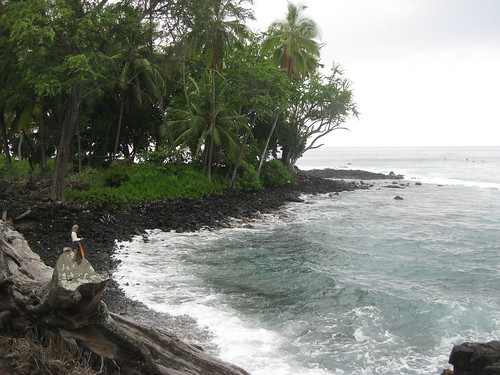
After a couple more stops along the way to Hilo, we arrived and set up camp mere meters from the ocean's edge.  We (illegally) hiked toward natural steam caves, lost our way to the hot ponds, picked up the occasional patchouli drenched hitch hiker ("we're going wherever the wind takes us, man"), and gazed at the stars while listening to waves crash on the beach.  Never a fan of sleeping outdoors, but I could live like this forever.

the view from our Hilo camp site

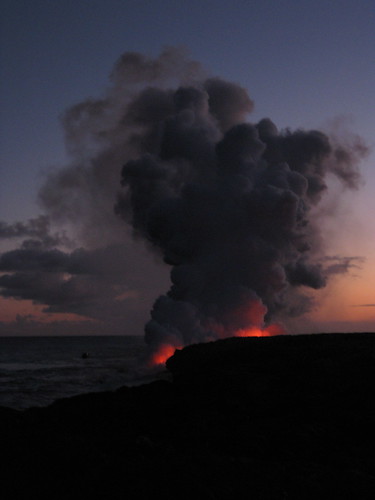
Guess what?  It gets even better.  The second day in Hilo was reserved for a 6 mile hike to the lava flow. We could see the billowing pinkish-gray smoke from a distance on our drive in, but I was eager to see real live lava up close and personal (or as close as one can get to molten magma).  The lava flow on the Big Island is constant, more visible at certain times than others, as it makes its way through a tube beneath the surface and sparks and spills into the ocean.

hiking to the lava flow

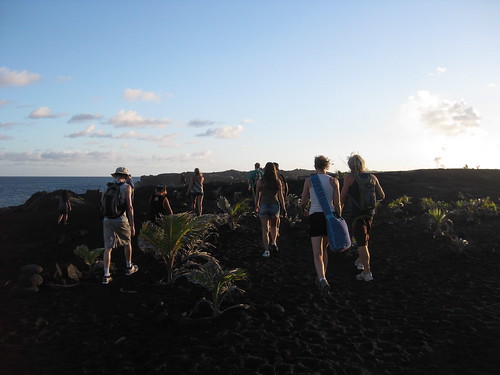
The land that we were traversing toward the eruption was actually new land formed from former eruptions.  The hardened rock beneath our feet was black and shiny, smelled of sulfur and became increasingly warm as we neared the cascading lava.  Once we hiked as far as we could, without singeing our eyebrows, we looked for small lava fissures to roast marshmallows.  Though a very cool and rare way to make s'mores, it doesn't make for the best tasting treat, that is unless you enjoy the crunch of lava rock between your teeth and the faint aftertaste of sulfur which induces a slight panic of being poisoned.

look at that magma!

My trip was coming to an end, but there were still so many things I had yet to cross off my list.  I mean I had been in Hawaii for 14 days and still had not tried my hand at surfing.  What was a girl to do?  I called the airline and inquired on the cost of changing my flight.  Far too expensive.  But according to my new Hawaiian friend, by way of Seattle (a seasoned traveler who has been to every exotic local one could think of), the easiest way to reschedule a flight was to "miss" that flight and plea (with girlish charms and perhaps some teary sniffles thrown into the mix) for a seat on the next flight out.  Well, as luck would have it, the next available flight was three days later.  Shucks.

where I learned to "surf"

So I was granted three extra days in paradise, 2 of which I would spend "surfing."  Yes, the quotation marks are essential as I'm not sure you could qualify what I did as surfing.  Abe did tell me I did quite well for my first time out (I rode a wave for about a split second at one point), but I still believe he was just being nice.  However, in my defense, I was taken out to one of the hardest spots to learn surfing.  A beach that was spotted with black rocks just waiting to tear the flesh off one's foot.  I gave it my all for about 30 minutes but then resigned to the notion that I would never be a "hot surfer babe."  I decided to instead sun bathe and watch others surf while pretending to take notes.

early morn on the high seas

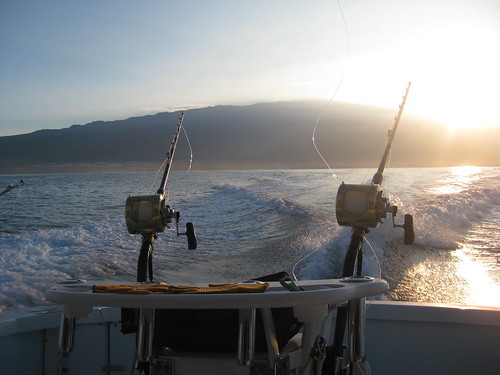
The last day and final thrill of my Hawaiian adventure had finally arrived, but this excursion began at 5 am (after a heavy night of drinking and singing karaoke- and please note I never sing karaoke, so my rendition of Madonna's "Like a Virgin" should serve as an indicator of how much drinking was actually involved) on a chartered fishing boat.  Abe, Jesse (the seasoned traveler), her Australian friend Kristofer, myself and the captain ventured out onto the open seas.  Just as I finished my egg McMuffin, breathed in the salty air and set my gaze on the glassy water's surface, the nausea hit me like a rock.  It was hard to tell at this point whether it was sea sickness, the whiskey I had consumed only mere hours before or perhaps even the egg mcMuffin (I hate those things but they're hard to turn down in the event of a hangover).  Whatever it was, it took hold of me in fierce fashion and wouldn't release its talons for a good 5 hours.

Kristofer about to catch a blue marlin

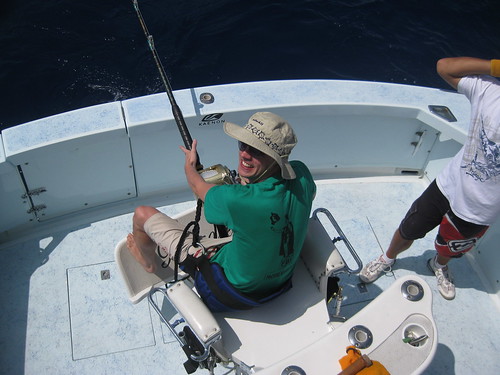
Luckily, fishing is a waiting game and just as the fog of nausea started to lift, the line pulled tight.  Kristofer, who had been in bad shape as well, vomiting at least twice more than I, jumped to the fighting chair and battled with the mighty fish at the end of the line.  All thoughts of nausea disappeared as the excitement escalated with the sudden and methodical actions of the crew.  Kristofer continued to reel in the fish (which had now been identified as a blue marlin since his great leap from the surface), sweat emerging from his pores, hands cramping with strain, but a wide grin remaining glued to his face.

after they clubbed the poor fish

Abe pulling the beast on board

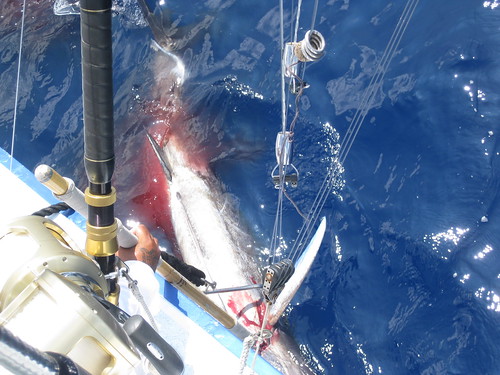
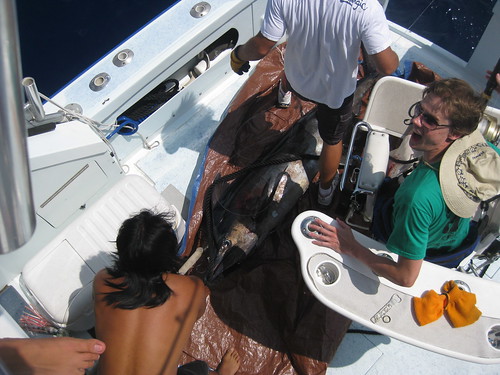
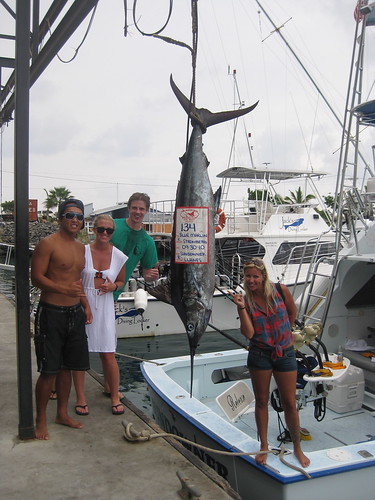
As the marlin reached the edge of the boat, the crew took over.  The great fish thrashed about, struggling to free itself from the hook.  The captain took a club to its head, an action I deemed cruel but was argued as necessary by all others.  The marlin was hauled on board and wrapped in tarp as we made our way back to shore.  We took the trophy to be weighed and photographed and our day out at sea was declared a victory, nausea and vomiting included.

our 134 pound trophy

I took my sea legs to shore, packed my bags and bid farewell to my new kindred spirits.  My Hawaiian adventure may have been over, but the memories and friendships I forged will last forever.

Hula Cheesecake

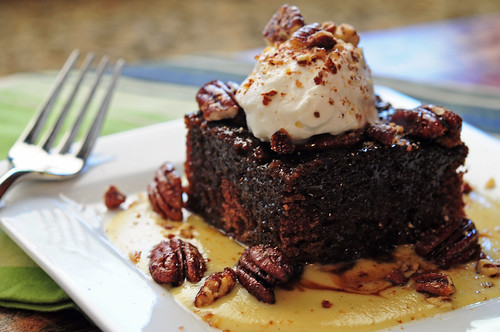
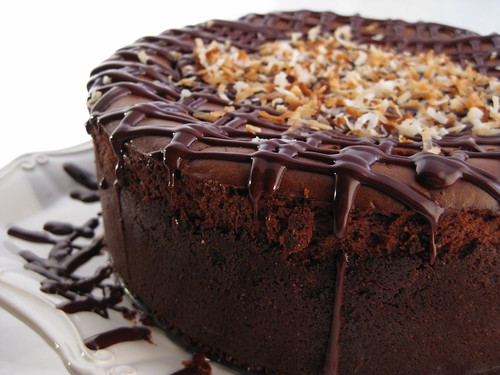
Hula pie is a sweet staple among the chain of the Hawaiian islands.  A wide variety of versions exist, but all include these essential ingredients: chocolate, coconut, coffee, and macadamia nuts.  I, of course, was working on my own adaptation all the while traveling, sight seeing and tanning.  I came home and put my mental creation to the test, serving it to a deserving and knowledgeable audience: my grandparents who had come over from Maui to stay with us during the holidays.  Ganny said it was perfection, but that sort of praise is expected from a grandmother.  However, I think my Hula Cheesecake was just about as good as any hula pie I ate while vacationing in paradise.
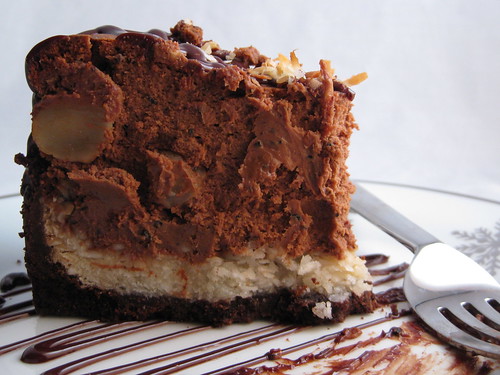
a bite of Hawaii

Hula Cheesecake
Recipe by Karlie Kiser

Ingredients:
Crust:
9 oz chocolate wafers
2 tbsp sugar
4 oz semisweet chocolate, chopped
1 stick unsalted butter, melted
pinch of salt

Macaroon layer
3/4 cup evaporated cane juice (super fine sugar can be substituted)
2 1/2 cups unsweetened shredded coconut (available at Whole Foods)
2 egg whites
1/2 tsp almond extract
1/2 tsp vanilla extract
pinch of sea salt

Cheesecake filling:
8 oz bittersweet chocolate, chopped
32 oz cream cheese, at room temperature
1 1/4 cups sugar
1 tbsp flour
1/4 cup Kahlua (or other coffee liqueur)
2 tbsp espresso powder
2 tbsp ground coffee (use a Kona blend if possible)
1 1/2 tbsp coconut extract
1 tsp vanilla extract
4 eggs
3/4 cup coarsely chopped macadamia nuts

Glaze:
1/2 cup plus 2 tbsp heavy cream
5 oz bittersweet chocolate, chopped

1/4 cup sweetened coconut, toasted

Directions:
1. Preheat oven to 350º F.  Spray the bottom and sides of a 9-inch springform pan with nonstick spray.  Line with a round of parchment paper if so desired.

2. For the crust, finely grind chocolate wafers and 2 tablespoons sugar together in a food processor.  Add semisweet chocolate and pulse until chocolate is efficiently chopped and combined.  Add melted butter and salt and pulse until mixture comes together.  Press crumb mixture onto bottom and half way up sides of the prepared springform pan.  Set aside.

3. For the macaroon layer, mix evaporated can juice, coconut, egg whites, almond and vanilla extracts and sea salt together in a small bowl with your hands (get messy- cooking is hands on!).  Press mixture onto top of chocolate crust (don't go up the sides).  You can use all the macaroon mixture or reserve some for other use, make this layer as thick as you like.  Bake in preheated oven for 8 minutes.

4. Melt 8 ounces bittersweet chocolate in a double boiler or bain marie over simmering water.  Stir until smooth and melted.  Set aside to cool slightly.

5. For the cheesecake filling, beat cream cheese and sugar together with an electric mixer (or stand mixer fitted with paddle attachment) until smooth and blended.  Beat in 1 tablespoon flour. 

6. In a small bowl, stir Kahlua, espresso powder, ground coffee and coconut and vanilla extracts together until espresso powder dissolves.  Beat into cream cheese mixture until combined, scraping down the sides as necessary. 

7. Add eggs 1 at a time, beating after each addition until just combined. 

8. Slowly stir in the melted chocolate, beating at low speed until fully combined.  Fold in the macadamia nuts. 

9. Pour cheesecake filling into crust and place on a baking sheet.  Bake until top is puffed and center 2-inches move only slightly when pan is gently shaken, about 1 hour (or more depending on your oven).

10.  Let cool at room temperature, then chill in fridge for at least 4 hours. 

11. For the glaze, warm heavy cream in a bowl set over a pan of simmering water, about 2 minutes.  Add the 5 oz bittersweet chocolate, let sit for 1 minute, then stir until melted and smooth.  Remove from heat and let cool only slightly, about 5 minutes.  Drizzle ganache glaze over chilled cheesecake in any manner you like.  I like to pour the ganache into a large squeeze bottle.  I find this to be the easiest way to control the direction of the drizzle.  Before the glaze sets, top the center of the cheesecake with toasted coconut.  Slice, serve and enjoy!

Serves at least 12